EasyManua.ls Logo

Brodit ProClip 855170 User Manual

Brodit ProClip 855170
2 pages
To Next Page IconTo Next Page
Page #1 background imageLoading...
Page #1 background image
16 December, 2016, www.brodit.com, © 2016 Brodit AB
Product 855170
855170 ProClip
Angled mount
The ProClip is a mounting bracket that you attach onto the vehicle’s dashboard. It provides a perfect mounting
platform for mobile phones, or other devices that you want to have within easy reach in the car. Safe, neat and
convenient!
The ProClip has a perfect fit, it is custom made for each vehicle to ensure a secure base for installations. And the
ProClip is easy to install. The bracket simply snaps into place in gaps in the dashboard, you do not need to drill
holes, not use special tools or not dismantle the dashboard. Made in black ABS plastic. Comes with detailed
instructions.
View demo video
EAN: 7320288551708
Item no 855170 fits:
Citroen C4 Grand Picasso II 13-17 (For Europe)
Citroen C4 Picasso II 13-17 (For Europe)
1(2)
Question and Answer IconNeed help?

Do you have a question about the Brodit ProClip 855170 and is the answer not in the manual?

Brodit ProClip 855170 Specifications

General IconGeneral
CompatibilitySpecific vehicle models
MaterialABS plastic
ColorBlack
BrandBrodit
PlacementDashboard
Model855170
Vehicle CompatibilitySpecific to certain vehicle makes and models

Summary

Brodit ProClip 855170 Overview

ProClip Angled Mount Description

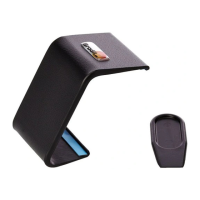
ProClip is a vehicle dashboard mounting bracket for phones or devices. Offers a perfect, safe, neat, and convenient mounting platform within easy reach.

Compatible Vehicles: Citroen C4 Picasso Models

Item 855170 fits Citroen C4 Grand Picasso II 13-17 (Europe) and Citroen C4 Picasso II 13-17 (Europe).

ProClip Installation Guide

Installation Step 1: Gap Preparation and Initial Insertion

Insert gap opener, clean area with alcohol pad, and hook the lower ProClip edge behind the air vent frame.

Installation Step 2: Securing the Upper Edge

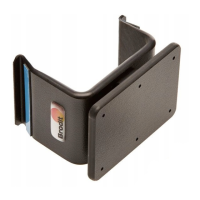
Hook the angled edge on the upper part of the ProClip into the gap next to the gap opener.

Installation Step 3: Final Placement and Securing

Press down on ProClip to fully insert the angled edge, attach adhesive tape, and pull out the gap opener.

Related product manuals