1
EN
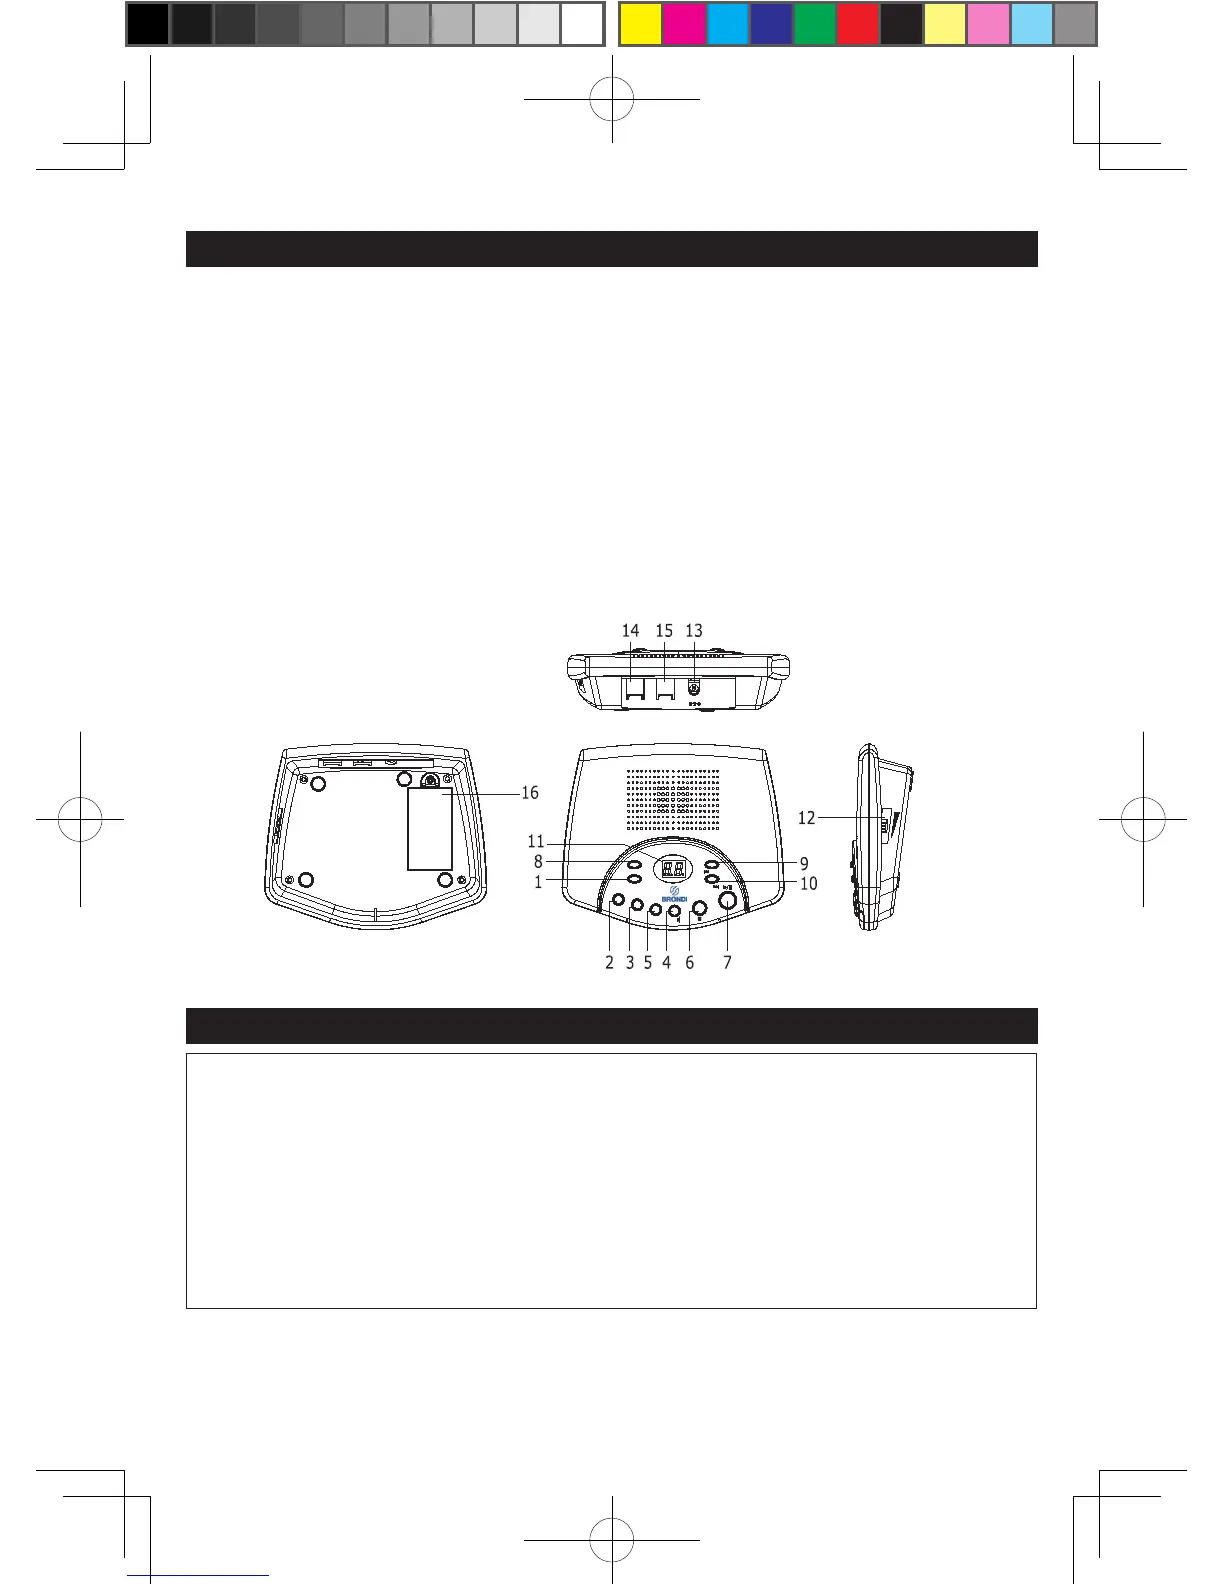
LOCATION OF CONTROLS
TOP
1. ON/OFF Button 7. PLAY/Pause Button
2. OGM1 (Outgoing Message 1) Button 8. DELETE Button
3. OGM2 (Outgoing Message 2) Button 9. RING/Button
4. SPK/MONI Button 10. CODE/
◄◄
Button
5. MEMO Button 11. LED Display
6. STOP Button
SIDE
12. Sliding Volume Knob
REAR
13. DC Jack (9V input) 14. TO LINE Jack
15.TO PHONE Jack 16. Battery Compartment (Bottom of Unit)
BATTERY PRECAUTIONS
BATTERY PRECAUTIONS
Follow these precautions when using batteries in this device:
1. Use only 9V(6LR61 or same type) of battery.
2. Be sure to install the battery in correct polarity. Reversed batteries may
cause damage to the deveice.
3. If the device is not to be used for a long period of time, remove the
battery to prevent damage or injury from possible battery leakage.
4. Do not try to recharge batteries not intended to be recharged; they can
overheat and rupture. (Follow battery manufacture’s directions.)
This section has been designed to provide a reference guide to help set up your answering machine.
1. Connect one end of the provided telephone line cord into the TO LINE jack. Plug the other end
into the telephone wall jack. You can link the other telephone to this answering machine with the
short telephone line cord. Plug one end of the short telephone line cord to the TO PHONE
 Loading...