KNOWING YOUR SEWING MACHINE
7
1
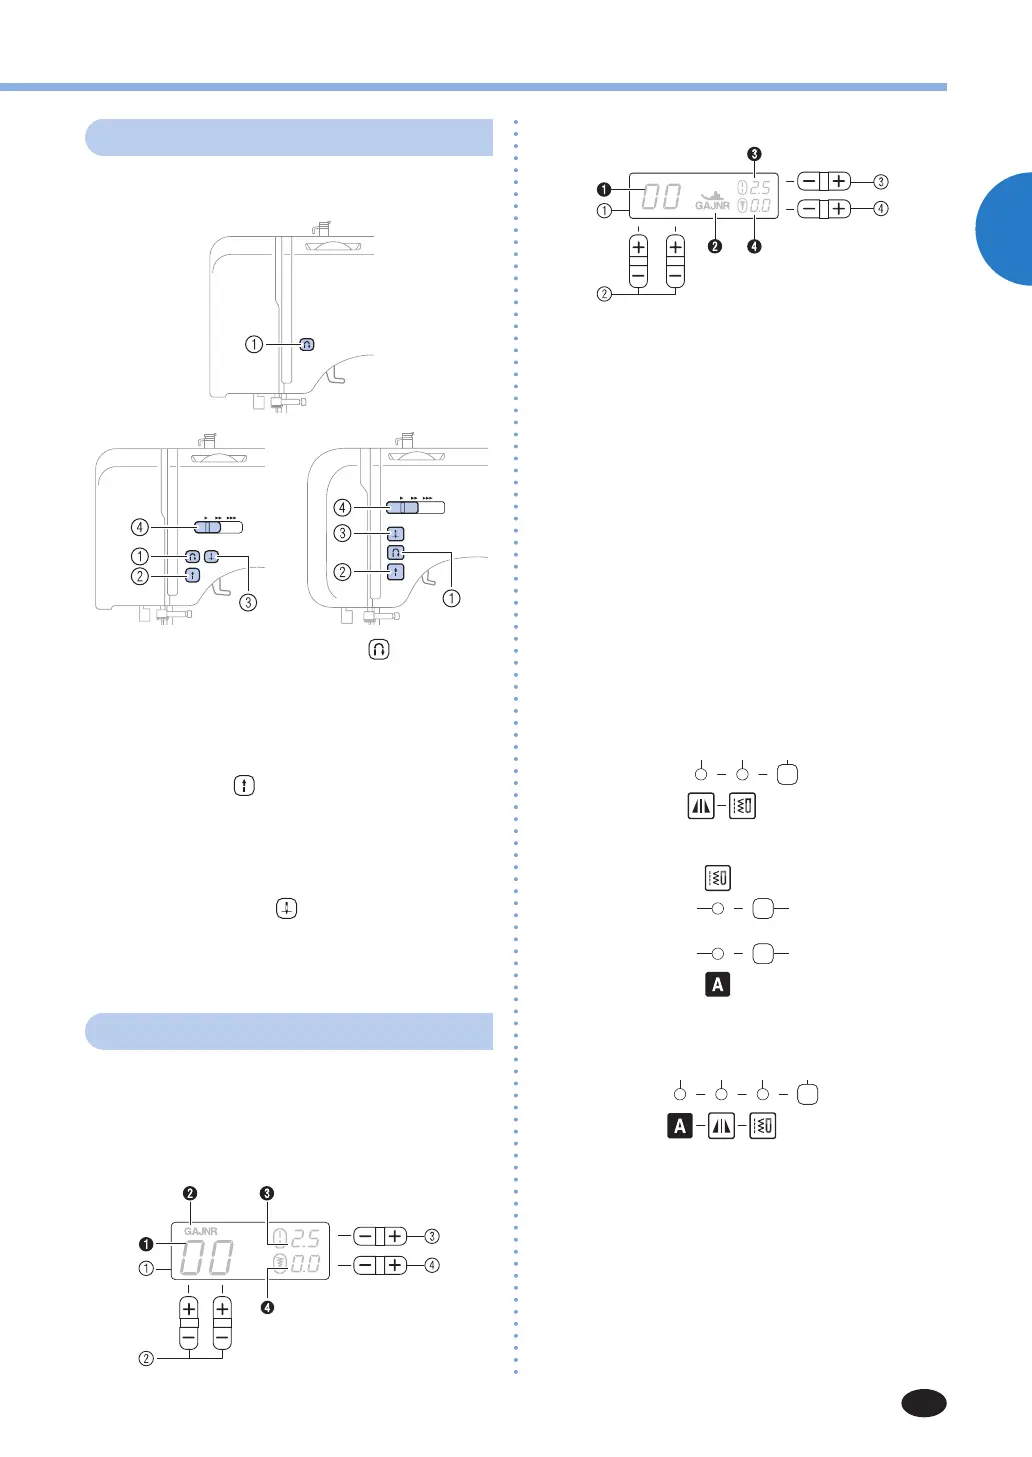
Operation buttons
The operation buttons differ depending on the
sewing machine model.
1 Reverse/reinforcement stitch button
Pressthisbuttontosewreversestitches.Reverse
stitches are sewn by keeping the button pressed down
to sew in the opposite direction. For details, refer to
“Sewingreinforcementstitches”(page27).
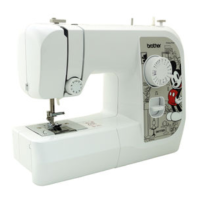
■
Buttons provided on some models
2 Start/stop button
Pressthisbuttontostartorstopsewing.Themachine
sews at a slow speed at the beginning of sewing while
thebuttonispressed.Whensewingisstopped,the
needle is lowered in the fabric. For details, refer to
“Startingtosew”(page26).
3 Needle position button
Pressthisbuttontoraiseorlowertheneedle.
4 Sewing speed controller
Slide this controller to adjust the sewing speed.
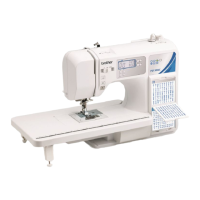
Operation panel
The operation panel allows you to select a stitch and
specify how the stitch will be sewn. The operation
panel differs depending on the sewing machine
model.
For models equipped with type A LCD
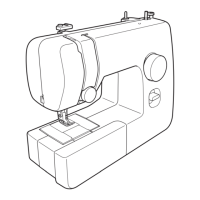
For models equipped with type B LCD
1 LCD (liquid crystal display)
Thenumberoftheselectedstitch(1),thepresserfoot
typetobeused(2),thestitchlength(mm)(3),andthe
stitchwidth(mm)(4)aredisplayedhere.
Thedisplaylocationofthepresserfoottype(2)differs
depending on the model.
ThismanualusestheillustrationsoftypeALCD.
2 Stitch selection keys (Page 25)
Select the number for the stitch that you wish to use.
3 Stitch length adjustment key
Pressthe“–”sidetoreducethestitchlength;pressthe
“+” side to increase the stitch length.
4 Stitch width adjustment key
Pressthe“–”sidetoreducethestitchwidth;pressthe“+”
side to increase the stitch width.
■
Keys and indicators provided on some models
Keys and indicators differ depending on the sewing
machine model.
For models equipped with mirror image stitches
7 6
For models equipped with character stitches
For models equipped with mirror image stitches
and character stitches
578 6
5 Stitch category selection key (Page 25 and 47)
Pressthiskeytoselectdesiredstitchcategory.
6 Utility stitch indicator
Lights up when the utility stitch is selected with the
stitch category selection key.
7 Mirror image stitch indicator
Lights up when the mirror image stitch is selected with
the stitch category selection key.
8 Character stitch indicator
Lights up when the character stitch is selected with the
character stitch key.