EasyManuals Logo

Brother MFC-L2750DW Quick Setup Guide

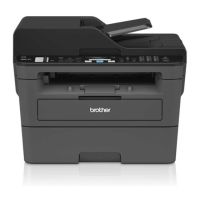
Brother MFC-L2750DW
2 pages
To Next Page IconTo Next Page
Page #1 background imageLoading...
Page #1 background image
Watch our FAQ Videos for help
with setting up your Brother
machine.
support.brother.com/videos
BK (Dye)CMY
BTD60BK
BT5000CMY
BT5001CMY
BT5009CMY
DO NOT USE
BK (Pigment)
BT6000BK
BT6001BK
BT6009BK
1
2
3
Remove the cap and protective
film from the ink bottle, and then
replace the cap.
NOTE
Fasten the ink bottle cap tightly to
avoid leakage.
Open the ink tank cover a and pull
the tab
b downwards to open the
cap of the ink tank.
1
2
IMPORTANT
NOTE
• The Reference Guide for this model is available on the enclosed installation disc.
• Save all packing materials and the box in case you must ship your machine.
• You must purchase the correct interface cable for the interface you want to
use. A USB cable is included for some countries.
USB cable
We recommend using a USB 2.0 cable (Type A/B) that is no more than 6 feet
(2 meters) long.
Ethernet (Network) cable
Use a straight-through Category 5 (or greater) twisted-pair cable for 10BASE-T or
100BASE-TX Fast Ethernet Network.
2
Load paper in the paper tray
For more information about paper handling and sizes, see the Reference Guide.
1
Unpack the machine and check the components
The components included in the box may differ depending on your country.
Remove the protective tape and film covering the machine and the ink tank cover.
When the machine has finished the initial cleaning
process, follow the steps on the LCD to configure the
machine settings.
• Check print quality
• Congurethetraysettings
• Set Firmware Update Notice
• Print the installation sheet
Connect the power cord and the
machine powers on automatically.
Follow the prompts displayed on the
LCD to set the date and time.
NOTE
If you are sharing one telephone line with an external
telephone, connect it as shown below. Before you
connect the external telephone, remove the white
protective cap c from the EXT. jack of the machine.
a. Extension telephone
b. External telephone
c. Protective cap
Quick Setup Guide
MFC-T910DW
Read the Product Safety Guide first, then read this Quick Setup Guide
for the correct installation procedure.
3
Connect the
power cord
4
Fill the ink tanks with the starter ink
5
Machine settings
ME X /LTN - ENG
Version A
Starter Ink Bottles
• Black
• Yellow
• Cyan
• Magenta
Quick Setup Guide
Product Safety Guide
Brother Installation Disc
USB Interface Cable
(For some countries)
Telephone Line Cord
The correct Receive Mode is
determined by the external
devices and telephone subscriber
services (Voice Mail, Distinctive
Ring, etc.) you will be using on the
same line as the Brother machine.
For more information, see Choose
the Correct Receive Mode in the
Reference Guide.
1. Press Ajustes (Settings).
2. Press a or b to select the following:
a. Select [Conf. inicial](Initial Setup), and then
press OK.
b. Select [Sel. idioma](Local Language), and
then press OK.
c. Select your language, and then press OK.
3. Press Detener/Salir (Stop/Exit).
1. Press Ajustes (Settings).
2. Press a or b to select the
following:
a. Select [Fax], and then
press OK.
b. Select [Setup Receive],
and then press OK.
c. Select [Receive Mode],
and then press OK.
d. Select your Receive Mode,
and then press OK.
3. Press Detener/Salir (Stop/
Exit).
Store your name and fax
number so the machine prints it
on all outgoing fax pages.
For more information, see Enter
Text on Your Brother Machine in
the Online User’s Guide.
1. Press Ajustes (Settings).
2. Press a or b to select the following:
a. Select [Initial Setup],
and then press OK.
b. Select [Station ID],
and then press OK.
c. Select [Fax], and then
press OK.
3. Enter your fax number (up to 20 digits),
and then press OK.
4. Enter your name (up to 20 characters),
and then press OK.
5. Press Detener/Salir (Stop/Exit).
7
Select your
language (if needed)
9
Set your Station ID
If you are not using your machine as a fax, go to
10
.
6
Connect the telephone line cord
If you are not using your machine as a fax, go to
7
.
8
Select the correct
Receive Mode
If you are not using your machine as a fax, go to
10
.
The latest manuals are available at the Brother Solutions Center:
support.brother.com/manuals
Check the ink bottle model name
on the label. Incorrect ink may
cause damage to the machine.
Connect the telephone line cord.
Use the jack marked LINE.
Pull the paper tray completely
out of the machine.
Open the output paper tray
cover a. Fan the paper well and load it in the tray.
Close the output paper tray cover, and
then slowly push the tray completely
into the machine.
Adjust the paper guides.
NOTE
Pull out the paper support a, and unfold
thepapersupportapb so that the
printed pages do not fall.
Remove the tip of the ink bottle.
Insert the nozzle of the ink bottle
firmly so that the ink does not
spill. Fill the ink tank by gently
squeezing the bottle as shown.
Empty the entire bottle into the
ink tank.
Push down on the cap of the ink
tank to close it tightly. Repeat step
4
for the three other ink tanks.
Close the ink tank cover. The
machine will prepare the ink tube
system for printing.
Point the nozzle upward so
that the ink does not spill,
and then remove the nozzle
from the ink tank.

Other manuals for Brother MFC-L2750DW

Questions and Answers:

Question and Answer IconNeed help?

Do you have a question about the Brother MFC-L2750DW and is the answer not in the manual?

Brother MFC-L2750DW Specifications

General IconGeneral
N-up printing4, 9, 16
Print technologyLaser
Maximum resolution1200 x 1200 DPI
Booklet printing functionYes
Print speed (black, normal quality, A4/US Letter)34 ppm
Copier resize25 - 400 %
Maximum copy resolution600 x 600 DPI
Maximum number of copies99 copies
N-in-1 copy function (N=)2, 4
Copy speed (black, normal quality, A4)34 cpm
Scan toE-mail, FTP, Image, OCR
Scan driversTWAIN, WIA
Scanner typeFlatbed & ADF scanner
Grayscale levels256
Output color depth8 bit
Image formats supportedJPG
Maximum scan resolution19200 x 19200 DPI
Document formats supportedPDF
FaxingMono faxing
Fax memory500 pages
Modem speed33.6 Kbit/s
Internal memory256 MB
Processor frequency600 MHz
Card reader integrated-
Sound pressure level (printing)49 dB
DisplayLCD
Control typeTouch
Product colorBlack
Display diagonal2.7 \
Market positioningHome & office
Standard interfacesEthernet, USB 2.0, Wireless LAN
USB 2.0 ports quantity1
Maximum duty cycle15000 pages per month
Recommended duty cycle0 - 2000 pages per month
Page description languagesBR-Script 3, PCL 6, PDF 1.7
Total input capacity250 sheets
Total output capacity120 sheets
Auto document feeder (ADF) input capacity50 sheets
Custom media width76.2 - 215.9 mm
Custom media length127 - 355.6 mm
Duplex media weight60 - 105 g/m²
Paper tray media typesEnvelopes, Labels, Plain paper, Recycled paper
Paper tray media weight60 - 230 g/m²
Non-ISO print media sizesExecutive
ISO A-series sizes (A0...A9)A4, A5, A6
Maximum ISO A-series paper sizeA4
Multi-Purpose Tray media weight60 - 163 g/m²
Wi-Fi standards802.11b, 802.11g, Wi-Fi 4 (802.11n)
Cabling technology10/100Base-T(X)
Security algorithmsSMTP-AUTH, SNMPv3, SSL/TLS
Ethernet LAN data rates10, 100 Mbit/s
Mobile printing technologiesBrother iPrint & Scan
Supported network protocols (IPv4)IPV4: ARP, RARP, BOOTP, DHCP, APIPA(Auto IP), WINS/NetBIOS name resolution, DNS Resolver, mDNS, LLMNR responder, LPR/LPD, Custom Raw Port/Port9100, SMTP Client, IPP/IPPS, FTP Client and Server, CIFS Client, SNMPv1/v2c/v3, HTTP/HTTPS server, TFTP client and server, ICMP, SNTP Client, Web Services (Print/Scan)
Supported network protocols (IPv6)IPV6: NDP, RA, DNS resolver, mDNS, LLMNR responder, LPR/LPD, Custom Raw Port/Port9100, IPP/IPPS, SMTP Client, FTP Client and Server, CIFS Client, SNMPv1/v2c/v3, HTTP/HTTPS server, TFTP client and server, ICMPv6, Web Services (Print/Scan), SNTP Client
Mac operating systems supportedMac OS X 10.5 Leopard, Mac OS X 10.6 Snow Leopard, Mac OS X 10.8 Mountain Lion, Mac OS X 10.9 Mavericks
Server operating systems supportedWindows Server 2008, Windows Server 2008 R2, Windows Server 2012, Windows Server 2012 R2, Windows Server 2016
Windows operating systems supportedWindows 10, Windows 7, Windows 8, Windows 8.1
Power consumption (off)0.03 W
Power consumption (ready)42 W
Power consumption (sleep)0.6 W
Power consumption (PowerSave)1.1 W
Power consumption (average operating)440 W
Energy Star Typical Electricity Consumption (TEC)1.348 kWh/week
Package depth517 mm
Package width580 mm
Package height434 mm
Package weight14900 g
Sustainability certificatesNordic Swan Ecolabel, ENERGY STAR
CertificationGS mark
Harmonized System (HS) code84433100
Weight and Dimensions IconWeight and Dimensions
Depth398.5 mm
Width410 mm
Height318.5 mm
Weight12200 g

Related product manuals