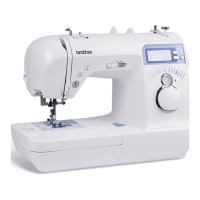
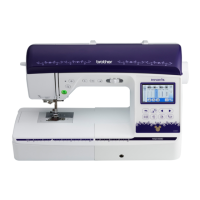
Do you have a question about the Brother NV-10A and is the answer not in the manual?
Overview of the sewing machine's main mechanical components and their arrangement.
Diagrams illustrating the movement of the needle bar, thread take-up lever, and feed dog.
Diagram showing the location of various electronic parts within the sewing machine.
Schematic illustrating the interconnections of the sewing machine's electronic control system.
Detailed descriptions of the function of various electronic switches and sensors.
Instructions and cautions for using the automatic threader with different thread and needle combinations.
Step-by-step instructions for disassembling the main external and internal components of the sewing machine.
Procedures for removing electrical components like the power supply, motors, and PCBs.
Steps to disassemble the thread tension unit and its related parts.
Instructions for taking apart the bobbin winding system.
Procedures for disassembling the feed dog and related feeding components.
Steps for disassembling the needle bar, presser assembly, and upper shaft.
Instructions for removing the base plate and handle components.
Detailed steps for disassembling the integrated needle and presser assembly.
Procedures for disassembling the combined feed and bobbin drive modules.
Procedures for inspecting the needle for bends, damage, or curvature.
How to enter and navigate the sewing machine's diagnostic test modes.
Overview of available test modes, their operations, and corresponding adjustments.
Procedure for adjusting the tension of the main timing belt.
Steps to adjust the tension of the motor drive belt.
How to adjust the upper thread tension for proper stitch formation.
Procedure for adjusting the needle's position relative to the feed dog and hook.
Adjusting the front-to-back position of the needle and presser.
Setting the correct gap between the needle and the rotary hook tip.
Adjusting the vertical travel range of the needle bar.
Setting the correct height of the needle bar relative to the rotary hook.
Adjusting the needle's side-to-side position to prevent interference.
Adjusting the needle thread block for proper thread passage.
Setting the presser bar height and ensuring it is parallel to the needle plate.
Adjusting the tension of the lower thread via the inner rotary hook.
Procedure for adjusting the forward and reverse feed amounts.
Adjusting the bobbin winder for even winding and correct quantity.
Adjusting the position of the bobbin winder switch.
Adjusting the position of the buttonhole lever switch.
Adjusting the horizontal and lateral positioning of the feed dog.
Setting the correct vertical height of the feed dog.
Adjusting the position of the inner rotary hook bracket.
A table listing error codes displayed by the machine and their potential causes.
Troubleshooting steps when the sewing machine does not power up.
Diagnosing issues when pulse motors fail to return to their home position.
Troubleshooting steps when pattern selection is not possible.
Diagnosing why the main motor is not engaging or rotating.
Troubleshooting issues with main motor speed, variance, or adjustment.
Diagnosing problems when the machine does not sew patterns correctly.
Troubleshooting steps when buttonhole sewing is not performed correctly.
Diagnosing problems with manual adjustment of stitch length and zigzag width.
Troubleshooting issues related to vertical needle movement and reverse stitching.
Diagnosing why the machine does not operate when the foot controller is used.
Troubleshooting steps when the LCD display shows incorrect information or is blank.
Diagnosing why the LCD backlight is not illuminating.
Troubleshooting steps when the bobbin winding function fails.
Diagnosing why the work area lamp is not turning on.
Troubleshooting specific error codes like F1, F2, F3, etc.
Troubleshooting guide for stitch issues like skipping, thread wear, breakage, uneven seams, and needle breaks.
Diagnosing problems related to power entry, safety timer, and indicator lamps not lighting.
Troubleshooting steps when the machine fails to operate even with the presser raised.
Addressing uneven stitch pitch on the left base line.
Diagnosing issues when the machine has no power, electronic sounds, or operating lamps.
Troubleshooting problems with inconsistent main motor speed or rotation.
Steps to resolve issues where threading the needle or machine is impossible.
Diagnosing problems with the threader lever not completing its cycle.
Troubleshooting when the needle thread lever operation is obstructed.
Addressing problems with incorrect upper or lower thread tension.
Guide for troubleshooting needle breakage, stitch skipping, and thread breakage during sewing.
Troubleshooting causes for uneven seams, including presser position and component scratches.
Diagnosing why the sewing machine stops intermittently during operation.
Troubleshooting buttonhole sewing failures, including blockage and switch issues.
Diagnosing why the bobbin winder shaft is not rotating.
Troubleshooting issues with incorrect bobbin winding quantity or uneven winding.
Diagnosing problems when the foot controller does not operate the machine correctly.
Instructions for routing and securing wires on the left and right sides of the needle-presser module.
Guidance on wiring the feed and rotary hook motor components.
Detailed instructions for wiring the insulation cover, power supply, and switches.
Steps for connecting wires for the bobbin winder mechanism to the main PCB.
Instructions for connecting various lead wires to the main PCB.
Guidance on connecting wires for the selecting panel, LCD, and LED lamps.
| Type | Electronic |
|---|---|
| Maximum Stitch Width | 5 mm |
| Maximum Stitch Length | 4 mm |
| Built-in Fonts | No |
| Needle Threading System | Automatic |
| Free Arm | Yes |
| Buttonhole Styles | 1 |
