MAINTENANCE
Pump Head Maintenance
Pump Head Assembly
Step 1: Ensure all parts are clean and free from damage (see Inspection section). Lubricate all O-rings
with petroleum based lubricant; lubricate packing and plunger with a Teflon or graphite based packing
lubricant.
Step 2: Install O-ring into bottom seat. Place 3/8” ball into bottom seat
(install metal gasket on seats for 3/16” plunger size) and thread bottom seat
into suction end of body utilizing a thread sealant. Tighten bottom seat.
Step 3: Install the 1/4” ball into the discharge end body for plunger sizes 1/4”
to 1/2". Install O-ring into top seat. Insert top seat into body. Place 3/8” ball
and ball check spring into top bushing. Thread top bushing into body utilizing
a thread sealant. Tighten top bushing.
Step 4: Install packing into body, ensuring it is installed in correct order and
orientation. Note: The “V-Ring” point should be pointing outward.
Install plunger packing gland onto the packing and insert the plunger into the
packing. Thread yoke nut onto the body.
Step 5: Thread body into housing, ensuring plunger fits through the plunger
packing gland nut and into the rod adapter. Note: The adjusting pin can be
temporarily removed to allow the rod adapter to extend and rotate to align
pin holes. Install plunger pin. Snugly tighten the plunger packing gland nut
onto body, do not over tighten gland nut.
Step 6: Tighten lock nut. Install gasket and cover with wing screws. Install
and tighten priming valve into head body. Note: 3/16” plunger size head
needs a 1/4" ball inserted into priming valve hole before installing priming
valve.
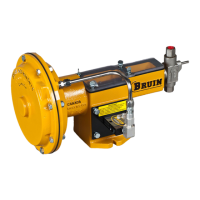
Pneumatically Operated Chemical Injection Pump
Maintenance
and Inspection
Disconnect power source and ensure pressure is removed from pump head prior to
performing any maintenance. Hazardous pressures can result in serious injury or
property damage.