Gemini X2/SC
Twin Wave
Electroporation Systems
Quick Start Guide
Unpacking the System
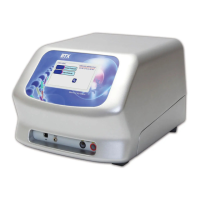
The shipping carton in which your BTX Gemini Twin Waveform
Electroporaon System is packed has been specically designed to
provide maximum protecon to the instrument during transportaon
and normal handling condions. Upon receipt, the carton should be
examined for any external damage resulng from shipment.
Open the carton and carefully remove the BTX Gemini Twin Waveform
Electroporator and inspect the unit for any apparent damage. Save the
carton and packing materials for future transportaon and shipping
requirements.
Packing Data
Check the packing slip to ensure that all items ordered and listed are
included in the shipment. Inform BTX immediately if any parts are
missing or damaged.
Power Source
As received, the instrument is ready for use with either 100-240 VAC,
50/60 HZ.
The power requirements are 350 was. In the USA, the power cord has
a standard three prong plug.
Installaon
Once you have determined that the components of the system have
not sustained any obvious damage in shipment, proceed with the
installaon.
Remove the insulang tab from the baery at the base of the unit.
Place the generator in a locaon that is a dry, level, sturdy surface free
from extremes in ambient temperature, dust or chemical exposure.
Allow the device to equilibrate to room temperature.
Unpack the safety dome, cuvee rack and disposable cuvee
chambers. Connect the safety dome, or in the case of the BTX
Gemini X2 System, specialty electrodes or HT Plate Handler, into the
connectors at the boom right-hand side of front panel.
Connect the mains/power cord to into the back panel at the boom le.
Power up the system by pushing the rocker switch located on the back
panel at the boom le. The display will ash the BTX logo. Once the
soware inializes, the Main Menu screen will appear.
You are now ready to begin your work.
Main Menu
User Protocol Review Screen
Protocols with preset parameters
for common cell and ssue types.
Cannot be modied by user, however
Preset protocols may be copied to
User Protocols for modicaon.
Protocols may be copied from
Preset Protocols or created from
scratch by the user for later use.
Download full user's manual at: www.btxonline.com
Voltage, Duraon, Number of Pulses, Pulse Interval, and Electrode
Gap may be modied by tapping on the gray icons for each. Green
Accept icon may be tapped to proceed to Run Protocol screen.
In Exponenal Decay Wave protocols, (instead of Duraon) Resistance
and Capacitance values may be set.