Do you have a question about the Bubble Magus Curve Elite Series and is the answer not in the manual?
Secure pump to board, considering power cord slot. Ensure screws are tight but not over-tightened.
Mount the lower plate onto the pump and tighten the locking nut securely.
Position the upper plate and lead wall over the lower section, then tighten the long nylon screw.
Connect the intake tube to the venturi as part of the skimmer body assembly.
Align venturi hole with pump outlet and fasten skimmer body to the board with screws.
Insert the venturi through the skimmer body, connecting it to the water pump outlet.
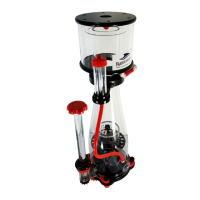
Attach the collection cup to the skimmer body, ensuring the outlet has an O-ring.
Connect the drain tube to the outlet port of the collection cup.
Submerge unit, connect power to a GFI outlet, and make adjustments using the adjustment tube.
Clean the collection cup and skimmer neck regularly for optimal performance.
Disassemble and clean the venturi and pump every 3 to 6 months for maximum life.
A complete skimmer cleaning is recommended every 6 to 12 months.
Avoid harsh chemicals; a 50/50 vinegar bath is a recommended cleaning method.
Ensure the pump is submerged before starting operation to prevent damage.
Bubbles indicate successful operation; restart if no bubbles appear or contact support.
New units may require a break-in period of several days for optimal performance.
The suggested external water level for operation is between 25-27 cm.
Each unit is factory pre-tested; traces of water indicate normal testing.
| Brand | Bubble Magus |
|---|---|
| Model | Curve Elite Series |
| Category | Other |
| Language | English |