$
Figure 6 Add support cords to upper hub
.: L#3#-?$?"#$,-7#$3468#,,$564$?"#$4#7-(1(12$
56&4$,34#-'#4$-47,:$HI(2&4#$^J$
$
Figure 7 All support cords aBached to spreaders
^: RN-8"$?"#$6&?#4$3#4(3"#4-=$864',$-?$?"#$
6&?#4$#1'$65$?"#$,34#-'#4$-47,$0#?@##1$
#-8"$65$?"#$,34#-'#4$-47,:$
$
;?-4?$0>$?-B(12$?"#$54##$#1'$65$-$3#4(3"#4-=$
864'$-1'$3-,,$?"#$?622=#$-?$?"#$#1'$65$?"#$
864'$?"46&2"$?"#$=#S/"-1'$"6=#$(1$?"#$
-'U-8#1?$,34#-'#4$?6$?"#$4(2"?$HI(2&4#$OJ:$$
$
T-=B$(1$-$86&1?#48=68B@(,#$'(4#8A61$
-N-8"(12$?"#$1#9?$864'$?6$?"#$-'U-8#1?$
,34#-'#4$-47$?6$?"#$4(2"?$&1A=$-==$?"#$
,34#-'#4,$-4#$8611#8?#'$-,$,"6@1$(1$$I(2&4#$
\:$$
Figure 8 Peripheral cords connect each spreader
!"#$)+.$,&3364?$,?4&8?&4#$(,$16@$8673=#?#$-1'$
4#-'>$?6$-88#3?$?"#$-1?#11-$@(4#,:$$
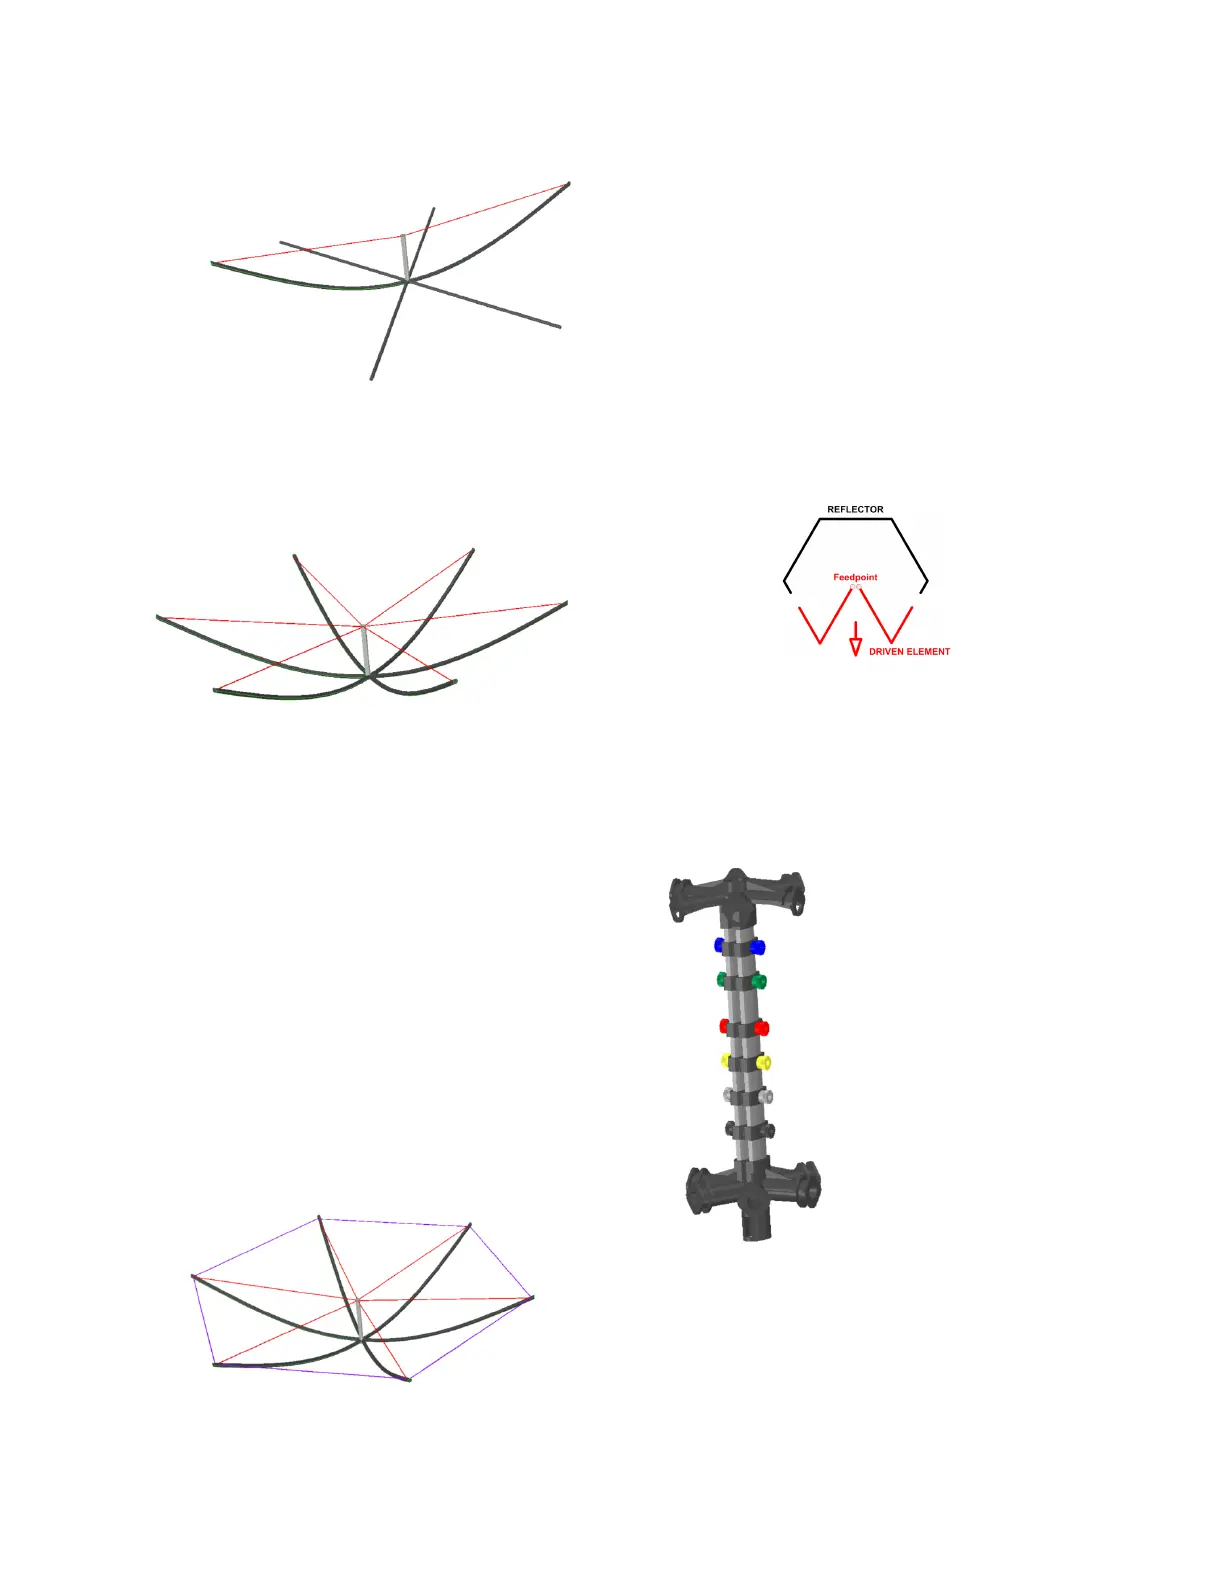
INSTALLING'ANTENNA'WIRES'
!"#$%&''()*+$(,$-$,(9/0-1'$-1?#11-$86734(,#'$65$,(9$
1#,?#'$-1?#11-,$'4(F#1$5467$-$,(12=#$5##'/36(1?$
=68-?#'$-?$?"#$?63$65$?"#$F#4A8-=$5##'/36(1?$
-,,#70=>:$*-8"$65$?"#,#$,#3-4-?#$-1?#11-,$861,(,?,$
65$-$?@6/#=#7#1?$0#-7$&,(12$-$'4(F#1$#=#7#1?$-1'$-$
3-4-,(A8$4#_#8?64$-44-12#'$?6$5647$-$76'(<#'$
`6961$0#-7$-1?#11-$HI(2&4#$[J:$$
$
Figure 9 Top view of element arrangement
!"#$F#4A8-=$5##'$36(1?$-,,#70=>$HYIRJ$"-,$-$
'#'(8-?#'$3-(4$65$8611#8A61,$(1'(8-?#'$0>$?"#$86=64/$
86'#'$,84#@$?#47(1-=,$HI(2&4#$EX$0#=6@J:$$$
Figure 10 Ver,cal feed-point assembly (VFA)
!"#$-1?#11-$564$#-8"$0-1'$(,$34#/?&1#'$564$?"#$0-1'$
-1'$861,(,?,$65$-$'4(F#1$-1'$4#_#8?64$-,,#70=>$
@"(8"$(,$,&3364?#'$0>$86=64/$86'#'$@(4#$8=(3,$
-N-8"#'$?6$?"#$,34#-'#4$-47,:$