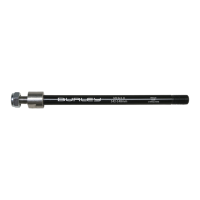
THRU AXLE
OWNER’S INSTRUCTION & SAFETY MANUAL
BEDIENUNGSANLEITUNG & SICHERHEITSHANDBUCH
INSTRUCTIONS UTILISATEUR ET MANUEL DE SÉCURITÉ
MANUAL DE INSTRUCCIONES Y DE SEGURIDAD DEL PROPIETARIO
WARNING
• Carefully read these instructions, your
Burley trailer manual and your bicycle man-
ual. Carefully follow all the instructions
included therein.
• Confirm that the towing bicycle is suitable
for pulling trailers before use. Pulling
a trailer with a bicycle that has not been
approved by its manufacturer for towing can
result in frame breakage or other material
damage.
• Burley Thru Axle and Hitch must be
installed to the appropriate bolting torque
before use. Please consult your local bike
shop if you do not have a properly calibrated
torque wrench for installation.
• Burley Thru Axle is only to be used when
using an attached trailer. Using a wider
axle can increase the risk of impacting trail
and road side objects. The manufacturer
supplied axle must be used when a trailer
is not in use.
• Keep this manual for future reference.
WARNUNG
• Lesen Sie diese Hinweise, das Benutzer-
handbuch für Ihren Burley-Anhänger und
die Bedienungsanleitung für Ihr Fahrrad
sorgfältig durch. Befolgen Sie alle darin
enthaltenen Anweisungen genau.
• Vergewissern Sie sich vor dem Gebrauch,
dass das Zugfahrrad für einen Einsatz mit
Anhängern geeignet ist. Das Ziehen eines
Anhängers mit einem Fahrrad, das nicht
vom Hersteller zum Ziehen zugelassen
wurde, kann zu Bruch oder anderen Materi-
alschäden führen.
• Steckachse und Kupplung von Bur-
ley müssen vor der Anwendung mit dem
entsprechenden Anzugsdrehmoment
angebracht werden. Bitte wenden Sie sich
an Ihr Fahrradgeschäft vor Ort, wenn Sie
nicht über einen entsprechend kalibrierten
Drehmomentschlüssel für die Installation
verfügen.
• Die Steckachse von Burely darf nur ver-
wendet werden, wenn ein mit dem Fahrrad
verbundener Anhänger genutzt wird. Bei
Verwendung einer breiteren Achse kann es
zu einer erhöhten Beschädigungsgefahr des
Wegs und von Objekten am Straßenrand
kommen. Die vom Hersteller zur Verfügung
gestellte Achse muss genutzt werden,
wenn kein Anhänger verwendet wird.
• Bitte bewahren Sie dieses Benutzerhand-
buch zum Nachschlagen auf.
AVERTISSEMENT
• Lisez attentivement ces instructions, le
manuel de votre remorque Burley, ainsi
que celui de votre vélo. Suivez-les stricte-
ment.
• Vérifiez que votre vélo puisse tracter
une remorque avant toute utilisation. Si
vous utilisez votre remorque avec un vélo
dont le tractage n’est pas une utilisation
approuvée par le fabricant, vous risquez
de briser le cadre ou de causer d’autres
dommages matériaux.
• L’axe traversant et l’attelage Burley
doivent être installés selon un couple
de maintien approprié avant toute utili-
sation. Veuillez consulter votre magasin
de vélos si vous ne disposez pas de clé
dynamométrique correctement calibrée
pour l’installation.
• L’axe traversant Burley ne doit être util-
isé que lorsque la remorque est arrimée.
L’utilisation d’un axe plus large peut
accroître le risque de percuter la route
et les objets qui la bordent. L’axe fourni
par le fabricant doit être utilisé quand la
remorque ne sert pas.
• Conservez ce manuel pour une référence
future.
ADVERTENCIA
• Lea atentamente estas instrucciones,
el manual de su remolque Burley y el
manual de su bicicleta. Siga atentamente
todas las instrucciones incluidas en los
mismos.
• Asegúrese de que la bicicleta sea adec-
uada para tirar de un remolque antes de
su uso. La tracción de un remolque con
una bicicleta que el fabricante no haya
aprobado para este fin podría dar lugar
a la rotura del cuadro o a otros daños
materiales.
• El eje pasante y enganche de Burley
se deben instalar con el par de apriete
adecuado antes de su uso. Consulte a su
taller de bicicletas local si no dispone de
una llave dinamométrica correctamente
calibrada para la instalación.
• El eje pasante de Burley solo se utiliza
cuando se utiliza un remolque. El uso de
un eje más ancho aumenta el riesgo de
chocar con objetos en el camino o en el
arcén. Se debe utilizar el eje suministra-
do por el fabricante cuando no se utilice
el remolque.
• Guarde este manual para su consulta
futura.