54
3
Unfold the hinged seat deck. With a partner,
lift and lower the seat deck so it’s nested
inside the tabs. Align the threaded inserts on
the bottom of the seat deck with the holes
through the tabs.
7
Fold the loose pocket of the seat cover over
the sleeper cushion that’s zipped up. Lift it
onto the frame of the sofa and line up the
pegs on the bottom of the sleeper cushion
with the holes on the seat decks. The hinged
seam between the cushion and the rest of
the cover should be in front.
4
Push a hand bolt through each of the four
holes an
d loosely turn to catch the
threaded inserts. You may have to tilt the
seat deck back and forth, or lift it up
slightly, in order to get the hand screws to
catch the threads. We recommend loosely
attaching all of the hand screws first, rather
than fully tightening one before the next.
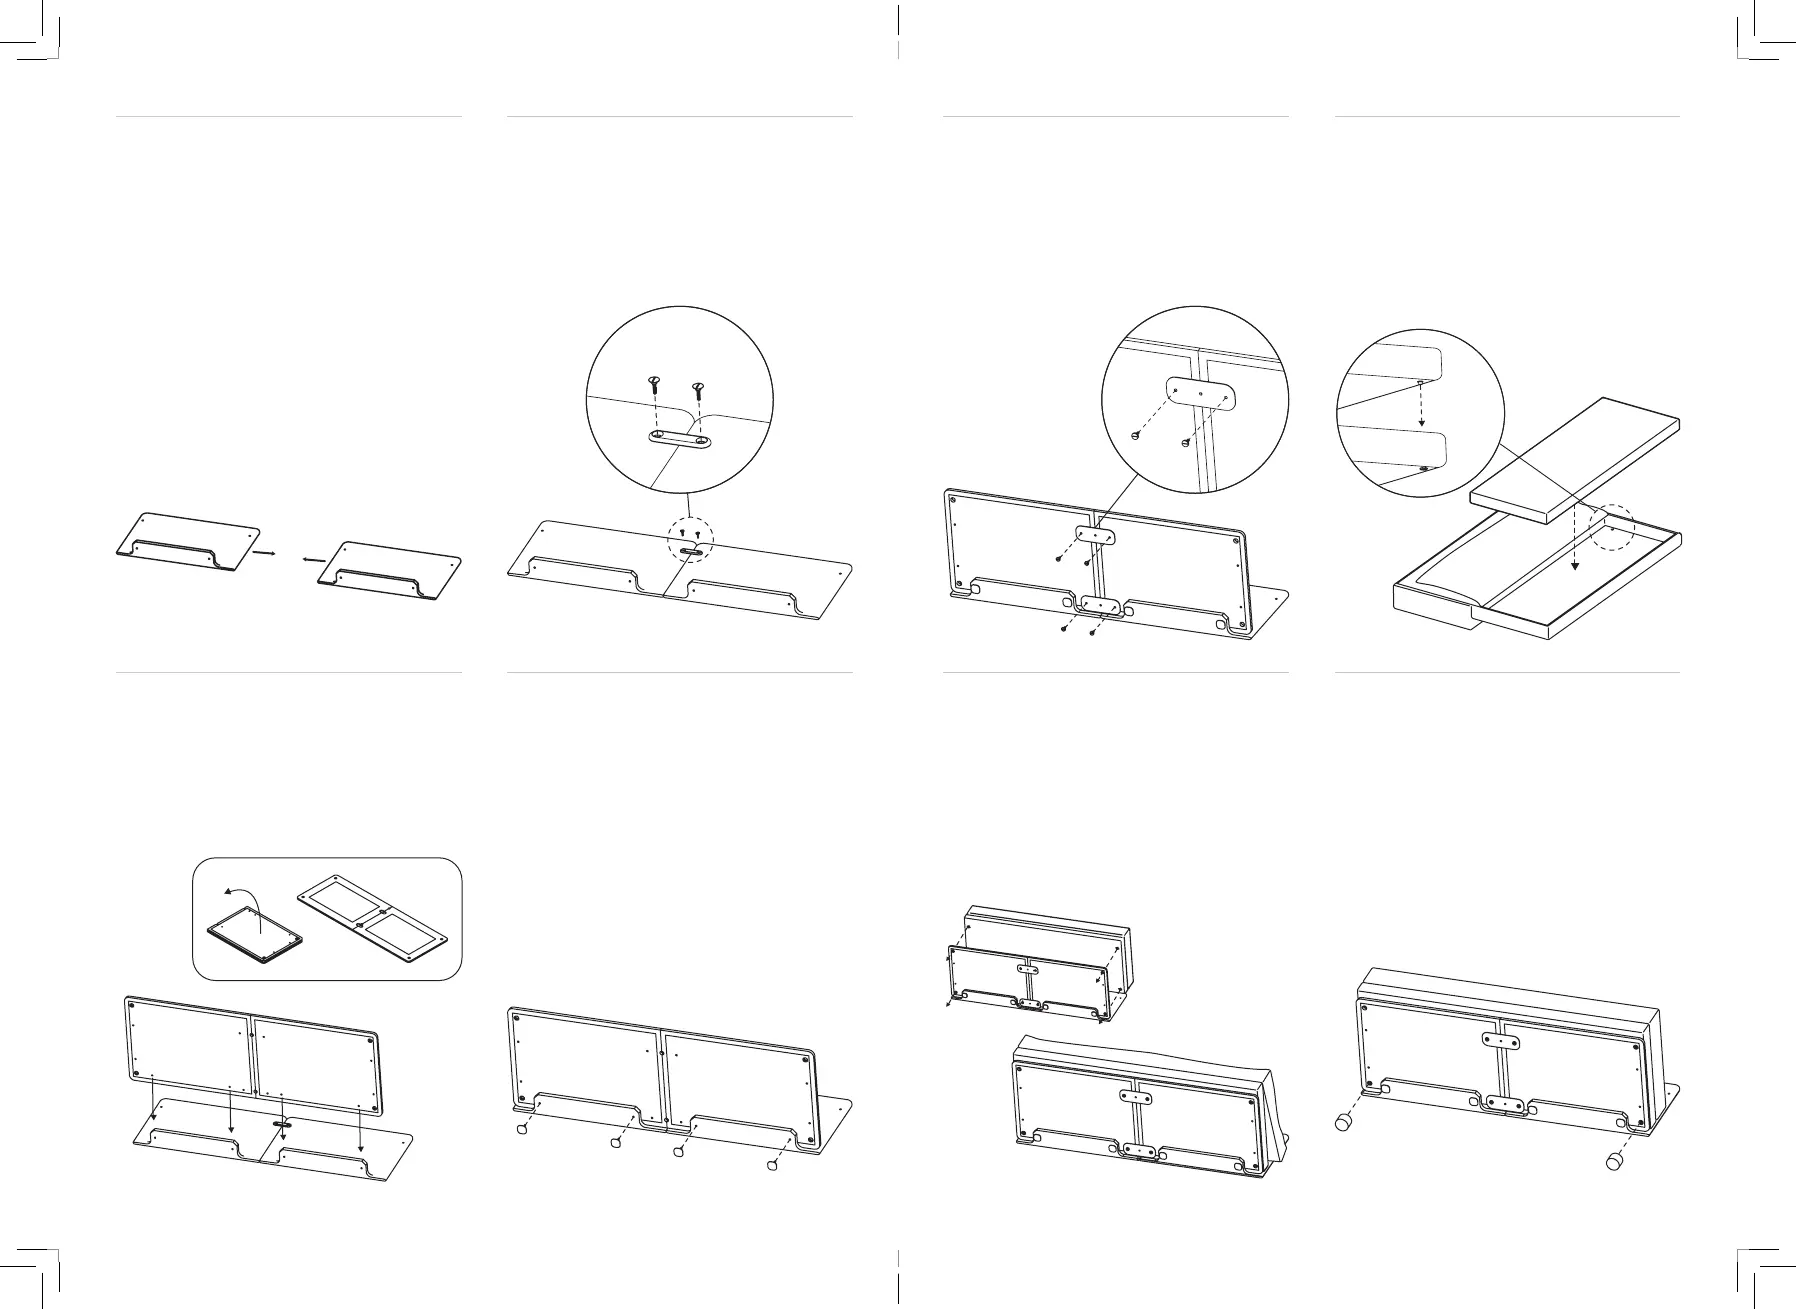
8
Grab two of your back
legs (they’re slightly
shorter than the front legs), and screw
them through the holes in the seat decks
into the threaded insert pegs on the thin
sleeper cushion.
1
Lay the left and right back pa
nels, marked
with corresponding stickers, flat on their
backs, so the tabs are perpendicular to the
floor. Line them up as shown.
5
Take both of the leg brackets and four
thumbscrews and attach them to the bottom
of the seat deck.
2
Grab a flat brace and two slot screws,
and use them to connect the
two back
panels. Once attached, if there is a gap
between the panels, unscrew the brace
and swap panels.
6
Next, lay out the seat cover so
that the
zippers are facing up. Insert the thin sleeper
cushion in the shallower side of the cover,
align the pegs on the cushion with the
holes in the cover and zip everything up.
RIGHT
LEFT
 Loading...