Do you have a question about the Bushnell 119837 and is the answer not in the manual?
Details the Trophy Cam HD Essential E3 as a digital scouting camera, its power consumption, and key features like Auto PIR Sensitivity.
Illustrates and labels the buttons, switches, and display on the back of the camera for operation.
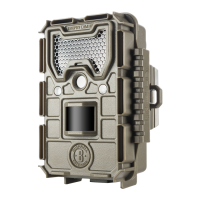
Identifies external components and sensors on the front of the camera, including lens, IR flash, and PIR sensor.
Provides instructions on how to insert eight AA batteries, emphasizing correct polarity and recommended battery types.
Details the process of inserting an SD card, including internal memory capacity and precautions.
Guides users on initial setup and familiarization with the camera's controls and basic functions.
Explains the 'safe' mode for maintenance, data transfer, and storage, noting minimal power consumption.
Describes the active scouting mode, including the motion indicator LED and automatic image capture upon detection.
Details how to use the SETUP mode with the LCD to adjust settings like resolution, time imprint, and video options.
Explains secondary functions of control keys for quick access to video, photo, or manual shutter in SETUP mode.
Guides users through selecting and modifying various camera parameters to customize operational preferences.
Explains how parameters and their current settings are displayed on the LCD, and how to navigate through them.
Details how to set the date and time for photo/video imprints using the SETUP menu.
Explains how to switch between 'Camera' (still photos) and 'Video' modes.
Guides users on setting the duration for captured video clips.
Provides step-by-step instructions for setting up the Field Scan time lapse feature, including start/stop times.
Explains how to control the frequency of photo/video capture within Field Scan blocks.
Sets the date and time for photo/video imprints. Format is 24-hour.
Selects whether still photos or video clips are captured upon trigger.
Selects resolution for still photos, balancing pixel count with file size.
Sets the duration for each captured video clip.
Defines the 'ignore triggers' time after initial detection to prevent redundant captures.
Adjusts PIR sensor sensitivity for different temperature and motion conditions.
Limits camera operation to specific periods like Day or Night.
Erases all files on the SD card to prepare it for reuse.
Controls whether the date and time are imprinted on photos.
Enables/disables Field Scan (Time Lapse) recording mode and sets blocks/intervals.
Enables/disables audio recording for video clips.
Restores all parameters to their original factory default settings.
Provides recommendations for securely mounting the camera on a tree for optimal picture quality and range.
Details how to attach the camera to a tree using the provided adjustable web belt.
Explains how to mount the camera using its tripod socket and optional accessories.
Guides users on testing the camera's sensing area and monitoring distance using the motion indicator LED.
Describes the process of switching the camera ON, including the motion indicator LED's behavior.
Explains how to view images by removing the SD card and using a computer or card reader.
Details connecting the camera directly to a computer via USB for image viewing and file system formats.
Instructs users to use the 'Format' parameter to delete all files from the SD card.
Guides users on downloading photos and videos to a PC or Mac via USB or SD card reader.
Addresses issues with 'false triggers' and provides solutions like repositioning or adjusting sensor level.
Offers reasons and solutions for unexpectedly short battery life, recommending specific battery types and SD cards.
Troubleshoots issues preventing the camera from capturing images, such as a full SD card or incorrect settings.
Provides steps to resolve issues where the camera fails to power on, checking battery installation and switch position.
Diagnoses reasons for dark night images, checking battery, flash range, and ARD shield.
Addresses dark daytime images, suggesting avoiding direct sunlight or strong light sources.
Explains how close subjects can appear too bright at night and suggests adjusting interval settings.
Troubleshoots bright daytime images, advising to check light sensor shade and camera lens direction.
Offers solutions for streaked subjects, suggesting different resolution settings or interval adjustments.
Addresses color cast issues, suggesting sensor servicing if consistent.
Diagnoses short video clips, checking SD card space and battery level.
Ensures the 'Time Stamp' parameter is set to 'On' for date/time imprints on photos.
Provides tips for capturing desired subjects, including sensor level, placement, and removing obstructions.
Explains the purpose of the PIR sensor LED in setup mode and why it doesn't flash during normal operation.
Troubleshoots blank LCD screens, checking switch position and ensuring proper mode selection.
Describes a normal faint black line appearing briefly on the LCD when switching to ON mode.
Addresses screens that power off, suggesting checking SD card installation.
Ensures settings are saved by pressing 'OK' after changes in Setup mode.
Troubleshoots Field Scan issues, checking for overlapping times and interval settings for video mode.
| Image Sensor | 3 Megapixel Color CMOS |
|---|---|
| Maximum Pixel Size | 4624x3468 (16 MP) |
| Lens | F = 2.8; FOV=38°; Auto IR-Cut-Remove (at night) |
| IR-Flash Range | 36'-100’ (12m-30m) |
| Picture Size | HD=1920x1440, 4K=3840x2880, 16M=4624x3468 |
| Video Size | 1280x720, 640x360 |
| PIR sensitivity | PIR with 4 sensitivity levels: Auto/High/Normal/Low |
| Shooting Numbers | 1— 3 programmable |
| Video Length | 5-60sec. programmable (15sec max for night video) |
| Display Screen | Std B&W Display: 24x32mm(1.5”) |
| Memory Card | SD or SDHC Card, Maximum capacity 32GB |
| Internal RAM | 64MB |
| Operation | User selectable: 24 Hour, Day only, or Night only (based on ambient light level) |
| Security | Strap; ¼-20 attachment |
| Response Time | 0.3 sec |
| Triggering Interval | 1 sec. - 60 min. programmable |
| Power Supply | 8xAA required |
| Stand-by Current | < 0.08mA (<7mAh/day) |
| User Interface | LCD display |
| Interface | USB; SD card holder |
| Operating Temperature | -20 - 60°C (Storage temperature: -30 - 70°C) |
| Operating Humidity | 5% - 90% |