EasyManua.ls Logo

BUT SKY3 User Manual

BUT SKY3
8 pages
To Next Page IconTo Next Page
Page #1 background imageLoading...
Page #1 background image
KEEP THE ASSEMBLY INSTRUCTION. THE RELEVANT INFORMATION YOU CAN FIND
4894223210010
4894223210010
NOTICE DE MONTAGE / ASSEMBLY INSTRUCTIONS
BUT International, 1 avenue Spinoza, 77 184 EMERAINVILLE
1
1. Repérez les différentes pièces nécessaires à l'assemblage de votre meuble.
2. Regroupez et comptez les pièces de quincaillerie.
3. Munissez-vous de l'outillage nécessaire à l'assemblage de votre meuble.
4. Aménagez-vous un espace propice à l'assemblage; moquette et couverture peuvent protéger votre
meuble des rayures
5. Procédez au montage sans forcer. Il est recommander de resserrez les vis au fil de l’utilisation.
6. Après assemblage de ce produit, il est conseillé d’aérer régulièrement la pièce pendant quelques jours.
CONSERVEZ VOTRE NOTICE DE MONTAGE. SI UNE PIèCE VENAIT à MANQUER, L'INFORMATION
RELATIVE à CELLE-CI FOURNIE PAR LA NOTICE DE MONTAGE RESTE LE MOYEN LE PLUS EFFICACE
DE COMMUNIQUER AVEC VOTRE MAGASIN.
1. Identify the parts which make up your piece of furniture.
2. Gather the hardware parts and count them.
3. Have the necessary assembly tools ready.
4. Organize a space for assembly, wall carpeting or a blanket will protect the furniture against scratches.
5. Never force the assembling while you put the parts together. You are recommended to tighten the
screws after the furniture has been used for some time.
6. After assembling this product, it is advisable to regularly ventilate the room for a few days.
YOU GET IN TOUCH WITH YOUR STORE IF A PART WAS TO BE MISSING.
ON IT WILL HELP
SKY3
EAN:
NOM DU PRODUIT
REFERENCE NO.
BLANC/WHITE
BLANC/WHITE
Question and Answer IconNeed help?

Do you have a question about the BUT SKY3 and is the answer not in the manual?

BUT SKY3 Specifications

General IconGeneral
BrandBUT
ModelSKY3
CategoryIndoor Furnishing
LanguageEnglish

Summary

Assembly Instructions

Preparation and General Advice

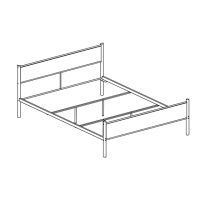
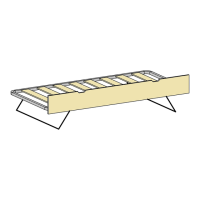
Essential preparatory steps and general advice for furniture assembly.

Parts and Hardware Identification

Component and Hardware Lists

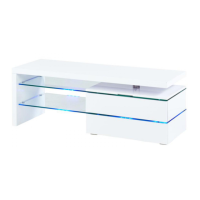
Detailed lists of all furniture components and hardware required for assembly.

Step-by-Step Assembly

Step 1: Assemble Main Frame

Assemble the main frame structure using specified panels and hardware.

Step 2: Attach Side Panels and Shelves

Attach side panels and install shelves into the unit.

Step 3: Install Back Panels

Secure the back panels to the assembled unit.

Step 4: Mount Support Hardware

Mount support hardware for drawers or doors.

Step 5: Attach Base Supports

Attach base supports or feet to the main unit.

Step 6: Attach Top Panel

Attach the top panel to the assembled unit.

Step 7: Attach Handles and Fittings

Attach external handles and fittings to the unit.

Step 8: Complete Frame Connections

Complete final frame connections and structural reinforcements.

Step 9: Install Drawer Slides

Install drawer slides onto the unit and drawers.

Step 10: Assemble and Insert Drawers

Assemble drawer components and insert them into the unit.

Step 11: Cable Management

Install cable management components.

Step 12: Wall Anchoring

Secure the furniture to the wall for safety using provided anchors.

Related product manuals