EasyManua.ls Logo

Buyers UTVS16 User Manual

Buyers UTVS16
8 pages
To Next Page IconTo Next Page
Page #1 background imageLoading...
Page #1 background image
www.buyersproducts.com
Phone (440) 974-8888
Fax 800-841-8003
Installation Instructions
UTVS16 UTV Spreader
PLEASE NOTE
1. Take precautions to operate the UTV/ATV in a safe manner. Follow
precautions and guidelines as outlined in the Owners Manual.
2. In the event the Spreader Motor is not operating, check fuse in
accessory adaptor and replace if blown.
3. Clean the Hopper and brackets after use. Some material can
cause corrosion to metal parts, thus reducing the life of the
Spreader Assembly.
continued
A multipurpose spreader designed to distribute
feed, seed, bagged rock salt, and fertilizer
while mounted on a UTV. The hitch mount and
detach brackets allow for easy installation and
removal for “Use-on-Demand” availability.
Mounting Instructions
1. Assemble the Frame Tubes, Plate, Plate
Weldment, and Gussets as shown on next page.
NOTE: The washers are installed between the Plate
and the Frame Tube to provide spacing for the Frame
of the Spreader Assembly.
2. Install the Hitch Mounting Frame into the hitch and
pin in place. (hitch pin not included)
3. Position the preassembled Hopper and Frame into
place on the Hitch Mounting Frame. Insert the
included spreader mounting pins and install the cotter
pins to secure the Spreader.
4. Slide the long end of the Gate Control Arm
through the hole in the top end of the Plate Weldment.
Slide the short end of the Gate Control Arm through
the Gate Control on the bottom of the Hopper, place
the included collar on the end and tighten.
NOTE: When assembled, both collars premounted
on the control arm should be between the Hopper
and the Plate Weldment.
5. Connect wire harness to motor and then plug the
accessory adapter into the UTV's accessory outlet.
6. A “push/pull” action on the Gate Control Arm
will allow you to control the opening size in the
bottom of the Hopper. Enlarging the opening size
will allow for more material to be spread. Adjust
the opening to accommodate the size and quantity
of material you wish to spread.
Operating Instructions
1. Set the Flow Control Collar on the Arm to
the desired position. Close the Shut-Off Gate com-
pletely. Load material into the Hopper; be sure to
secure the Hopper Cover in place. Turn the “on/off”
switch to the “on” position. While moving, open the
Shut-Off Gate to begin spreading material.
2. Adjust the Shut-Off Gate by using the Flow
Control Arm to increase or decrease the size of the
opening. This will allow you increase or decrease
the amount of material being spread.
Question and Answer IconNeed help?

Do you have a question about the Buyers UTVS16 and is the answer not in the manual?

Buyers UTVS16 Specifications

General IconGeneral
BrandBuyers
ModelUTVS16
CategorySpreader
LanguageEnglish

Summary

Mounting Instructions

Assemble Frame Components

Assemble frame tubes, plate, plate weldment, and gussets.

Install Hitch Mounting Frame

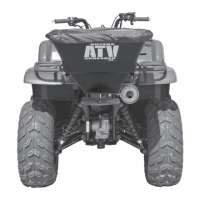
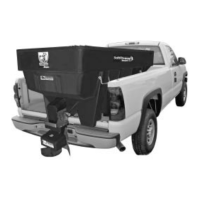
Install hitch mounting frame into UTV hitch and secure with pin.

Attach Hopper Assembly

Position hopper/frame onto hitch mount and secure with spreader pins.

Connect Gate Control Arm

Route gate control arm through plate and hopper, secure with collar.

Connect Electrical Harness

Connect wire harness to motor and plug into UTV accessory outlet.

Adjust Material Flow Control

Explain gate control arm function for adjusting opening size for material spread.

Operating Instructions

Set Spreading Flow Rate

Set flow control collar, close gate, load material, turn on, open gate to spread.

Adjust Spreading Volume

Adjust shut-off gate opening size using the flow control arm.

Important Safety and Maintenance

Safe UTV/ATV Operation

Follow UTV/ATV owner's manual precautions for safe operation.

Troubleshoot Motor Operation

Check fuse in accessory adapter if spreader motor is not operating.

Hopper and Bracket Cleaning

Clean hopper and brackets after use to prevent corrosion.

Parts Diagram

Spreader Components

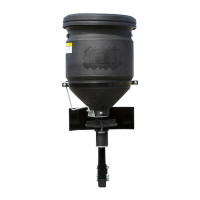
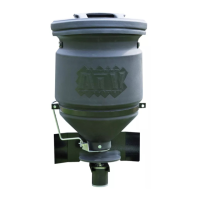
Labeled diagram of spreader parts including hopper, frame, motor, and control arm.

Hitch Mounting Frame Assembly

Diagram showing the assembled hitch mounting frame with spreader pins.

Warranty Information

Product Warranty Terms

Details the one-year warranty for truck/trailer hardware, including exclusions and claims.

Related product manuals