9
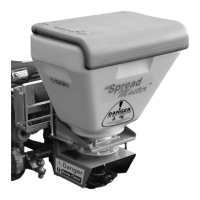
Quick Smart system mounting
Install the Quick Smart™ attachment kit on the ATV as detailed in the installation instructions
provided in the kit.
Quick Smart spreader attachment
Attach the QS Adaptor Bracket to the spreader using the M8x25 nuts and bolts provided.
Attach the spreader to the ATV by locking the adaptor bracket into the QS ATV bracket. Ensure
that the bracket is correctly engaged under the latches.
Wiring
Place the console in the required position and connect the battery cable to the vehicle battery.
The red wire must be connected to the positive terminal. Attach the console to the vehicle using
the self adhesive Velcro fasteners provided.
WARNING
To avoid injury ensure that the switch is in the OFF position before connecting cables.
Connect the console to the spreader. Ensure that any excess cable is stowed where it cannot be
pinched or damaged.
Switch the spreader on and check that the spinner turns clockwise when viewed from the top. If
the spinner turns anti-clockwise, reverse the polarity of the wiring. Your spreader is now ready to
use.
OPERATION
The product to be spread is placed in the hopper and the lid snapped shut.
When the switch is turned on electrical power is supplied to the spinner motor. The spinner will
spin up to operating speed.
When the shutter handle is pulled toward the operator the shutter will open to a position
determined by an adjustable stop. Product will then flow from the hopper through an adjustable
orifice into the delivery chute. At the base of the chute there are two delivery holes which ensure
that product enters the spinning disk at the correct position to spread the product behind the
spreader over 180 degrees.
An agitator shaft in the bottom of the hopper ensures that product flows continuously through the
metering orifice, and ensures that product does not bridge in the neck of the hopper.
CAUTION
The agitator flail may not be required for free-flowing products such as granulated fertiliser and
seed. To avoid overloading the motor the flail may be removed when these products are being
applied.