This document provides instructions for setting up and maintaining the Cabanon Aruba Comfort Tent. It covers various aspects from initial pitching to frame and canvas upkeep, ensuring the longevity and optimal performance of the tent.
Function Description:
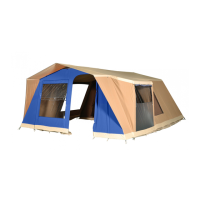
The Cabanon Aruba Comfort Tent is designed for outdoor accommodation, offering a comfortable and stable shelter. It is a robust tent suitable for various outdoor environments, providing protection from the elements. The tent features a modular design, allowing for an integrated kitchen area, which enhances its functionality for camping and extended stays. The design emphasizes ease of assembly and durability, making it a reliable choice for users seeking a high-quality tent.
Usage Features:
Pitching (Emplacement/Pitch):
- Site Selection: Avoid low-lying areas to prevent water accumulation.
- Ground Preparation: Clear the ground of stones and branches before pitching to prevent damage to the groundsheet and ensure a smooth surface.
- Tree Avoidance: Do not pitch directly under trees. Sap and bird droppings can damage the water-proofing of the canvas, compromising its protective qualities.
Stabilization (Haubanage/Stabilization):
- Canvas Tension: When pitching, ensure the canvas is stretched to its maximum tension for stability and proper form.
- Pegging: Drive pegs into the ground at a 45-degree angle.
- Elastic and Strap Fixing: Only fix the elastic cords and straps once the pegs are halfway into the ground. This prevents damage to the canvas from the mallet during the initial pegging process.
- Door and Roll-up Sections: For doors and roll-up sections, cross the elastic cords over each other. This technique helps to reduce tension on the zippers and the canvas, prolonging their lifespan and preventing undue stress.
Assembly Steps (Montage/Set up):
- Groundsheet Placement: Lay and peg the groundsheet down onto the prepared ground using the provided eyelets (tétines).
- Frame Assembly (Halfway): Assemble the tent frame to half its height. This involves connecting the initial frame components.
- Canvas Positioning: Place the canvas over the central point of the partially assembled frame.
- Canvas Unfolding: Unfold the tent canvas, starting from the front side and extending towards the back side.
- Raising the Tent: Raise the tent to its full standing position, one side at a time, and adjust the canvas as needed to ensure it sits correctly on the frame.
- Zipping Canvas to Groundsheet: Zip the canvas to the groundsheet, starting from the back of the tent.
- Frame Adjustment: Adjust the frame using the adjustable legs (pieds réglables) to achieve the desired tension and stability.
- Pegging Down: Peg the tent down securely using the handles (poignées) to ensure it is firmly anchored to the ground.
- Awning/Kitchen Frame Assembly: Assemble the frame for the awning or kitchen area and secure it to the main tent frame from the inside.
Maintenance Features:
Canvas Upkeep (Entretien de la toile/Canvas upkeep):
- Cleaning Before Storage: When leaving the pitching site, clean the bottom of the walls and remove any excess mud off the pegs. This is crucial for preventing rot and maintaining cleanliness.
- Drying Before Folding: It is imperative to dry the complete canvas before folding. Never fold the tent if it is wet or damp, as this can lead to mold and mildew growth.
- Spot Cleaning: Never wash a stain with detergent. Instead, use a slightly wet sponge or a soft-haired brush with clear water or even mild soap with a neutral pH. Avoid harsh chemicals that could damage the waterproofing.
- Interior Cleaning: Dry-clean inner tents, roof linings, and curtains.
- Mold Prevention: Mold is a significant enemy of the canvas. To prevent mushroom growth, a complete drying is essential.
- Condensation: Do not underestimate condensation. Ensure proper ventilation to minimize its effects.
- Canvas Shrinkage (First Use): The canvas may shrink during the first few uses. This is a normal reaction for cotton that is a living material and reacts with the air. To mitigate this phenomenon, dry up the canvas tightly and do not forget to close all the zips. This helps the canvas to settle into its final shape and tension.
- Ventilation: To prevent condensation and ensure proper air circulation, always keep the tent well-ventilated and remember to close all openings when not in use to protect against elements.
Frame Upkeep (Entretien de l'armature/Frame upkeep):
- Material: The frame is made of treated aluminum and steel.
- Cleaning: The frame should be cleaned with a dusting cloth.
- Storage: Proper storage is necessary to prevent loss or damage.
- Spare Parts: In case of loss or damage, the after-sales service can provide replacement parts. References inscribed on the plans should be used when ordering.
- Springs and Clips: The springs (ressorts de solidarisation) and button clips (cliquets) are easily removable and replaceable with a screwdriver. This allows for simple repairs and maintenance of the frame components.
Important Technical Specifications:
- Frame Material: Treated aluminum and steel, ensuring durability and resistance to corrosion.
- Canvas Material: Cotton, a living material that reacts to environmental conditions, particularly moisture. This material choice contributes to the tent's comfort and breathability.
- Waterproofing: The canvas is treated for waterproofing, but this can be compromised by sap and bird droppings, highlighting the importance of proper pitching site selection.
- Adjustable Legs: The frame incorporates adjustable legs, allowing for precise tensioning and leveling of the tent on uneven ground.
- Modular Design: The ability to attach an awning or kitchen frame indicates a modular design, offering flexibility and expansion options for users.
This comprehensive guide ensures that users can effectively set up, use, and maintain their Cabanon Aruba Comfort Tent, maximizing its lifespan and performance in various outdoor conditions.