LP GAS CYLINDER INFORMATION
King Kooker
®
Outdoor Cookers are manufactured for use with 20lb. (9 kg) LP Gas Cylinders. Important
information to remember about LP Gas cylinders include:
1. Always read and follow the cylinder manufacturer’s instructions.
2. Make sure that the gas cylinder is not overfilled. The maximum weight of a properly filled 20 lb. (9 kg) LP
gas cylinder is approximately 38 lbs (17 kg). Never fill the cylinder beyond 80% full.
3. Make sure that the cylinder valve has the proper connection for a Type 1 appliance fitting.
4. Do not store a spare LP gas cylinder under or near this appliance.
5. Disconnect the cylinder from the cooker for storage.
6. Store the cylinder out of the reach of children.
7. Do not use or store the cylinder in a building, garage or enclosed area.
8. Always use a 20 lb. (9 kg) cylinder in the proper upright position for the proper vapor withdrawal. It should
also be stored and transported in the upright position.
9. The cylinder must have a protective collar to protect the cylinder valve.
10. Place dust cap on cylinder valve outlet whenever the cylinder is not in use. Only install the type of dust cap
on the cylinder valve outlet that is provided with the cylinder valve. Other types of caps or plugs may result
in leakage of propane.
11. Cylinder must be turned OFF while not in use.
ALWAYS READ AND FOLLOW THESE AND THE CYLINDER MANUFACTURER’S INSTRUCTIONS.
FAILURE TO
FOLLOW THESE INSTRUCTIONS AND WARNINGS COULD RESULT IN FIRE, EXPLOSION, BURN
HAZARD OR CARBON MONOXIDE POISONING WHICH COULD CAUSE PROPERTY DAMAGE,
PERSONAL INJURY OR DEATH.
15
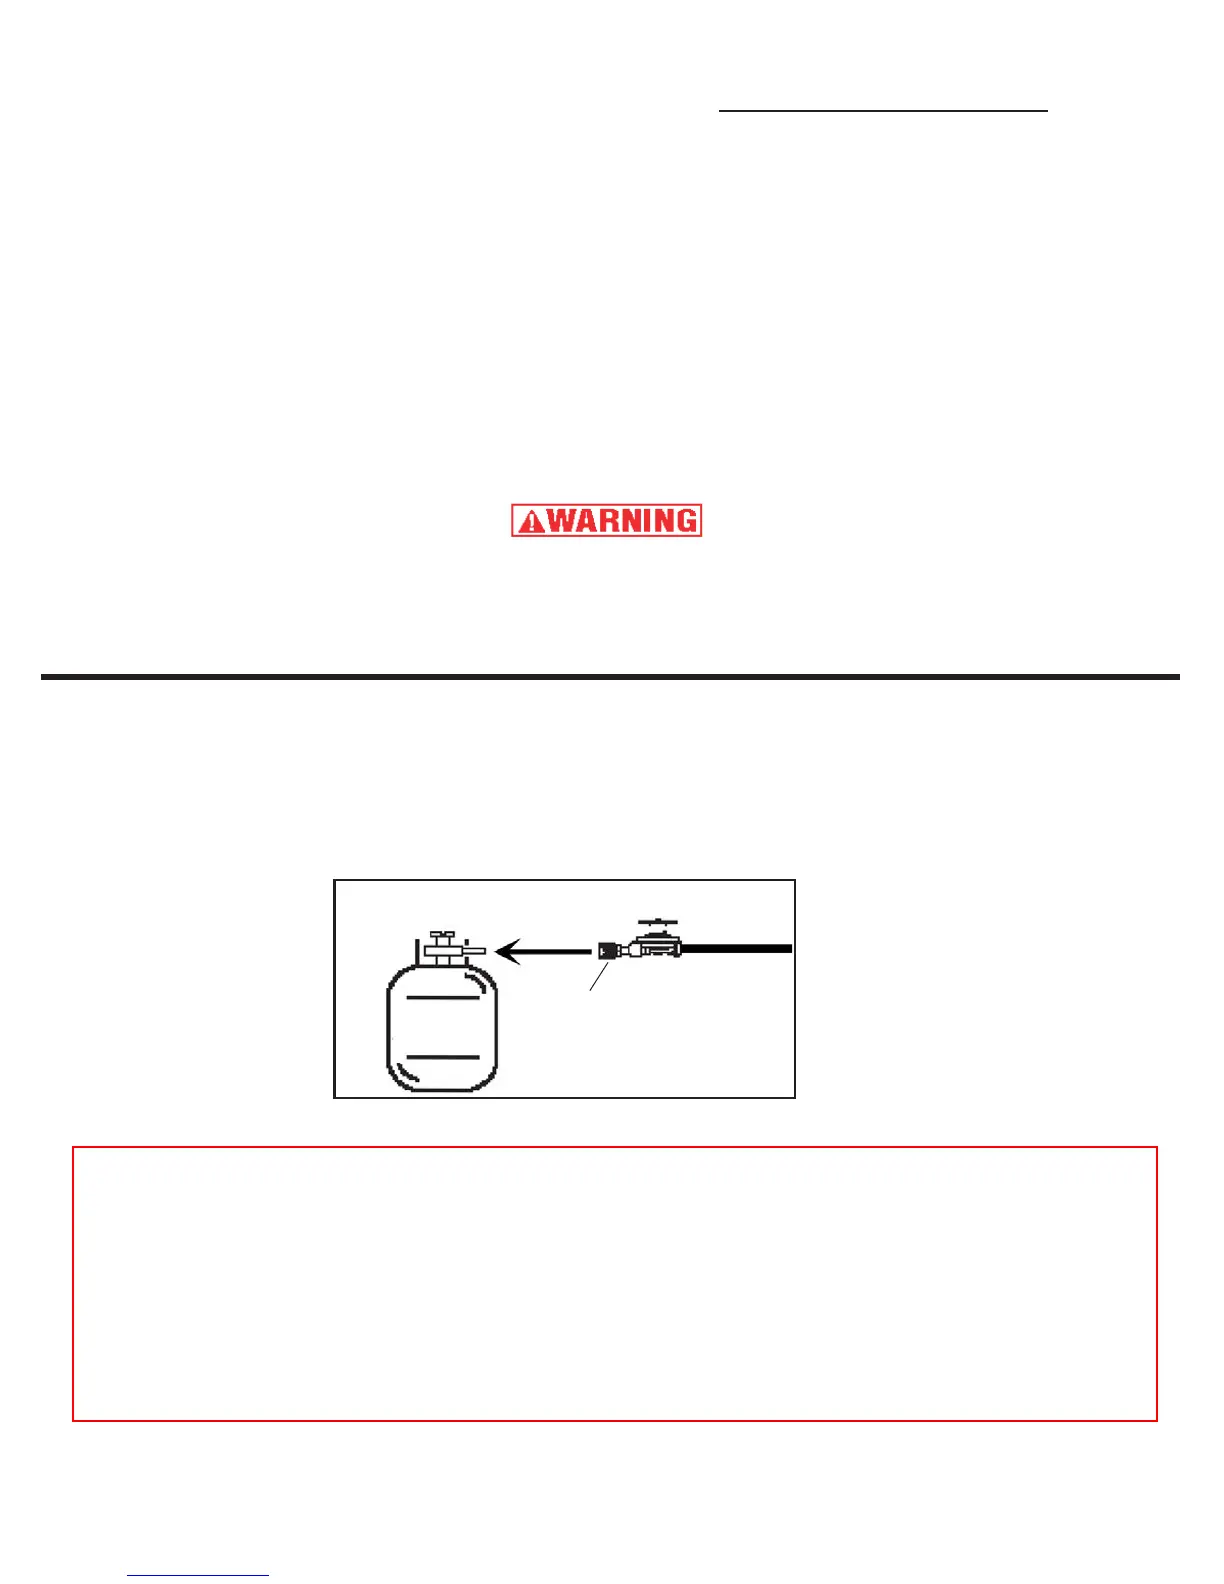
CONNECTION INSTRUCTIONS
1. Check that your hose assembly is set to not allow gas flow. Turn the regulator control counterclockwise
until it stops. This is the OFF position.
2. Attach the regulator to the cylinder valve by turning the Type 1 fitting clockwise. Hand tighten with the
regulator positioned upright. Refer to the assembly diagram for the appliance below.
3. Perform the Leak Test:
4. Before lighting the cooker, check that the venturi tube is free of obstruction and that the orifice is properly
threaded into the venturi tube as per instructions on pages 10-11. Both situations must be corrected if
necessary before lighting to prevent flashback.
LEAK TEST
Before lighting the appliance, a thorough leak test must be satisfactorily completed using
a non-ammonia soapy water solution (50% non-ammonia soap and 50% water). This is to be
applied with a small brush to all gas joints after the cylinder valve is opened (no more than
1/2 turn). If bubbles are seen, indicating a leak, turn off the cylinder and tighten the leaking
connection until a further leak test shows no leaks.
If tightening the connection does not stop the leak, call Metal Fusion, Inc. (800) 783-3885,
for assistance.
NEVER USE HOSE/REGULATOR ASSEMBLY IF LEAKING.
TYPE 1
CONNECTION
* Model May Vary From Picture
20 lb. LP
Gas Cylinder