1-800-732-0144
7
STEP :: 01
PREPARE THE REMOTE TRANSMITTER
CHARGE THE REMOTE TRANSMITTER
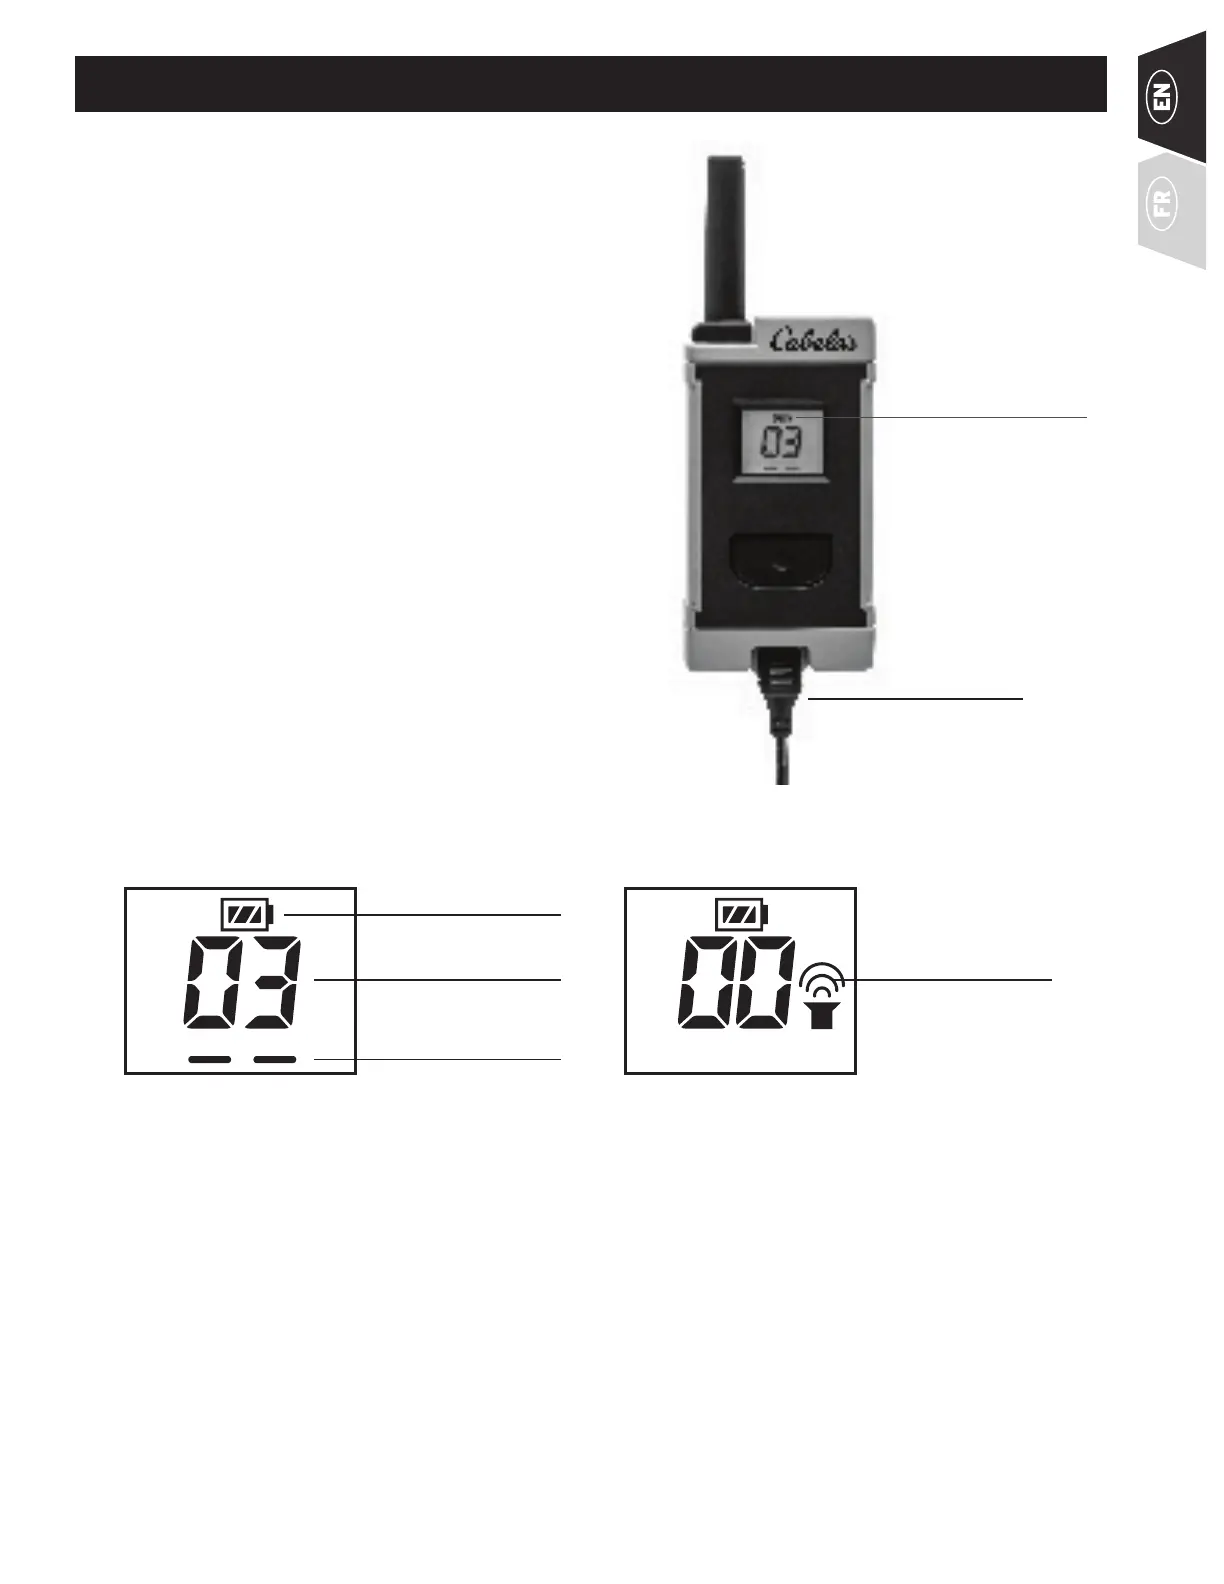
1. Lift the rubber cover protecting the Charging Jack
2. Connect one of the charger connectors to the
Charging Jack.
3. Plug the charger into a standard 120/240-volt AC
wall outlet.
4. Charge the Remote Transmitter for 2 hours for the
first charge and every charge thereafter.
Using Li-Ion technology, the Remote Transmitter only
requires a 2 hour charge. It is not harmful to let the unit
charge for more than 2 hours.
5. When charging is complete, remove the charger
connector, and replace the rubber cover. The unit
will preform a brief LCD test, and revert back to the
normal LCD screen.
NOTE: Approximate battery life between charges is 50
to 70 hours, depending on frequency of use.
BATTERY ICON:
CYCLES LOW, MEDIUM,
AND HIGH DURING
CHARGE. FULL BAR WHEN
COMPLETELY CHARGED.
CHARGER
CONNECTOR PLACED
IN THE REMOTE
TRANSMITTER
CHARGING JACK
TRANSMITTER LCD
NOTE: The Remote Transmitter’s backlight turns off after 5 seconds to conserve battery life; the LCD display
automatically turns off after approximately 30 minutes.
BATTERY STATUS
TONE INDICATOR
STIM LEVEL
STIM INDICATOR