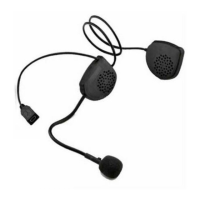
9) Connettere il dispositivo bluetooth all’auricolare sinistro D,
all’antenna E e al microfono F (Foto 9) (antenna già predisposta
nel casco).
(FOTO 9)
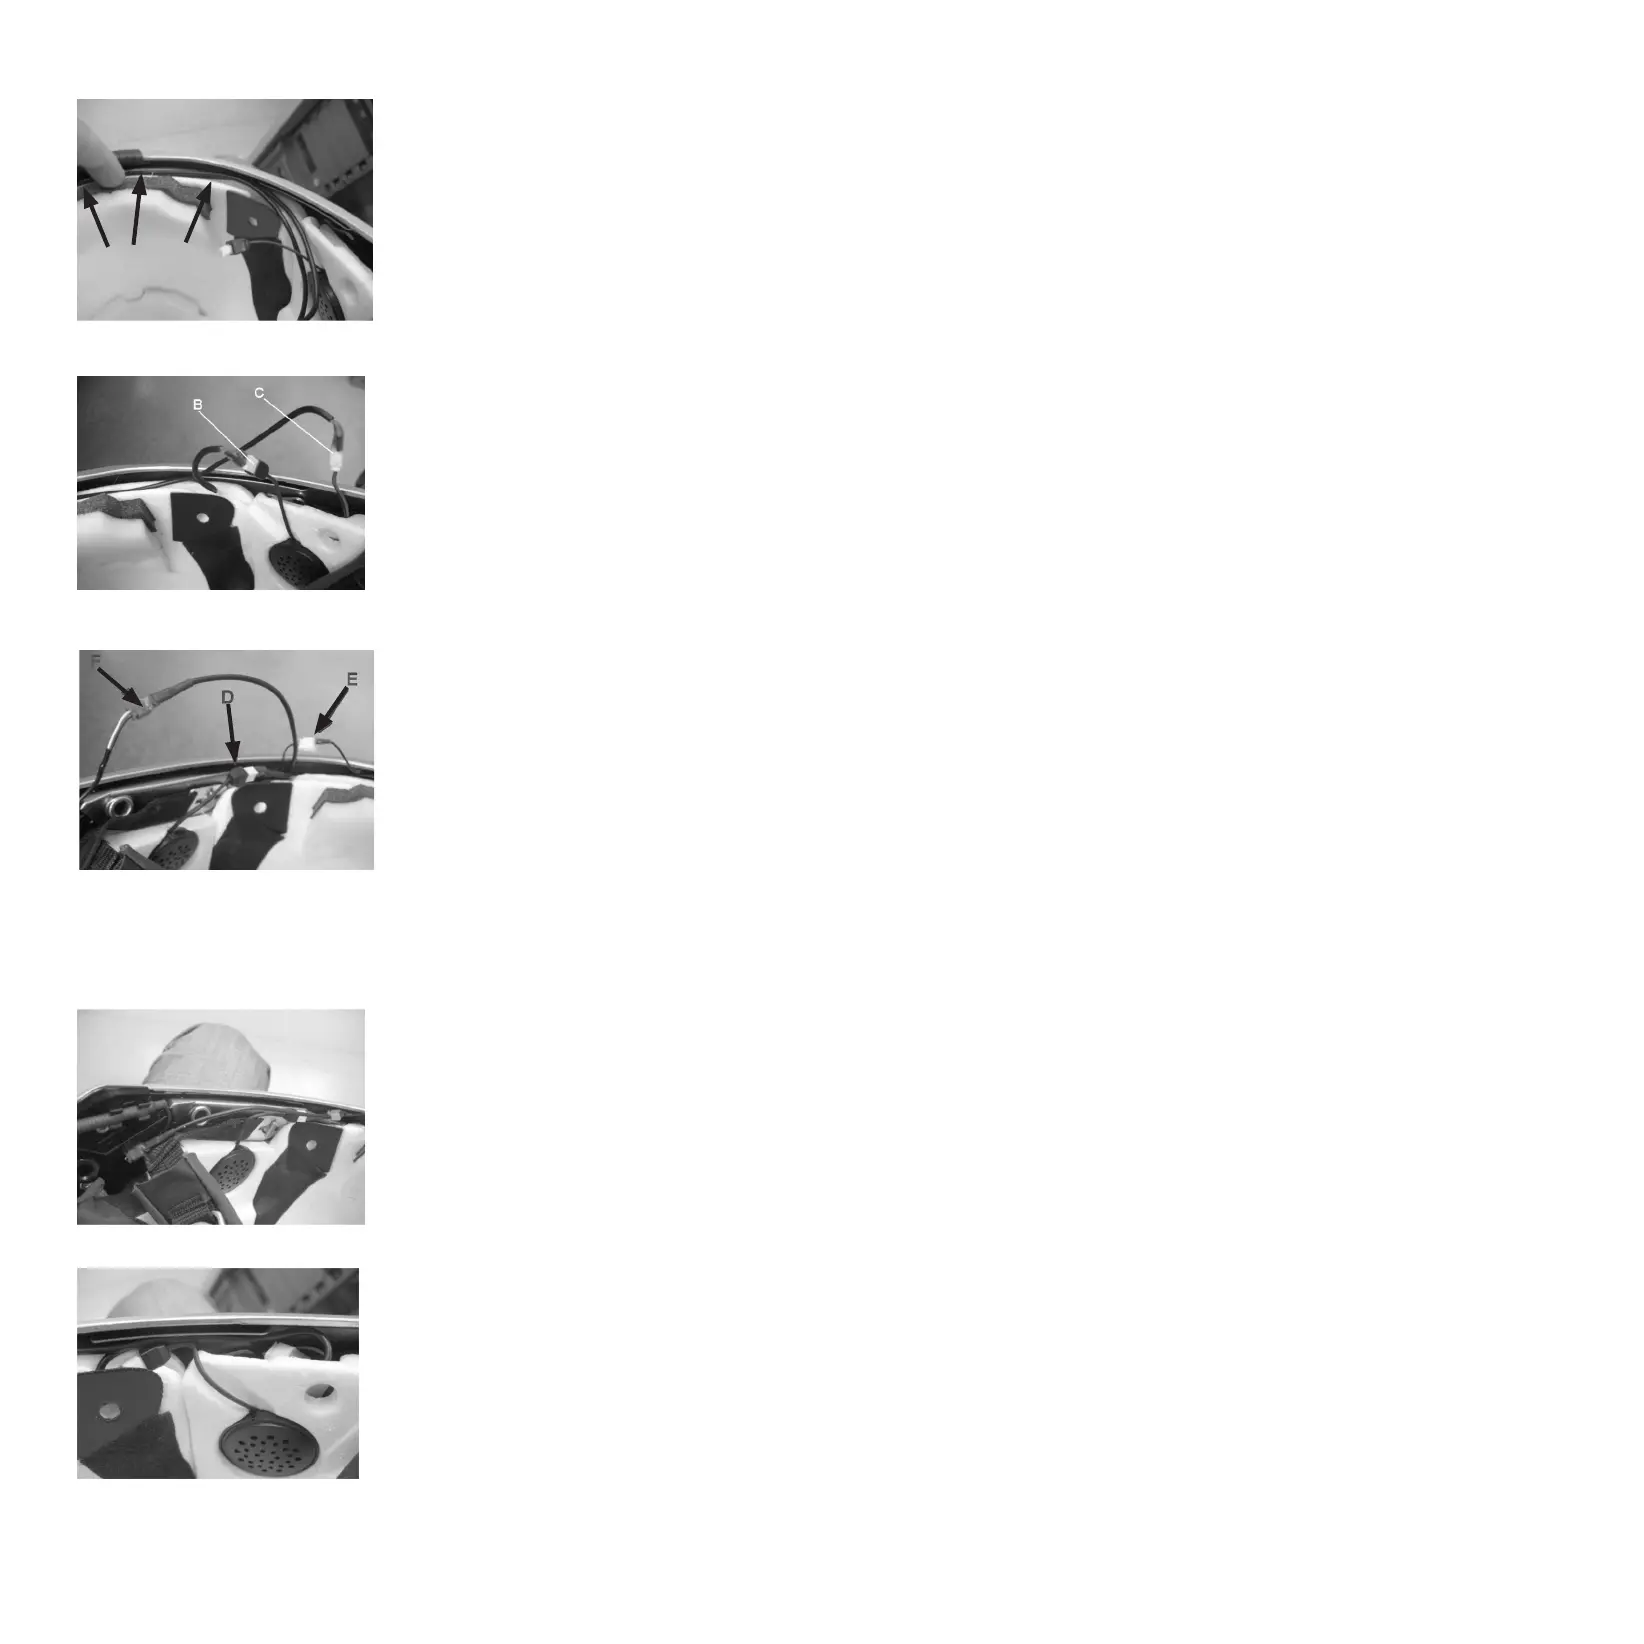
10) Sistemare e bloccare accuratamente i cavi FOTO 10 / FOTO
11 e montare l’interno lavabile e i guanciali. Durante quest’ultima
operazione assicuratevi di non “pizzicare” i cavi elettrici.
(FOTO 11)
(FOTO 10)
9) connecter le système Bluetooth ® à l’écouteur gauche D, à l’an-
tenne E et au microphone F.(Photo 9) ( l’ antenne est déjà prédi-
spose sur le casque)
10) Accommodate and x properly all the cables as shown in Pic.
10 and 11, then mount back the inner lining and cheek pads. Du-
ring this procedure make sure not to damage the cables.
9) Connect the cables on the inner side of the key pad with the left
ear pad D, with the antenna E ( antenna already included under the
EPS) and the microphone F (Pic 9)
10) Ajustar adecuadamente todos los cables tal como muestran las
fotos 10 y 11. Seguidamente, montar el interior y las mentoneras
del casco. Durante este último paso, asegurarse de no dañar los
cables.
8) Verbinden Sie die Bluetooth Vorrichtung mit dem linken Kopfhö-
rer, mit der Antenne E und dem Mikrofon F wie auf dem Foto 9. (Die
Antenne ist im Helm integriert.)
10) Bringen Sie sorgfältig die Kabel unter Foto 10 / Foto 11 und
montieren Sie das waschbare Innenfutter und die Wangenpolster.
Während diesem letzten Vorgang vergewissern Sie sich, dass die
Kabel nicht eingezwickt werden.
9) Conectar los cables de la parte interior del teclado al altavoz
izquierdo D, a la antena E (ya incluida bajo el EPS) y al micrófono
F. (Foto 9)
10) Bien positionner les câbles Photo 10 et photo 11 et monter
l’intérieur lavable et les coussins de joue . Pendant cette opération,
veiller à ne pas « coincer » les câbles électriques.
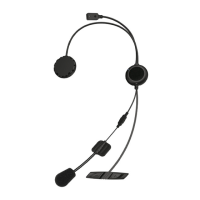
8) Inserire i 2 cavi più lunghi nella cavità scavata nel polistirolo e
connetterli all’auricolare destro B e alla batteria C. (Foto 8 a, b)
8) Insert the 2 longest cables on the apposite seating along the
EPS ( as indicated by the arrows in the picture); connect one cable
to the right ear pad B and the other to the battery C. (Pic.8 a,b)
8) Insertar los dos cables más largos a lo largo del EPS (tal como
indican las echas rojas en la foto inferior); conectar un cable al
altavoz derecho (B) y el otro a la batería (C). (Foto 8 a, b)
8) insérer les câbles plus longs dans le siège prédisposé dans le
polystyrène et les connecter à l’ écouteur de droite B et à la batterie
C. (Photo 8 a,b)
(FOTO 8 a)
(FOTO 8 b)
8) Stecken Sie die zwei längsten Kabel in die Führung an der St-
yroporschale und verbinden Sie diese mit dem rechten Kopfhörer
B und der Batterie C.(Foto 8 a,b)
F
D
E
 Loading...