22
GB
• If you wish to check for leaks on your appliance, do it outside. Do not try to detect leaks using a ame, use soapy water. The correct
way is to smear the joints with soapy water. If bubbles form then there is a gas leak. Immediately turn off the gas supply rst by
closing the control valve on the gas cylinder and then the appliance valve, check that all the connections are properly tted. Re-check
with soapy water. If a gas leak persists return the product to your CADAC dealer for inspection / repair.
• Do not modify the appliance. Do not use it for anything for which it has not been designed.
• During use, parts of the appliance will become hot (particularly the burner) Avoid touching hot parts with bare hands. The use of
gloves is recommended.
• Keep young children away from the appliance at all times.
• Do not twist or pinch the hose.
• Do not move the appliance during use.
• Do not use the appliance without the pot stands being in place and properly located.
• Turn off the gas supply at the gas container after use.
• Do not modify the appliance, any modication may be dangerous.
3. Assembly Instructions
• PLEASE NOTE: Please ensure all protective packaging and plastic are removed from the
appliance before use.
• This appliance may only be used with an approved hose and regulator.
• The hose length should be no less than 0.8m (800mm) and shall not exceed 2.0m (2000mm)
and replace when the hose is damaged or shows signs of brittleness or cracks.
• Do not twist or pinch the hose. Ensure that it is routed away from the stove body so as to
prevent deterioration / damage to the hose caused by heat.
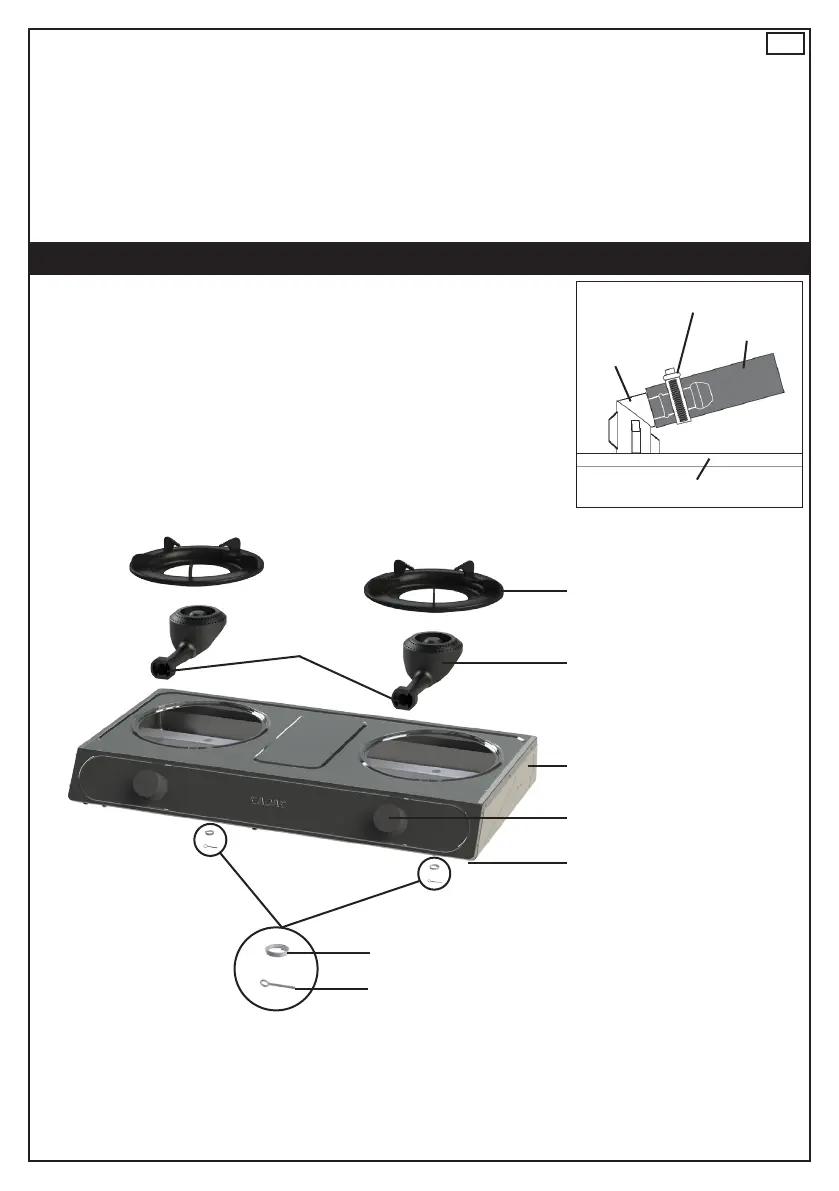
• Fit the one end of the low-pressure hose onto the regulator nozzle and the other end onto the
stove nozzle, by pushing on rmly until fully seated against the back shoulder on the nozzle
(See Fig. 4).
• Ensure that the connections are made securely and do not allow gas to leak.
• Ensure that the appliance valves are in the off position by turning the knobs fully clockwise to
the stop (See Fig. 3).
• Open the gas valve on the cylinder and test for any leaks.
• Check all gas connections for any signs of gas leaks.
• Your appliance is now ready to be used.
Fig. 4
Hose clamp
Hose
Stove body
Nozzle (H)
Spring (G)
Retaining Pin (F)
Burner (B)
Control Knob (E)
Pot Stand (A)
Stove Body (D)
Foot (I)
Air intake adjusters
 Loading...