33
GB
6. General Maintenance
This appliance does not require scheduled maintenance.
• It is dangerous to use an appliance with a cracked or perished seal. Inspect seals regularly and replace if they are not in order, before
using the appliance.
• If the appliance was in use, it will be hot. Allow to cool suf ciently before attempting any maintenance.
• The stem is tted with a jet to regulate the correct amount of gas.
• Should the hole in the jet become blocked this may result in a small ame or no ame at all.
• Do not attempt to clean the jet with a pin or other such device as this may damage the ori ce, which could make the appliance
unsafe.
Replacing a blocked jet:
• Ensure that the cylinder valve is closed, then disconnect the appliance from the gas cylinder.
• Remove the fat pan, BBQ grid and ame tamer from the appliance.
• Unscrew the appliance from the gas cylinder.
• Remove the mesh and lter using a very thin at screwdriver (Located at the bottom of the stem). The jet is now visible to remove.
Unscrew the jet from the adaptor using a suitable size at screw driver. Do not use pliers to remove the jet as this may damage the jet,
making it unusable or impossible to remove.
• Screw a new unique No. 23 CADAC jet, ensure a gas tight seal. Don’t over tighten the jet. Then place the mesh, followed by the lter.
Replacing a seal:
• Remove the rubber seal without damaging the seat, replace it with a new seal making sure it is well seated.
7. Troubleshooting
• A normal ame is blue and may have a yellow tip. If the ame is completely yellow, it may be that the jet is not securely tted. Re-
tighten the jet to give a gas tight seal. An over lled gas cylinder can also cause large yellow ames. Cylinder should be returned to
lling station and checked by weight.
• Check that the inlet to the burner pipe is clear and free of obstructions.
• If the ame power drops or the gas will not light, check that the gas cylinder still contains gas (shake to hear the noise made by the
lique ed gas). If there is still gas, the jet might have become blocked or partially blocked.
• If you suspect a blocked jet, follow the instructions above.
• Check for spider webs or insect nests in the gas tube or primary air inlet.
8. Cleaning
• It is recommended to clean your appliance after every use. This will prolong the life of your appliance.
• To clean the fat pan, simply wipe with a damp cloth using a little detergent, if necessary.
• DO NOT IMMERSE IN WATER as this will allow water to get into the burner tube causing the appliance to malfunction.
• Do not use abrasive cleaners or scourers as this will cause permanent damage to the surface.
• To avoid ignition failure, keep the burners clean.
• Use a brush to clean the burners.
• A tooth brush may be used to clean out the burner tube.
9. Storage
• Handle the appliance with care. Do not drop it.
• After use, wait until the appliance has cooled down, disconnect it from the gas cylinder and store in a cool dry place. Store your
cylinder in a well-ventilated place.
• It helps to place a cover over the appliance when not in use as this will prevent the ingress of dirt and insects, which may affect the
gas ow.
• Warning: An LP cylinder not connected for use shall not be stored in the vicinity of this or any other appliance.
• LPG cylinders should preferrably be stored outdoors if not in use.
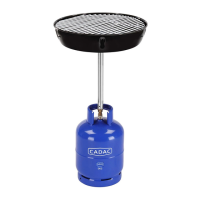
5. Operating the Appliance
• CAUTION: Accessible parts may become very hot. Keep young children away from the appliance.
• Do not move the unit whilst in use. The use of protective gloves is recommended.
• To light the appliance, light a match or barbecue lighter, turn on the cylinder valve by turning the control knob in an anti-clockwise
direction to the open position and light the appliance burner.
• Warning: If the burner fails to ignite within 10 seconds, turn the control knob off (clockwise). Wait three minutes before attempting to
re-light.
• Use the control knob to adjust the ame intensity to the desired level by turning the knob clockwise to decrease the ame and anti-
clockwise to increase the ame.
• Cooking temperatures are easily adjusted to suit your own requirements by turning the cylinder valve control key or knob to regulate the
degree of heat. A feature of the Handi Braai is that it offers various heat zones. This is very useful as some foods cook quicker than others
and the food that is ready rst, can be moved to the cooler areas of the grid to keep warm whilst the balance of the food is still cooking.
• When using the appliance in windy conditions - always try to use the appliance in an area shielded from wind - as high winds will affect
the performance of the appliance and the ame may damage the unit in high winds.
• To pack away, let the unit cool off. After cleaning, remove the appliance from the cylinder and pack the appliance in clean and dry place.
503-0721 LEV3 (765) Handi Braai - User Manual (SA).indd 3 2018/08/03 14:29:10
 Loading...