Calsense
10 CS3000 Quick Start Guide
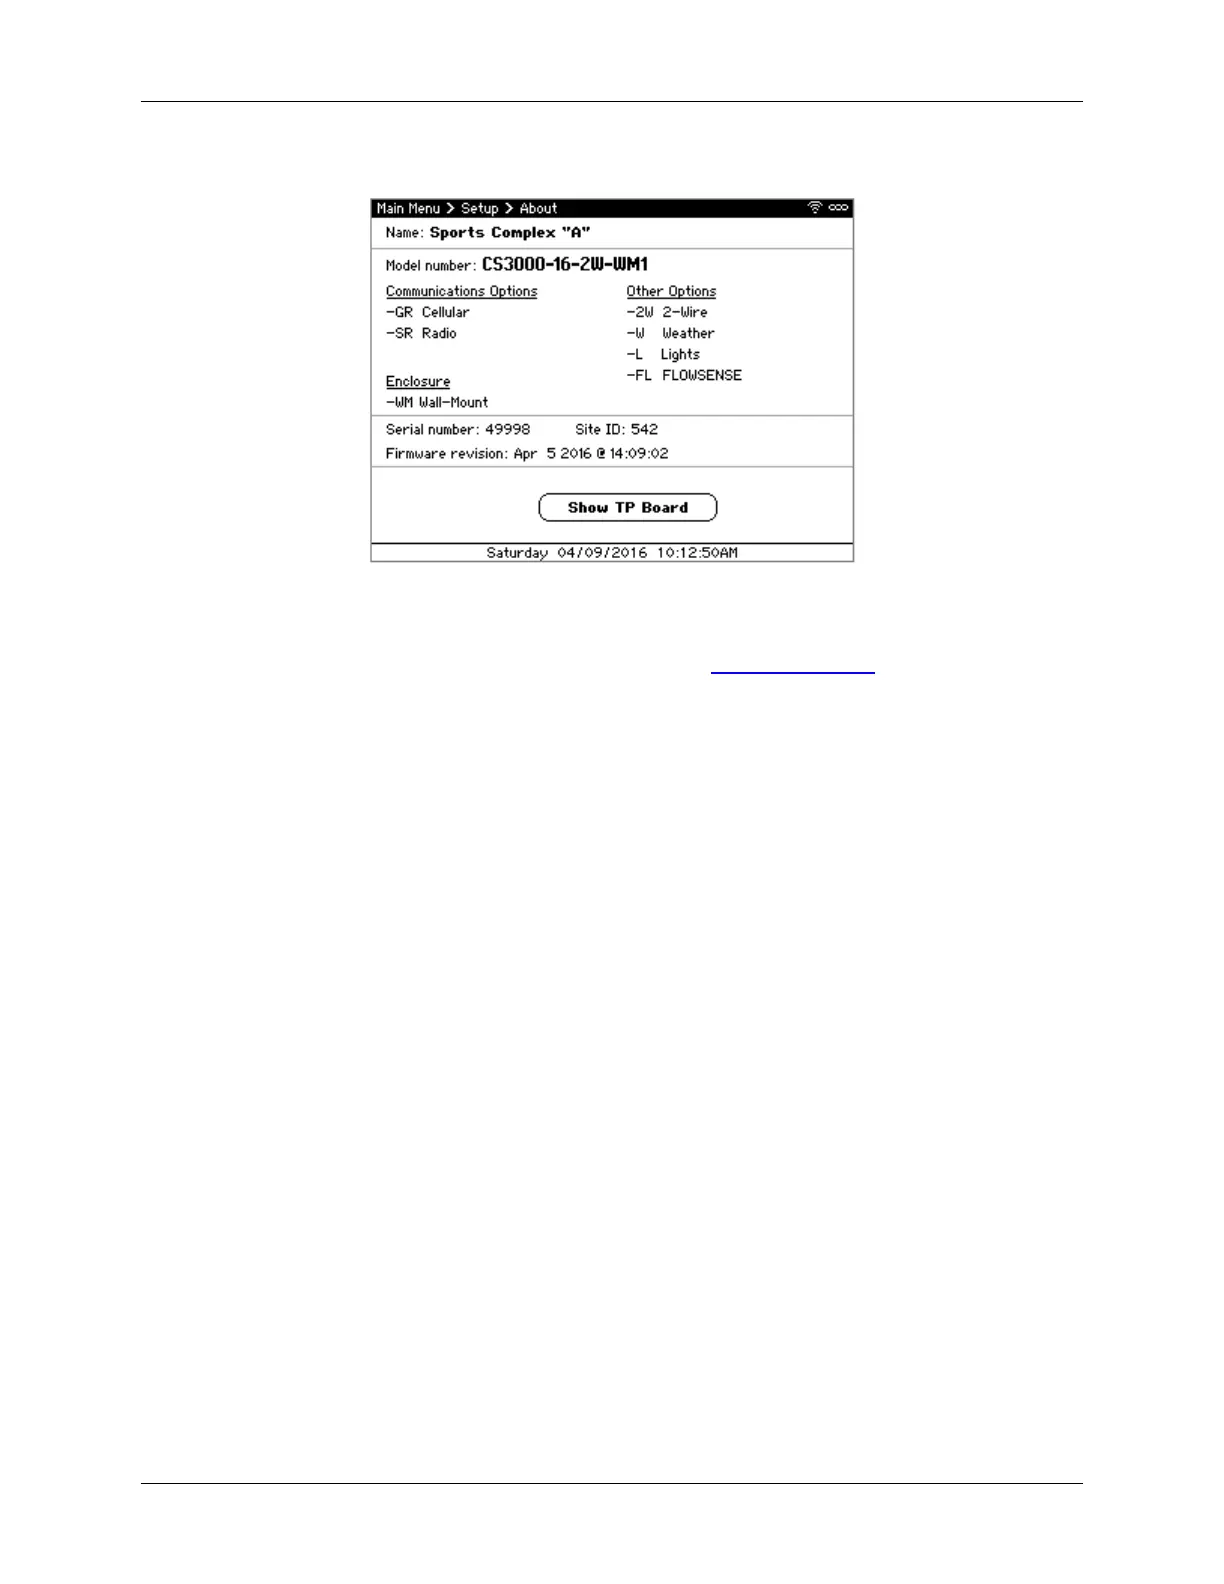
2. Navigate to About and press SELECT. The About screen displays (Figure 11).
Figure 11 - About screen
3. Make note of the Site ID and Serial Number displayed on the screen.
4. Using a computer, log in to Command Center Online at www.calsense.net.
5. If the CS3000 already exists, skip to Step 7. Otherwise, tap or click Settings > Site Controllers.
The Site/Controllers list displays.
6. On the CS3000 Sites heading, tap or click [Add CS3000].
7. Type the Site ID and Serial Number noted in Step 3 and tap or click Add Site. The controller is
added.
8. Tap or click Settings > Weather Sharing. The Weather Sharing list displays.
9. Locate the new site in the list and tap or click Edit. The Site Settings page displays.
10. Under Sharing Settings, select your ET and Rain source. If you don’t have an on-site ET Gage
and/or Rain Bucket, select WeatherSense to receive data generated by Calsense.
11. Click Save to save the changes. Weather Sharing will automatically occur each night shortly after
8:00 PM local time.