Page 3 of 7
CV-550SPK V3 WATERPROOF KEYPAD
INSTALLATION INSTRUCTIONS
Wiegand Out to Access System (Card/PIN stored in Access System)
Reader Mode
Step 1) 03 0 #
(Enables data lines to be connected to an Access Controller)
Facility Code
Step 2) 60 (0-255) # (Must match Access Controller)
Set D0 & D1 Output
Step 3) 61 0 #
(Enables D0 & D1 Wiegand Output data format)
Set Output Bit Length
Step 4) 62 (26-66) # (Example of 26 bit: 62 26 #)
PIN Output (5 Digits)
Step 5) 64 4 # (1–5-digit key + # key buffered output)
Set 4/8 Bit Burst Output
Step 6) 64 (0, 2) # (0 = 4 bit burst, 2 = 8 bit burst, conrm
with Access manufacturer)
Alarm Conguration (D.H.O/F.E.)
Door Held Open (D.H.O.)
35 (0-99) # The set time starts once the door is unlocked, then
it will generate the alarm if the door is not closed. Timing is in
minutes. Closing the door resets the alarm.
Door Forced Open (F.E.) 40 (0-99) #
Door opened with no valid PIN or Card immediately triggers
an alarm.
Timing is in minutes. Master Programming Code resets alarm.
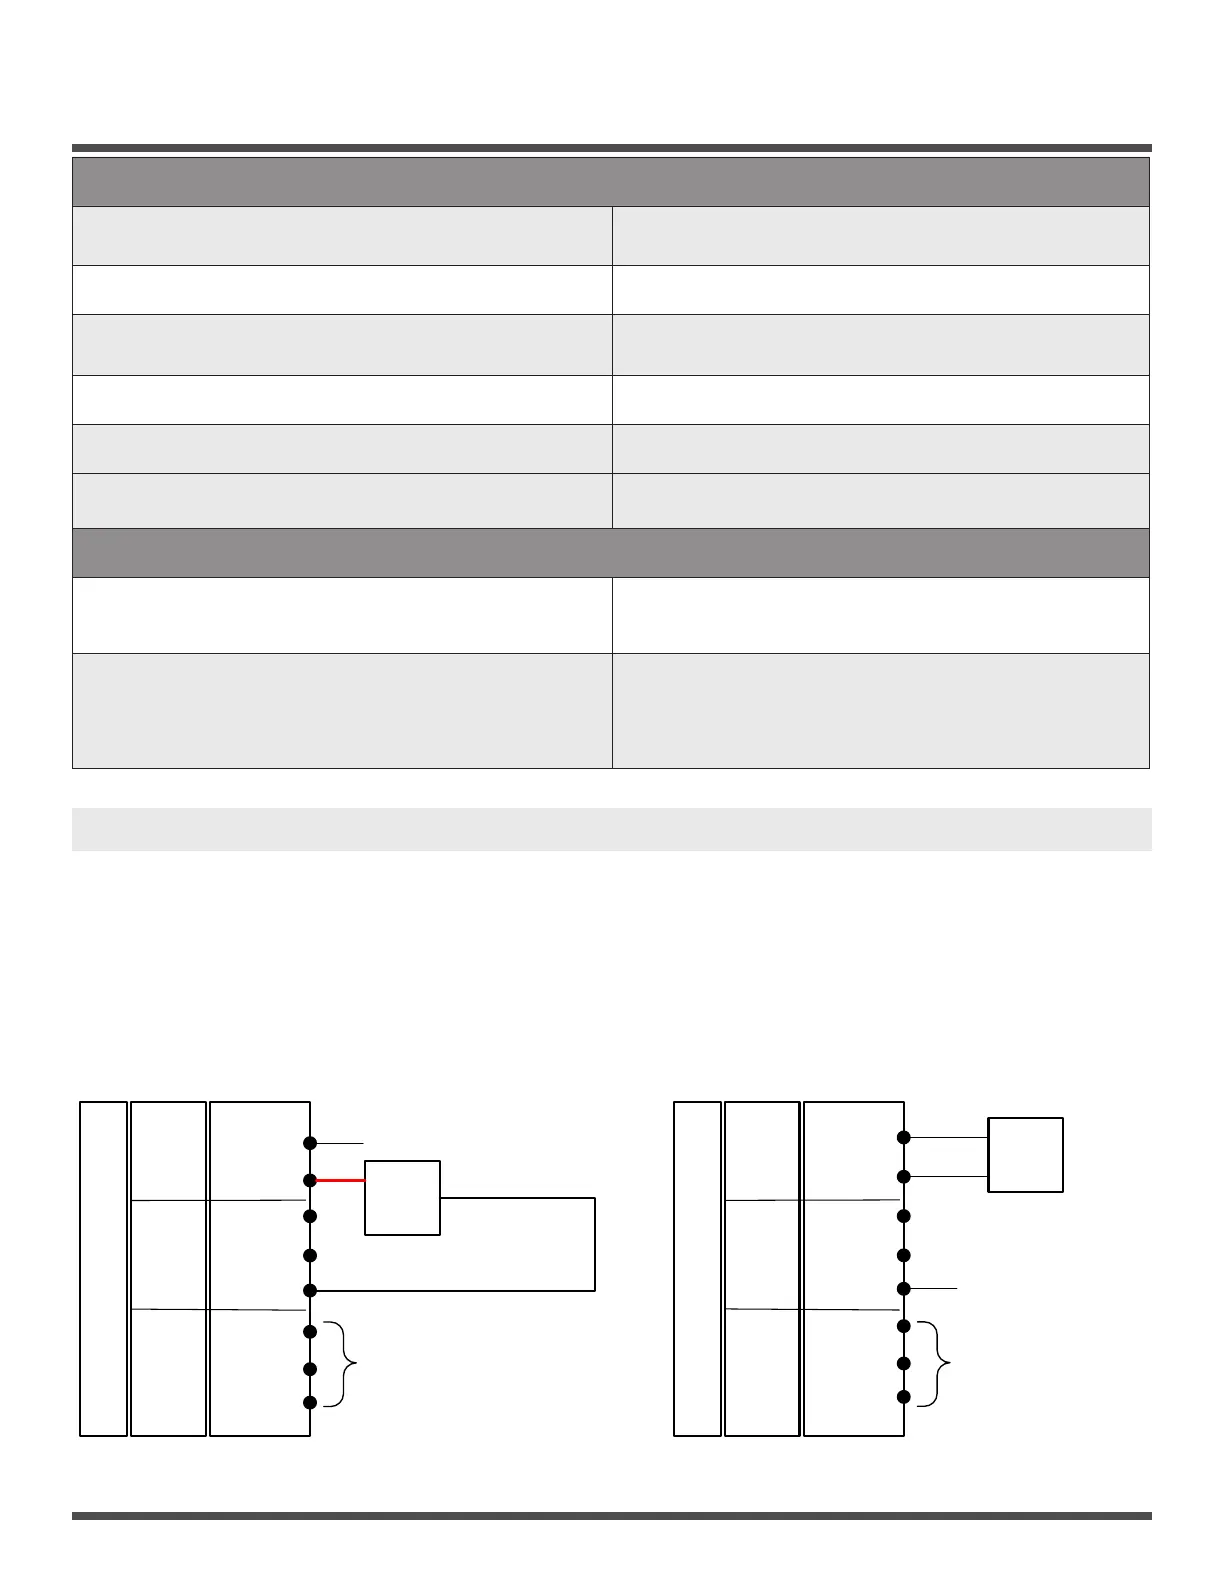
4. WIRING CONNECTIONS FOR DC OR AC POWER
The CV-550SPK V3 keypad can be powered by either DC or AC power within a range of 10V – 28V. When wiring for DC power use
the red wire for positive and the black wire for ground. When wiring for AC power use the red wire (AC1) to one AC wire and light
green wire (AC2) to the other AC wire.
Note: Conrm you are using the light green wire and not the dark green Data 0 wire.
Stand Alone Access Control Keypad
AC2
AC1
D_IN
OPEN
GND
NO
COM
NC
Light Green
RED
BROWN
YELLOW
BLACK
BLUE
PURPLE
ORANGE
Camden Model: CV-550SPK V3
Stand Alone Access Control Keypad
AC2
AC1
D_IN
OPEN
GND
NO
COM
NC
Light Green
RED
BROWN
YELLOW
BLACK
BLUE
PURPLE
ORANGE
Camden Model: CV-550SPK V3
Power
Supply
DC
10-28V
+ve
-ve
Not Used
Relay contacts
To trigger door
strike or
Maglock
Power
Supply
AC
10-28V
Not Used
Relay contacts
To trigger door
strike or
Maglock
Camden Model: CX-TRP-612DC
Camden Model: CX-TRP-4016
Wiring for DC Power (AC1 & gniriW)DNG for AC Power (AC1 & AC2)
Note: Connect corresponding power as shown above to prevent damage to the keypad.
 Loading...