FA00948M4A - 11/2017FA00948M4A - 11/2017
Description
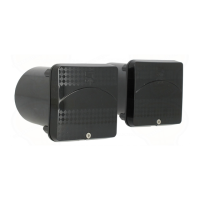
Radio-controlled wireless photocells with control card
RIOCT8WS or RIOCN8WS, complete with buzzer to warn of
fl at batteries or any radio-communication issues.
Main control-card components
①Buzzer
②CH1 and CH2 warning LED
③Programming buttons T1 and T2
Main casing components
④Casing base
⑤Casing cover
⑥Shell-fastening screw
⑦card-fastening screw
⑧ Board
Technical data
Type RIOPH8WS
Power supply (V DC) 3
Stand-by absorption (μA) 80
Current draw in transmission (mA) 15
one CR123A (mAh) lithium battery 1700
* Battery life (months) 24
Radio frequency (MHz) 868.95
** Radio range over clear areas (m) 30 max.
Infrared range (m)
10 max.
Transmission power (dBm) 10 max.
Materials PC-ABS
* The battery duration is calculated on a yearly average of
20 daily-maneuvers.
** Do not place the RIOCN8WS or the RIOCT8WS card
behind walls, metal fences or any other obstructions that
could interfere with radio communications.
Installing
⚠Fit the RIOPH8WS photocells near the RIOCN8WS
or the RIOCT8WS card, so as not to have any metal or
cement obstructions.
- Fasten the RIO-LUX base ④ to the DB-L column (not
supplied), or to the wall.
- Fit the control card ⑧ into the base ④ and fasten with
the supplied screw ⑦.
- Save, the RIOPH8WS transmitter and receivers, on the
RIOCT8WS or THE RIOCN8WS control card (SEE THE
SAVING CHAPTER).

 Loading...