EasyManua.ls Logo

CAMMHD DSJ-W4 - User Manual

Default Icon
16 pages
Print Icon
To Next Page IconTo Next Page
Loading...
CAMMHD
Mini Portable Camera
DSJ-W4 Product Manual
VER1.0
Question and Answer IconNeed help?

Do you have a question about the CAMMHD DSJ-W4 and is the answer not in the manual?

Summary

Prompt Before Use

Camera Charging

Details on charging the camera, including indicators and supported charging methods.

Format Micro TF Card

Instructions for formatting the TF card to FAT32-32KB for camera compatibility.

Suggestions for Use

Function Key Identification

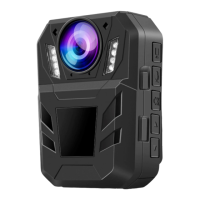
Labels and identification of all physical buttons and ports on the camera.

Micro TF Card Installation

Step-by-step guide for correctly inserting the TF memory card.

Product Usage Guide

Video Recording Operations

How to start, stop, and manage video recording sessions and indicators.

Individual Registration Mode

Guide for using the camera for individual registration recording.

Photography Mode

Instructions on taking still photos with the camera and associated indicators.

Motion Detection Recording

How to activate and utilize the motion detection feature for recording.

Indicator Light Control

Steps to turn the camera's operational indicator lights on or off.

Product Description and Features

Camera Reset Procedure

Method to perform a forced shutdown when the camera freezes.

Magnetic Mounting and Clip

Explains the camera's magnetic absorption and clip functionality for mounting.

Time and Resolution Settings

Safety Precautions

Product Specifications

Overview

This document describes the CAMMHD DSJ-W4 Mini Portable Camera, a device designed for portable video recording, individual registration, photography, and motion detection. It features a built-in lithium battery and supports recording while charging.

Function Description

The DSJ-W4 camera offers several core functions:

  • Video recording: Initiated by a long press of the "Start / Video button" for 2 seconds to power on, followed by a short press to start recording. The blue light flashes slowly during recording. Another short press stops recording, and the blue light remains on. Video files are automatically saved in 5-minute sections.
  • Individual registration: Similar to video recording, a long press of the "Start / Video button" for 2 seconds powers on the device. A short press of the "record button" starts recording, indicated by a slow yellow light flash. Another short press stops recording, and the blue light stays on. Separate recording files are saved in one-hour sections.
  • Photography: To take photos, long press the "Power / Video Key" for 2 seconds to turn on the device, then short press the "Photography" button. The yellow light flashes for 5 seconds to indicate photo completion, and the blue light stays on. Photos are automatically saved, and a short press takes one photo at a time.
  • Motion detection: Activate by pressing and holding the "power / video button" for 2 seconds to turn on, then holding the "photography button" for 3 seconds. The blue light flashes slowly, and the device records for one minute. If an object passes near the camera, it continues to record. If no object passes, recording stops after 5 minutes, and the blue light stays on.
  • Hidden indicator light: While the camera is working, the blinking indicator light can be turned off by pressing and holding the "record button" for 3 seconds. To turn it back on, press and hold for another 3 seconds. This operation does not affect the camera's working state.

Important Technical Specifications

  • Photo format: JPG
  • Recording mode: WAV
  • Video format: AVI
  • Image encoding: M-JPEG
  • Image ratio: 0.672916667
  • Playback software: Compatible with consumer audio and video players on the operating system.
  • Video resolution: 1080P @ 30fps, 720P @ 30fps. The resolution can be set via a configuration file: 0 for 1280 * 720 @ 30fps, 1 for 1920 * 1080 @ 30fps.
  • Support system: Windows XP / 7Nsta / 8/10; Mac OS x10.4 or higher; Linux.
  • Battery type: High capacity lithium polymer battery, 560 mAh.
  • Charging voltage: DC-5V = 500mA.
  • Light source frequency: 50Hz / 60Hz.
  • Interface support: Micro USB 5 pin.
  • Charging time: Approximately 1 hour.
  • Video working time: Approximately 3 hours.
  • Recording working time: Approximately 7 hours.
  • Product size: 32X28X91 (mm).
  • Product weight: Approximately 348g.
  • Storage support: Maximum support for 64GB TF card.

Usage Features

  • Charging: The camera has a built-in lithium battery. Before first use, charge the camera for about an hour. The red light is always on during charging and turns off when fully charged. The device supports recording while charging. It can be charged via a charger or a computer.
  • TF Card Formatting: For first-time use, the micro TF card should be formatted to FAT32-32KB using a card reader on a computer. If the card is less than 64GB, it can be formatted directly on the computer. If it's more than 64GB, third-party software is required to format it as "FAT32-32KB".
  • TF Card Installation: The memory card should be inserted into the card slot with the text facing the back of the product, then pressed in with a finger.
  • Camera Reset: If the camera freezes and cannot be turned off, a forced shutdown can be performed by pressing a needle vertically into the reset hole to activate the reset button.
  • Magnetic Absorption and Clip Function: The product features strong iron absorption, allowing it to be adsorbed and fixed on iron objects. It also has a clip function for versatile attachment.
  • Time and Resolution Settings: To set the time and resolution, insert the camera's TF card into a computer via the data cable. After the computer recognizes the removable disk, open it. Rename the file "Settime" to "settings". Delete its contents and enter Arabic numerals (e.g., "011") to save the text file and exit. Re-register the camera to apply settings. The "Settings" text document will then disappear.
    • The first number (e.g., '0' or '1' in '011') sets video resolution.
    • The second number (e.g., '0' or '1' in '011') controls the loop recording function. '0' disables loop recording (stops when TF card is full), '1' enables it (new recordings overwrite old ones).
    • The third number (e.g., '0' or '1' in '011') controls the recording time watermark. '0' disables it, '1' enables it (displays year/month/day, minute:second).
  • Recording Time Watermark Setting: After the TF card is loaded and the first recording is made, a "settime" text file (e.g., "20180421,1828:08") will be generated in the root directory. To change the time, edit this file (e.g., to "12/24/2020 23:59:59") and save it. After disconnecting the computer and recording again, the watermark will update.

Maintenance Features

  • Battery Low Indication: When the battery is too low, the indicator light flashes quickly, and the device automatically stops recording, saves the file, and turns off.
  • No Card Indication: If there is no TF card when booting up, the blue light will keep blinking.
  • Automatic Shutdown: The machine will automatically turn off after 3 minutes of inactivity (no recording or recording state).
  • Battery Care: The product uses lithium batteries. Avoid direct sunlight for prolonged periods. Do not use in high temperature, high humidity, or dusty environments.
  • Pre-use Charging: If the product has been stored for a long time, charge it before use.
  • No Disassembly: Do not disassemble or repair the machine yourself.

CAMMHD DSJ-W4 Specifications

General IconGeneral
BrandCAMMHD
ModelDSJ-W4
CategoryDigital Camera
LanguageEnglish

Related product manuals