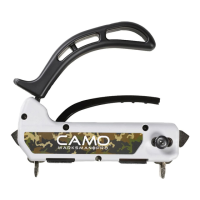
Installation Instructions – CAMO™ Marksman Pro™
With the CAMO HIDDEN DECK FASTENING SYSTEM (CAMO System), you create a beautiful, fastener-free deck surface using
any treated wood, hardwood, cedar, composite or PVC deck board.
The CAMO Marksman Pro is used to guide the CAMO screw into the side of the deck board into the joist. It can be used on any
nominal 1” x 6” and 2” x 6” solid or grooved deck board. No pre-drilling is necessary, and the Marksman Pro provides automatic
3/16” spacing between deck boards.
Before beginning installation of your deck, you will need the following:
– CAMO Hidden Fasteners
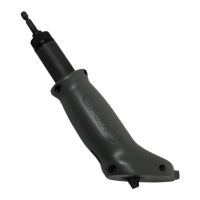
– CAMO Driver Bit (included with CAMO Hidden Fasteners)
– CAMO Marksman Pro Tool
– Drill (set drill speed to highest setting for maximum driving efficiency)
– Optional: “L brackets” or 2-1/2” x #7 Pro-Fit
®
Platinum Series Trimhead Screws (for starter board) 2 ½” x #7 CAMO
trim head deck screws
! ! "
Adjust the CAMO Marksman Pro to fit the boards you are using: Loosen the thumb dial at the
rear of the tool to adjust the CAMO spacer teeth to fit the width of your deck boards. The middle
setting fits most standard nominal 1” x 6”
and 2” x 6” deck boards.
# # $ ! #
To begin deck installation, lay your first deck board (the starter board) in position. If the starter board runs parallel to the house or
other structure, it may be necessary to face fasten the board (see options below). If so, we recommend using 2 ½” Pro-Fit
®
Platinum Series premium trim head screws. 2 ½” x #7 CAMO trim head deck scre
TIP: You can secure the starter board in several ways:
(1) face fasten the first board or board and a half
(2) face fasten only the edge adjacent to the house/structure - to do this, lay out the location for the CAMO fasteners that will
be driven TOWARD the house/structure; with the Marksman Pro tool in place on one end of the starter board, maintain slight
downward pressure on the Tool Handle. Load one CAMO screw into the screw guide. No pre-drilling is necessary. Prestart
the screw about ½ inch into the board; squeeze the Trigger Handle to remove the Marksman Pro; continue the length of the
board; position the deck board with the pre-started screws on the outside edge; with the board snug to the house/structure,
finish driving the CAMO screws. Finish the board by face fastening the inside edge of the board
(3) avoid face fastening by using “L brackets” to fasten the starter board from below the deck to the joists.