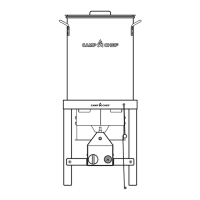
The Camp Chef SHP30TF is a 30-quart turkey fryer designed for outdoor cooking. It operates on LP (propane) gas and includes a stand, cooking pot, strainer, thermometer, and a regulator/valve assembly.
Function Description:
The SHP30TF is primarily used for deep-frying turkeys and other foods outdoors. It features a burner that heats a cooking pot filled with oil or other liquids. The appliance includes a safety timer that automatically shuts off gas to the burner after 15 minutes, requiring manual reset for longer cooking times. It also has an igniter button for easy lighting and a safety button that must be held down during ignition and for 10 seconds after the burner lights to heat the thermocouple. The unit is designed for use with a 20 lb (9.07 kg) LP gas cylinder.
Important Technical Specifications:
- Capacity: 30 quarts (cooking pot).
- Maximum Cooking Vessel Diameter: 12 inches (305 mm).
- Fuel Type: LP (propane) gas only.
- LP Tank Requirements: Approximately 12 in (31.1 cm) diameter x 18.25 in (46 cm) tall, 20 lb (9.07 kg) LPG capacity or 47.6 lb (21.6 kg) water capacity. Must be constructed and marked in accordance with U.S. Department of Transportation (DOT) or Canadian Standard CAN/CSA-B339. LP tank valve must have a Type 1 outlet, safety relief valve, and a UL listed Overfill Protection Device (OPD) with a unique triangular hand wheel.
- Operating Temperature Range: Minimum 32°F (0°C).
- Oil Temperature Range: 325°F - 350°F (160°C - 175°C) for cooking. Oil should not exceed 400°F (200°C).
- Clearances: Minimum 10 ft (3 m) from any structure, combustible material, or other gas cylinder. Minimum 25 ft (7.5 m) from any flammable liquid. Minimum 24 inches (61 cm) between the LP tank and the appliance.
- Timer: Automatic shut-off after 15 minutes.
- Thermometer: 12-inch oil thermometer, must register approximately 212°F ± 20°F (100°C ± 10°C) in boiling water for proper function.
- Maximum Turkey Weight: 18 lbs (8 kg) to prevent oil overflow.
Usage Features:
- Outdoor Use Only: This appliance is strictly for outdoor use and should not be operated in buildings, garages, enclosed areas, recreational vehicles, or boats.
- Unattended Operation: Never operate the appliance unattended. The user must remain in the immediate area and have a clear view of the product during operation.
- Surface Requirements: Use only on a level, stable, non-combustible surface such as bricks, concrete, or dirt. Avoid surfaces that can burn or melt (wood, asphalt, vinyl, plastic).
- Fuel Supply: Keep the fuel supply hose away from heated surfaces. Always check for leaks before use by applying a soapy solution to joints and connections.
- Oil/Grease Handling:
- Never mix oil and water. Ensure the cooking pot is completely dry before adding liquids.
- Do not fill the cooking pot above the maximum fill line or below the minimum oil fill line.
- Never allow oil or grease to get hotter than 400°F (200°C). If oil smokes, immediately turn off the burner and gas supply.
- All food products must be completely thawed and towel-dried before being immersed in hot oil.
- Lower food slowly into hot cooking liquid to prevent splashing or overflow.
- Use insulated oven mitts or gloves for protection from hot surfaces and splatter.
- Do not use the lid when cooking turkeys.
- Only use the provided hook for lowering and removing food from the pot.
- Lighting Instructions:
- Remove all appliances and pots from the burner to ensure free airflow.
- Turn control valve(s) to OFF.
- Turn the timer knob clockwise until it stops.
- Slowly open the LP bottle valve.
- Hold down the safety button and the ignition button while rotating the regulator control knob until the burner lights.
- If ignition doesn't occur in 5 seconds, turn controls off, wait 5 minutes, and repeat.
- Continue to hold the safety button for 10 seconds after lighting to heat the thermocouple.
- For match lighting, light a long match and place it over the burner, then slowly rotate the regulator control knob.
- Shutting Off: Turn the regulator control knob counterclockwise to OFF, then turn the LP tank valve clockwise to a full stop.
- Safety Features:
- The timer prevents uncontrolled fires by shutting off gas after 15 minutes.
- The appliance is equipped with a regulator/valve assembly that must be used as supplied.
- The heat shield must always be in place during use.
- In case of fire, do NOT attempt to extinguish with water. Use a Type BC dry chemical fire extinguisher, dirt, sand, or baking soda. Call the fire department.
- Do not move the appliance when in use; allow it to cool to 115°F (45°C) before moving or storing.
- LP Tank Handling:
- Always close all control valves and the LP tank valve before disconnecting.
- Install a safety cap on the cylinder valve outlet when the LP tank is not in use or disconnected.
- Do not store LP tanks in enclosed spaces or inside vehicles.
- Never store a spare LP tank under or near the appliance.
- Never fill the cylinder beyond 80% full.
- LP tanks must be stored outdoors, out of reach of children.
- Ensure LP tanks are in the correct operating position as specified in assembly instructions.
Maintenance Features:
- Cleaning:
- All cleaning and maintenance should be done when the appliance is cool and the fuel supply is turned off.
- Do not clean any part in a self-cleaning oven.
- Burner: Wire brush loose corrosion from the exterior. Clean clogged gas port holes with a paper clip. Inspect and clean the burner tube often (once or twice a month) to prevent spider webs and nests that can obstruct gas flow.
- Cooking Surfaces, Pots, and Pans: Clean with soapy water and a nylon cleaning pad.
- Black Soot: Scrub off with steel wool. Do NOT spray oven cleaner on aluminum pots.
- Stuck Food: Soak in hot water, then scrub with a nylon pad.
- Hard Water Stains: Fill the pot to the darkened area with a mixture of water, cream of tartar, and vinegar (1 qt water, 2 Tbsp cream of tartar, 1/2 cup vinegar), then boil for 10 minutes.
- After the appliance cools, wipe areas where paint and finish have burned off to minimize rusting.
- Confirm all components are completely dry after cleaning and before storing.
- Hose Check: Before each use, check for cuts or wear. Replace damaged hose assemblies.
- Hardware: Tighten all hardware on a regular basis (1-2 times a year or more depending on usage).
- Thermometer Check: Check thermometer function before each use by inserting it into boiling water. If it doesn't function properly, obtain a replacement specified by the manufacturer.