14 15
Leak Testing
Extinguish all open flames before connecting the
gas supply to the appliance and before checking
for leaks.
1. Turn all control knob(s) to OFF.
2. Be sure regulator is tightly connected to
LP tank.
3. Slowly open LP tank valve by turning hand
wheel counter clockwise. If you hear a rushing
sound, turn gas off immediately. There is a
major leak at the connection. Correct the leak
before proceeding.
4. Brush 50/50 soap and water solution onto
indicated connections shown.
5. If “growing” bubbles appear, there is a leak.
Close LP tank valve immediately and retighten
connections. If leaks cannot be stopped, do
not try to repair. Call for replacement parts.
Order new parts by giving the serial number,
model number and name of items needed to
the Service Center at 1-435-752-3922.
6. Always close LP tank valve after performing
tank leak test or when appliance in not in use
by turning hand wheel clockwise.
Do not use appliance until leak checked.
If you cannot stop a gas leak, immediately
close LP tank valve and call LP gas supplier or
your fire department!
LP Tank Leak Test
Appliance must be leak checked outdoors in well
ventilated area, away from ignition sources such
as gas fired or electrical appliances. During leak
test, keep appliance away from open flames or
sparks.
• Leak test must be repeated each time LP tank
is exchanged or refilled.
• Do not smoke during leak test.
• Do not use an open flame to check for gas leaks.
Use a clean paintbrush and 50/50 soap and water
solution. Use mild soap and water. Do not use
household cleaning agents. Damage to gas train
components can result. Brush soapy solution onto
all weld seams and entire valve area.
If “growing” bubbles appear, do not use or
move the LP tank. Contact an LP gas supplier or
your fire department.
Hose Check
Before each use, clean and inspect the hose
before each use of the appliance. If there is
evidence of abrasion, wear, cuts or leaks, the
hose must be replaced prior to the appliance
being put into operation. Use only valve/hose/
regulator specified by manufacturer.
To prevent accidental fires, before using the
appliance ensure that the hose is not damaged
and all joints and connections are not leaking by
turning on the cylinder valve, leave the burner
valve closed, and apply a soapy solution to the
joints and connections. If a continuous hissing
sound is heard, or if the soapy solution bubbles,
there is a leak. Do not use the appliance if there is
a leak. Replace the faulty parts.
Keep the fuel supply hose away from any
heated surfaces.
USING YOUR GRIDDLE
LIGHTING INSTRUCTIONS
Follow these instructions exactly:
Opening the LP Valve
1. Check that all burner control knobs and the
cylinder valve are turned to the “OFF” position.
2. Turn on the fuel supply by rotating the cylinder
valve knob counter-clockwise to full open.
DO NOT stand with head, body, or arms over
the grill when lighting.
Lighting the Burners
1. Make sure all control knobs are in the
“OFF” position.
2. Select the burner to be lit. Push and turn
the control knob of that burner to the
“HIGH” position.
3. If ignition does NOT occur in 5 seconds, turn
control knob to “OFF”, wait 5 minutes to allow
gas to dissipate and repeat lighting procedure.
4. Repeat steps 2–3 for lighting each burner. If
burner does not ignite, wait 5 minutes, see
“Match Lighting the Burners” section.
5. To turn off, turn each control knob clockwise
until it locks in the “OFF” position. This does
not turn off the gas flow from the cylinder.
Note: If burner does not light or flame is too low,
you may have spider or other insect blockage in
burner. See “Burner Assembly/Maintenance”
under Care and Maintenance.
The regulator may make a humming or whistling
noise during operation. This will not affect the
safety or use of the appliance.
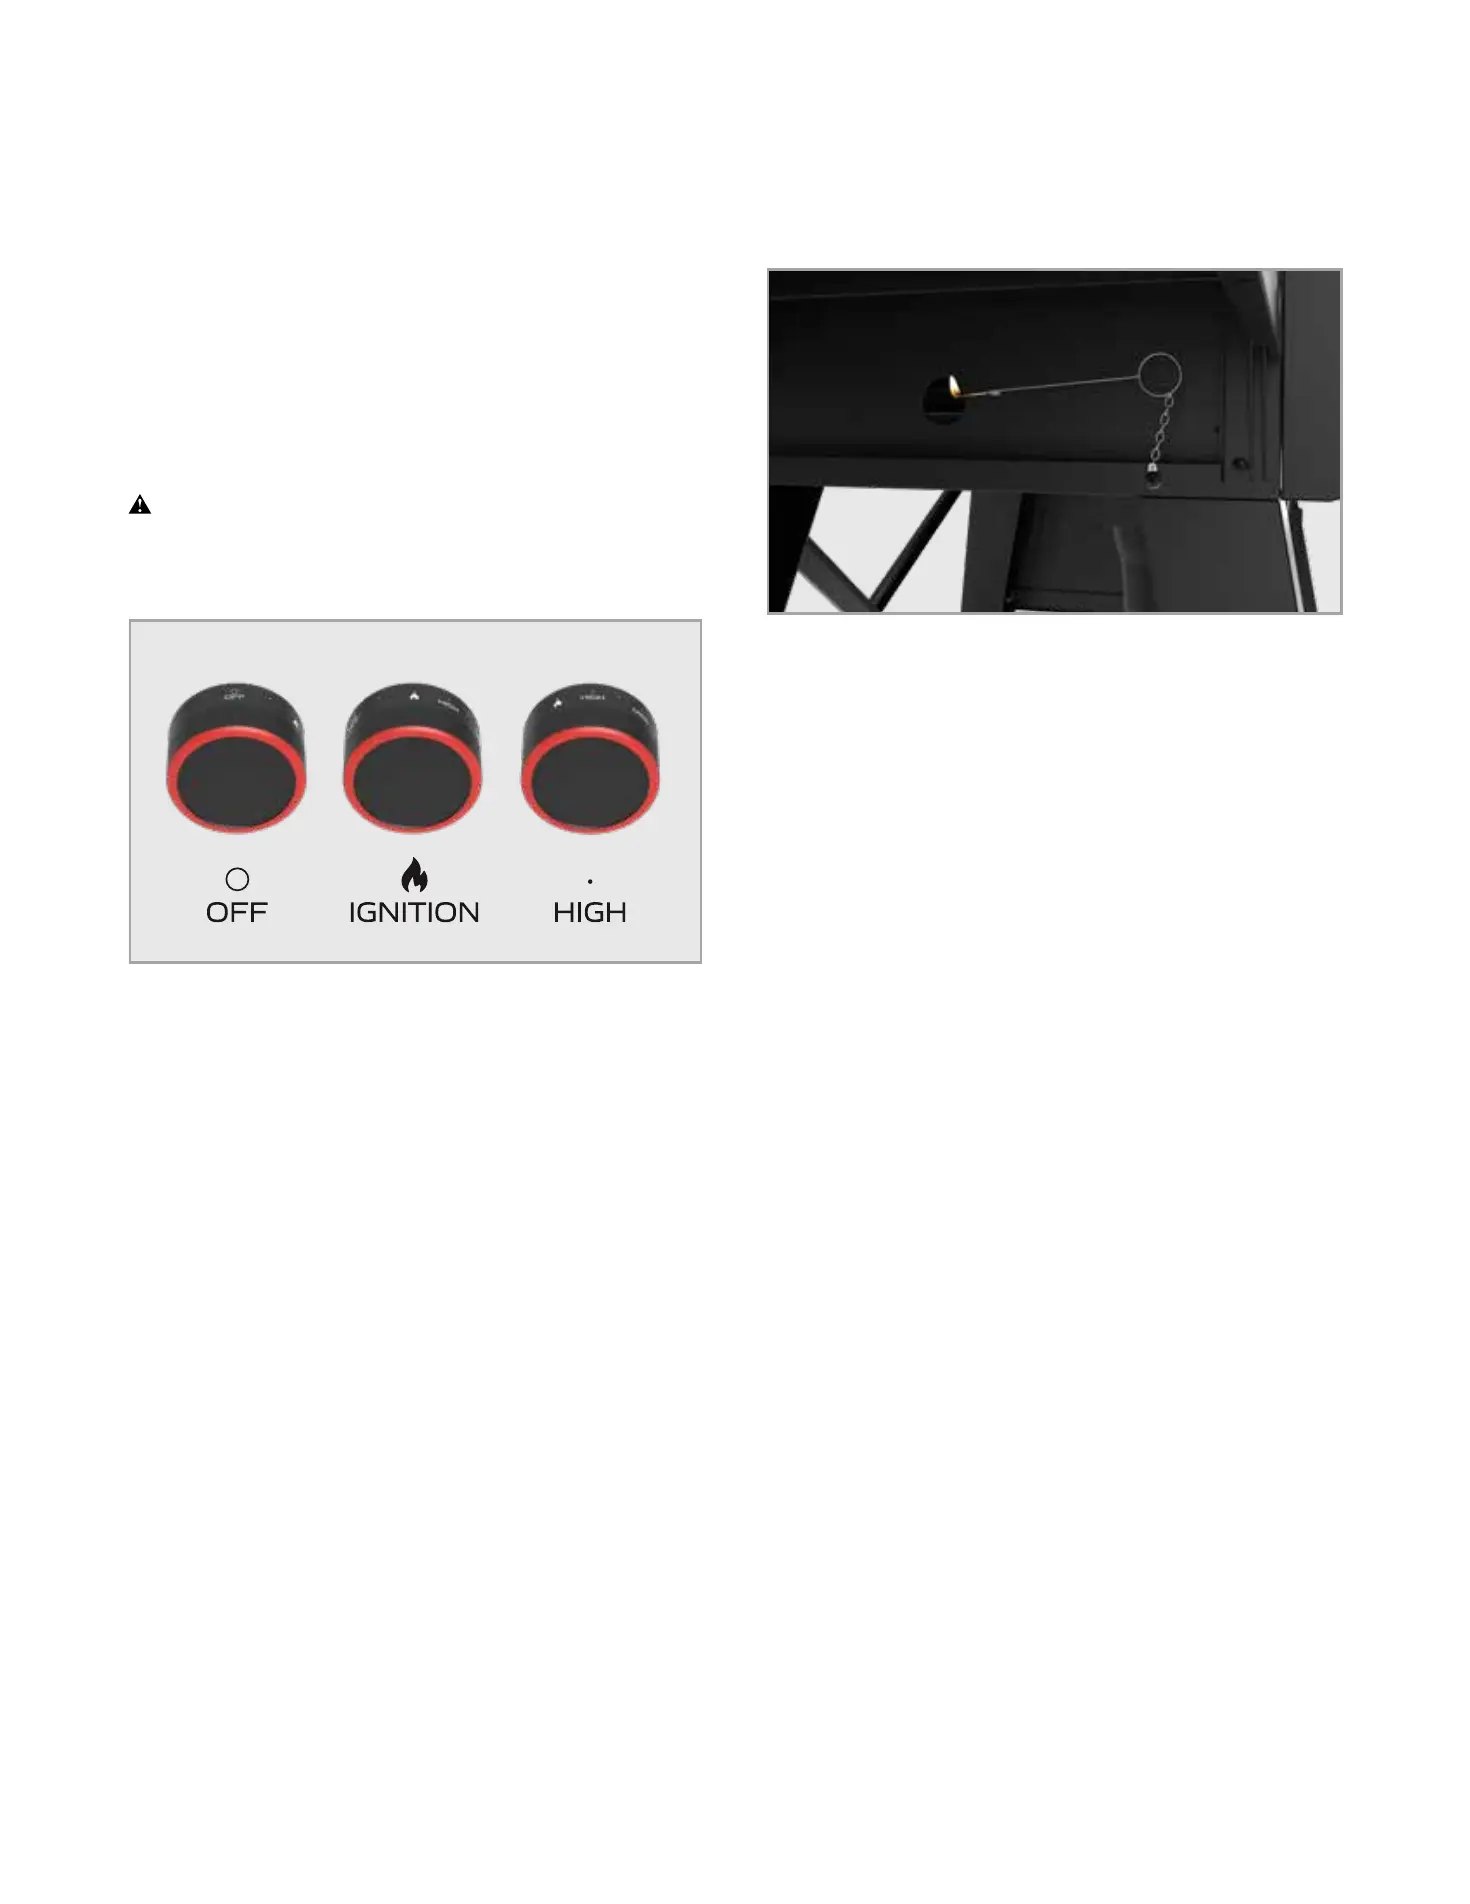
Match Lighting the Burners
1. Turn the burner control knobs to “OFF”.
2. Place a paper match in the end of the match
holder. Strike the match and place through
lighting hole in the left hand side of the grill to
approximately 1/2” (1 to 2 cm) from the burner.
3. Turn on the FAR LEFT burner control knob to
the “HIGH” position. The burner should light
within 5 seconds.
4. If the burner does not light, turn the control
knob to “OFF” and wait 5 minutes for gas to
dissipate and repeat lighting procedure.
5. Once lit, light adjacent burners in sequence by
pressing in and rotating the control knob to
the “HIGH” position.
6. If the burner does not light within the first
few attempts of match lighting, there is a
problem with the gas supply. Turn off the gas
at the burner and cylinder. DO NOT attempt to
operate the grill until the problem is found and
corrected. See “Trouble Shooting” section of
this manual.
 Loading...