3. Make sure buttons are fully engaged as shown
in Fig. 5.
ASSEMBLY INSTRUCTIONS
Remove all loose parts from the inside of the grill
and hopper. Lay a blanket or piece of cardboard
down to protect the grill.
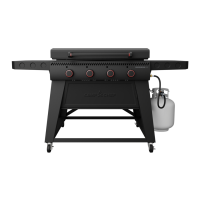
INSTALL HANDLE
1. Install the handle as shown in Fig 6.
2. Tighten all hardware.
FIG. 6
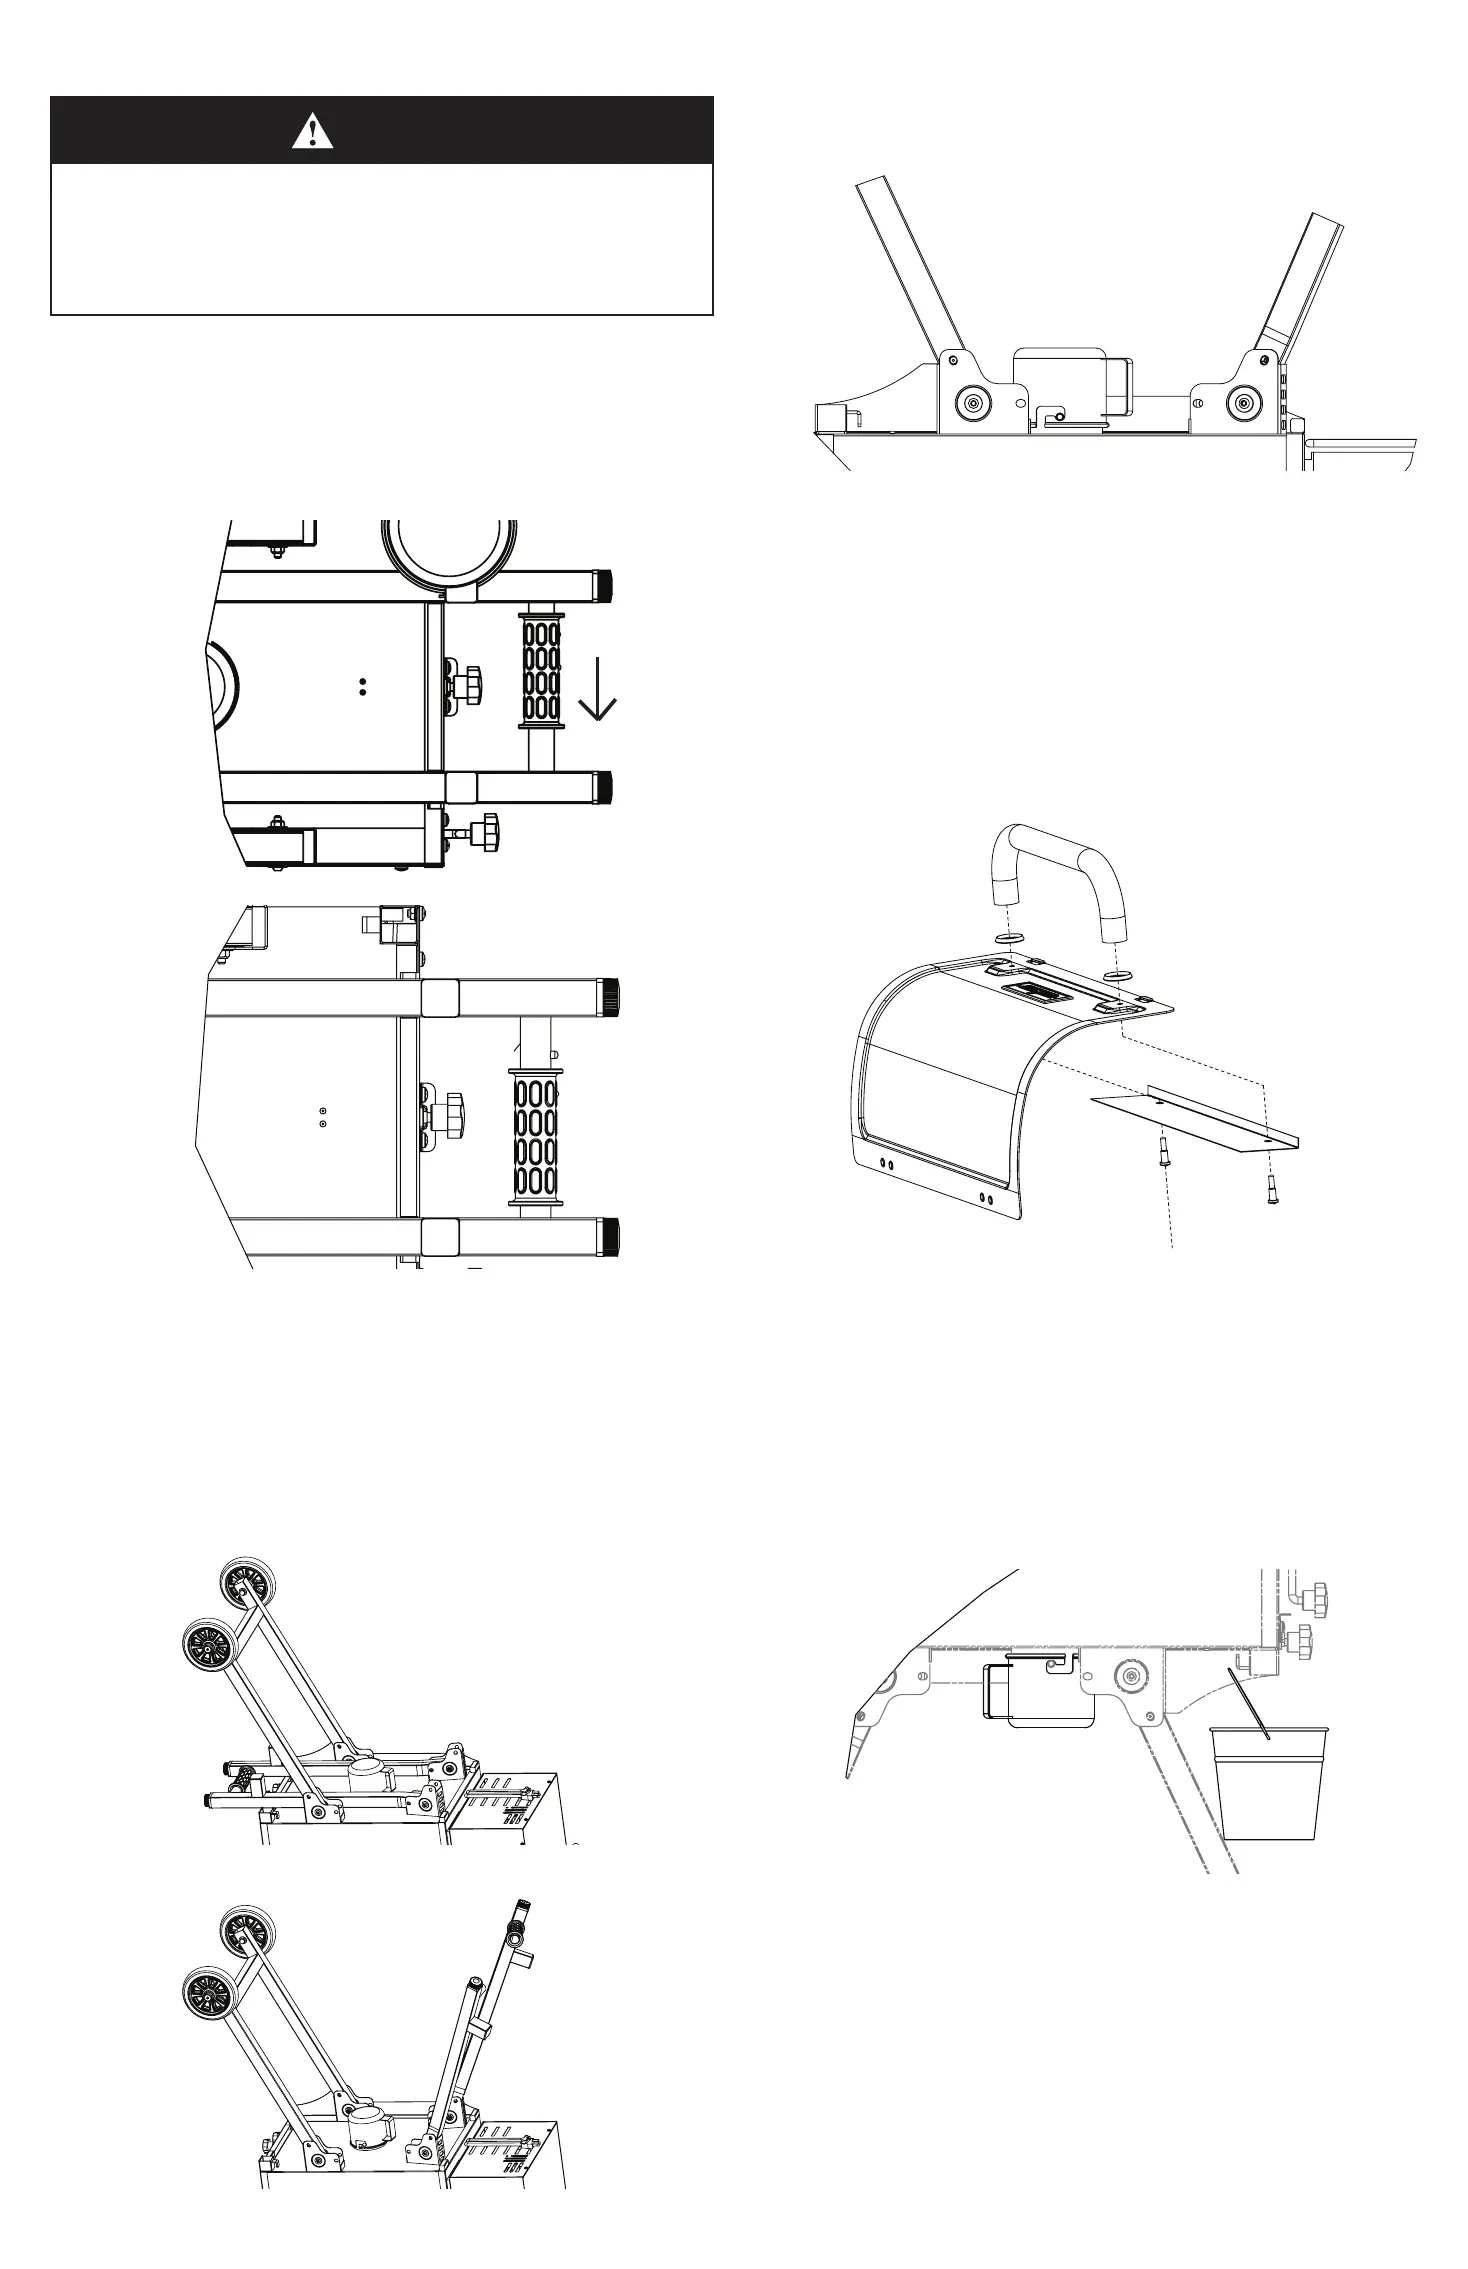
GREASE BUCKET
1. Hang grease bucket from tube as shown in Fig 7.
ASH CUP
1. Install Ash Cup as shown in Fig 7. Never use
grill without Ash Cup in place.
FIG. 7
INSTALL DRIP TRAY
1. Install the Drip Tray as shown in Fig 8 and Fig 9.
DANGER
Do not work on this grill if it is plugged in.
Electric shock may occur resulting in death or
serious injury.
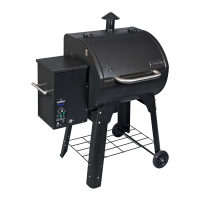
HOW TO EXTEND AND FOLD LEGS
1. Place grill upside down on the ground. Press in
the push button and slide the pull handle to one
side to unfold the legs as shown in Fig 1 and 2.
2. Press push buttons in and unfold legs starting
with the straight leg with wheels. Make sure all
push buttons lock into place as shown in Fig. 3
and 4. Stand grill upright on solid level ground.
FIG. 4
FIG.8
FIG. 9
WARMING RACK AND COOKING GRATE
1. Install the cooking grate as shown in Fig 10.
FIG.10
CLEAN-OUT PORT KNOB
1. Clean-out Port knob must be pushed in when
grill is on. Make sure pullout lock is pushed
down and locks the knob to prevent inadvertent
opening of the clean-out port. See Fig 11.
2. Lift pullout lock and pull clean-out port knob to
empty ash into ash cup. See Fig 12.
3. See instructions for burner clean-out.
FIG. 11
FIG. 12
Black
BURNER CLEAN-OUT
Before each use the burner should be cleaned out
by lifting the pullout lock and pulling the clean-out
port knob on the right side of the grill to open the
burner clean-out. This will allow the ash from
previous use to fall into the cup under the grill.
The cup should be removed and emptied and then
reinstalled before each use.
DANGER
Never Operate the Pellet grill without the ash
cup in place.
Make sure the burner clean-out port is closed
and locked before starting the grill.
Never open the burner clean-out port when the
grill is hot.
After cleaning out the burner make sure to close
the burner clean-out by pushing the clean-out port
knob in on the left side of the grill. Make sure to
lift the pullout lock and push the clean-out port
knob all the way in and lock in place with the
pullout lock. Every 50 hours of use, remove the grill
grates, grease tray, and heat deflector and clean
the inside of the grill. If you notice a lot of ash
blowing around in the grill it is time to vacuum it
out.
FILLING THE AUGER TUBE
CAUTION: ONLY USE THE FEED SETTING WHEN
HOPPER HAS RUN OUT OF PELLETS. FEED SETTING
IS NOT FOR NORMAL USE.
The first time you use your grill or any time the
hopper has ran out of pellets you will need to fill
the auger tube. This simply means you must fill
the auger tube with pellets until pellets reach the
burner. This is done by turning the dial to the FEED
position and then holding in the bypass button
for 3 seconds. This will turn the auger on and the
digital readout will display “FEED”. The auger
will remain on for no more than 5 minutes. This is
ample time for the pellets to reach the burner. It
 Loading...