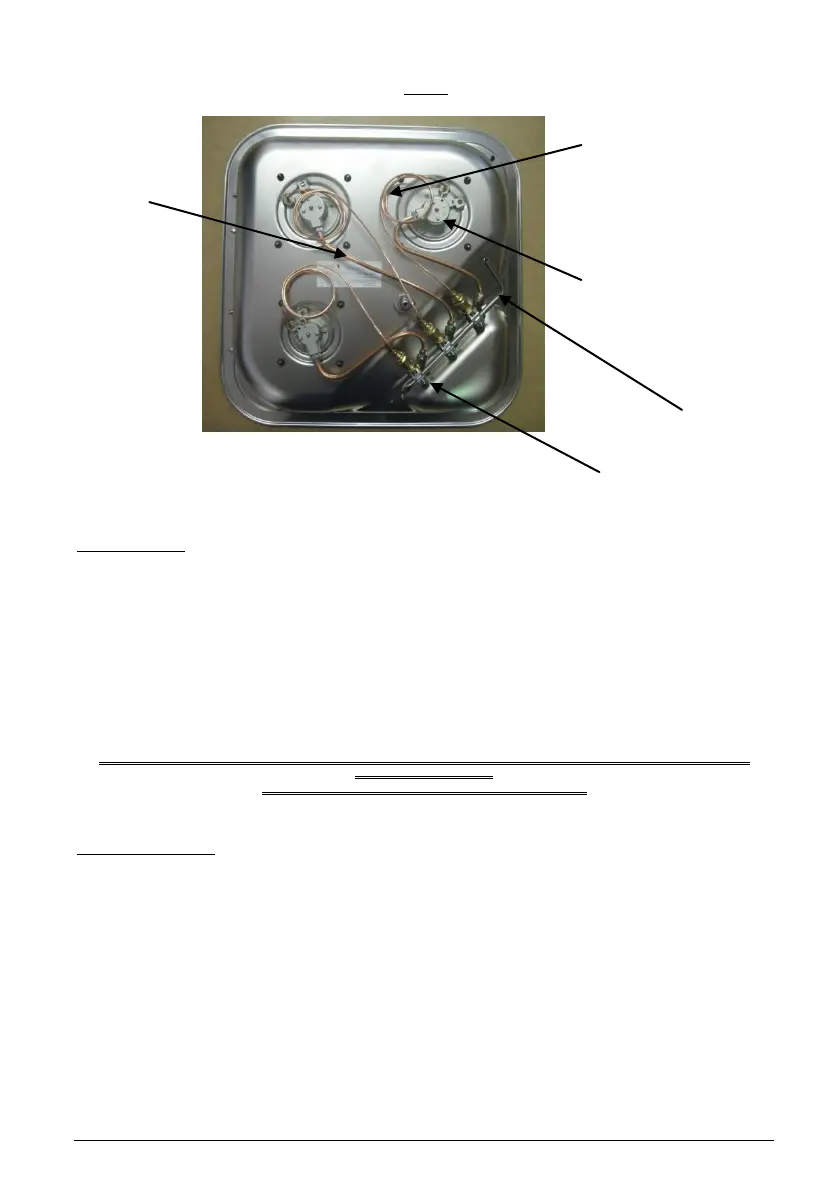
Figure 4
Proceed with reassembly.
Greasing the valves: if the rotation of the knob becomes difficult, it is necessary to grease the valve to prevent damage. Proceed
as follows:
- dismantle the valve from the gas ramp and the internal tubes;
- dismantle the body of the valve;
- remove the conical male element, cleaning it with thinner;
- lightly re-grease the cone using appropriate grease;
- introduce the cone into its seat, manoeuvring it to expel any excess grease. Remove the excess grease with a cloth;
- remove the cone again to ensure that the grease has not blocked the internal gas passages;
- refit the valve.
AFTER COMPLETING EACH REASSEMBLY, ALWAYS CHECK THAT THE SEAL CONFORMS TO THE INSTALLATION
STANDARDS IN FORCE.
THE USE OF A NAKED FLAME IS STRICTLY FORBIDDEN.
TECHNICAL FEATURES
Installation class: 3
Fastening method:
M.S. SUPER silicone
Appliance category: *
Gas (group) and supply pressure: *
Total burner power (Q
n
): *
* see the plate on the first page, in accordance with the country of destination
The following tables show the technical data for each burner, in relation to the appliance categories.
thermocouple
Copper ramp
Injector cup
Stainless steel ramp
valve
 Loading...