EasyManua.ls Logo

Canaan AvalonMiner1246 - User Manual

Canaan AvalonMiner1246
27 pages
Print Icon
To Next Page IconTo Next Page
Loading...
AvalonMiner1246 User Manual
Overview
Thank you for purchasing our products. To ensure that you can fully
understand and install this product, please read the manual carefully.
Please keep it for future reference.
Safety regulation
Warning: in order to prevent equipment damage, falling, electric shock,
fire and other accidents that threaten personal safety, please install and
use in strict accordance with the instructions. Do not transform the
equipment or replace the parts by yourself.
Do not use power supply beyond rated voltage range.
Do not place equipment in unstable places.
When checking and repairing the equipment, please entrust
professional personnel to operate.
When the equipment is abnormal, cut off the power supply quickly and
contact the after-sales department.
Hardware connection
1. Network port connection;2 is the fan connection. Connect the 4 Pin fan
extension cable, as shown in the figure:
Question and Answer IconNeed help?

Do you have a question about the Canaan AvalonMiner1246 and is the answer not in the manual?

Summary

Overview and Safety

Product Introduction

Thank you message and advice to read the manual carefully.

General Safety Warnings

Warning to prevent damage, electric shock, fire, and personal injury by following instructions.

Hardware Connections

Network Port and Fan Connection (1, 2)

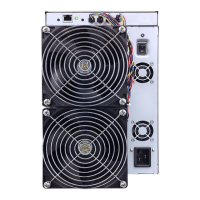
Identifies network port (1) and fan connection (2) as shown in the figure.

Fan, Power Supply, and Hash Board Connections (3, 4, 5)

Details fan (3), power supply (4), and hash board (5) connections with extension cables.

Buttons and Indicator LEDs

Button Functions

Describes the functions of the RESET and FUNC buttons for system operation.

Indicator LED Status Meanings

Explains the meaning of different LED colors (red, yellow, green) during operation.

Miner Work Modes

Normal Mode Operation

Describes the standard operating mode, supporting DHCP or static IP.

Configuration Mode Access

Details how to enter configuration mode and its static IP settings.

System Configuration and Login

System Settings and Web Access

Explains accessing the device's web service for system configuration.

User Login Credentials

Provides default username and password for accessing the device.

Network and Pool Settings

Network Configuration Options

Guides on configuring network settings, including DHCP and static IP options.

Pool Settings and Work Mode Selection

Details factory default pool settings and selection of work modes like normal or high performance.

System Management Functions

Changing User Password

Instructions on how to set a new administrator password for the device.

Firmware Upgrade Procedure

Explains how to upgrade the device's firmware using .AUP files or FMS software.

Factory Reset Procedure

Details the steps to restore the device to its factory default settings.

Device Guarantee and Warranty

Warranty Terms and Conditions

Outlines the product's 180-day warranty and conditions that void it.

Troubleshooting Common Malfunctions

Boot Failure Diagnosis

Covers failure phenomena, possible causes, and inspection/repair methods for boot issues.

Mining Operation Issues and Solutions

Discusses problems like inability to mine, no hashrate, and provides troubleshooting steps.

Log Analysis and Monitoring

Interpreting Miner Log Parameters

Explains key parameters like NETFAIL, SYSTEMSTATU, TAvg, Vo, and PS status.

Advanced Configuration Details

Pool Configuration Interface

Shows how to configure pool addresses, workers, and passwords in the mining machine interface.

Network Configuration Interface

Explains DHCP mode and static IP configuration, including DNS settings for network access.

Miner Assembly and Installation

Component Integration

Details assembling hash boards, power supply, MM board, and rear panel into the chassis.

Final Wiring and Casing

Covers connecting fan lines, securing the upper shell, and completing the miner assembly.

Firmware and Reset Procedures

Factory Reset Methods

Provides two methods for restoring the miner to its factory default settings.

Firmware Version Checking

Explains how to check the firmware version via the background interface or FMS.

FMS Batch Firmware Upgrade

Details the procedure for performing batch firmware upgrades using FMS software.

Log Parameter Details

System and Network Log Fields

Describes parameters like Elapsed, Ver, DNA, NETFAIL, SYSTEMSTATU, DH, Temp, TMax relating to system and network status.

Hardware and Power Log Fields

Details parameters such as TAvg, Fan speeds, Voltage (Vo), Power Supply (PS), and chip frequency distribution (PLLO, PLL1).

Hashrate and Chip Status Fields

Explains hashrate metrics (GHSmm, GHSavg), frequency (WU, Freq), LED status, and chip-specific data (MGHS, MTmax, MTavg, TA, SFO, SF1, PVT).

LED Status Indicators

Normal Startup LED Sequence

Describes the sequence of LED flashes during a normal startup condition.

LED Status Meanings

Explains the meaning of different LED statuses like Off, Red, Yellow, and Green lights.

Overview

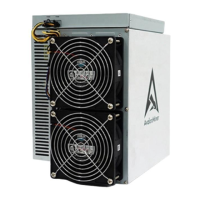
This document outlines the features, usage, and maintenance of the AvalonMiner1246.

Function Description

The AvalonMiner1246 is a cryptocurrency mining device designed for efficient operation. It supports two primary working modes: "normal mode" and "configuration mode." In normal mode, the device operates using either DHCP (dynamic acquisition) or static IP for network connectivity, with DHCP being the factory default. Configuration mode, accessible during startup, allows users to set a static IP address (defaulting to 192.168.168.168 with subnet mask 255.255.255.0) and configure network, mining pool, and password settings via a built-in web interface.

The device features a control board with various connection points for essential components. It connects to a network via a dedicated port and uses 4-pin fan extension cables for fan connections. Power is supplied to the control board via a 6-pin cable. Hash boards are connected to the control board using 2x 7-pin cables.

The control board includes several buttons and indicator LEDs for user interaction and status monitoring. The "RESET" button performs a system reset without affecting network settings. The "FUNC" button offers multiple functionalities, including restoring factory configurations, entering configuration mode, and switching the LED light status during operation.

Important Technical Specifications

  • Network Connectivity: Supports DHCP and static IP. Default static IP in configuration mode: 192.168.168.168, subnet mask: 255.255.255.0.
  • Fan Connections: Uses 4-pin fan extension cables.
  • Power Supply Connection: 6-pin cable to the control board.
  • Hash Board Connection: 2x 7-pin cables to the control board.
  • Default User Credentials: Username: root, Password: root.
  • Firmware File Format: *.AUP.
  • Warranty: 180 days from the date of customer receipt.

Usage Features

Hardware Connection:

  1. Connect the network cable to the network port (1).
  2. Connect the 4-pin fan extension cable to the fan connection (2).
  3. Connect the 4-pin fan extension cable to the fan connection (3).
  4. Connect the 6-pin power supply cable to the control board (4).
  5. Connect the hash board to the control board using 2x 7-pin cables (5).

Button and Indication LED:

  • RESET Button: Resets the system without affecting network settings.
  • FUNC Button:
    • Restores factory configuration.
    • Enters configuration mode.
    • Switches LED light status during operation.

Indication LED Status:

  • Red Flash (after power on): Device initialization.
  • Yellow (approx. 3 seconds after start): Device is starting. Press FUNC key during this period to enter configuration mode.
  • Green (normal mining): Normal operation.
  • Yellow (system preparation): System is preparing.
  • Red (system overheated): Overheating warning.
  • Alternating Yellow/Green (during system operation): Flashes via FMS software or manual FUNC key press. Press again to restore original color.
  • Red Flash (after pressing FUNC for 5 seconds on power-on): Indicates factory settings restore. Requires RESET or power cycle to restart.

Work Mode:

  • Normal Mode: Default mode, uses DHCP or static IP.
  • Configuration Mode:
    • Enter by pressing the FUNC button during the second red LED flash (approx. 3 seconds) at miner startup.
    • IP address is static: 192.168.168.168, subnet mask: 255.255.255.0.
    • Access web interface via PC browser to configure network, mining pool, and password.
    • To access, set PC static IP to 192.168.168.100 (or any non-conflicting address in the same network segment) with subnet mask 255.255.255.0. Connect PC directly or via the same switch/router.

System Setting:

  • Access the device's built-in web service through a browser.
  • Login with default username root and password root to view the Overview page.

Network Setting:

  • Click "Network" in the console to set DHCP or static IP.
  • A restart is required after saving network settings (via reboot button or power cycle).

Pool Setting:

  • Configure mining pool settings (address, worker, password).
  • Select "Normal mode" (normal/low power consumption) or "High performance" (high power consumption). High performance requires a power supply with higher output.
  • A restart is required after saving pool configurations.

User Password:

  • Change the default password (root) via the "administrator" option in the console.

Firmware Upgrade:

  • Firmware files are in *.AUP format, available from the official website or customer service.
  • Upgrades can also be performed using FMS software.
  • In FMS, select the miner and click "upgrade." Choose the .AUP file and click "open."
  • Successful upgrades will be confirmed; failed upgrades will list affected IP addresses. Failed miners can be restarted via the "Restart" button in FMS and re-upgraded.

Restore to Factory Setting:

  • Method 1: With the miner powered off, press and hold the FUNC key, then power on. Keep FUNC pressed until the red LED flashes.
  • Method 2: With the miner powered on, press and hold the FUNC key. While holding FUNC, press and release the RESET button. Keep FUNC pressed until the red LED flashes.
  • After restoring, the system will clear saved configurations (network, mine pool, password). The white indicator light will flash frequently, confirming success. Release FUNC, then press RESET or power cycle to restart with default settings.

Miner Simple Makeup (Assembly Instructions):

  1. Assemble hash boards, case shell, and rear panel.
  2. Place the chassis vertically. Push the three hash boards onto the guide rail, ensuring correct component direction.
  3. Assemble the hash boards in place.
  4. Assemble the rear panel to the chassis, paying attention to direction.
  5. Align the power supply with its opening and the hook on the power support. Press it level and push horizontally until it clicks into place.
  6. Assemble the MM board, paying attention to the locating pin.
  7. Place the conductive aluminum bar (positive pole). Assemble the set screw first (do not tighten), then other screws, and finally tighten the set screw.
  8. Connect the fan extension cable to the MM board, following the connection sequence.
  9. Place the conductive aluminum bar (negative pole). Assemble the set screw first (do not tighten), then other screws, and finally tighten the set screw.
  10. Connect the voltage regulating line and the temperature sensing line plug to the MM board.
  11. Hash (refer to assembly diagram).
  12. Place the upper shell and fix it with flat head screws.
  13. Assemble the fan line in sequence.

Maintenance Features

Device Guarantee:

  • 180-day warranty from receipt.
  • Warranty is voided by:
    • Physical damage from self-dismantling or other reasons (fracture, fragmentation, missing corner/components).
    • Damage from lightning strike, voltage surge.
    • Burn marks on the circuit board or chip.
    • Water inflow or immersion damage.
    • Damp or corroded circuit board.
    • Beyond the warranty period.
  • Chargeable maintenance service and parts purchase are available for out-of-warranty damage.

Malfunction Troubleshooting:

Boot Failure:

  1. Phenomenon: Fan does not turn or LED light does not light up after starting.
  2. Possible Causes: Loose fan wiring, disconnected miner control board power supply, poor AC power input, broken power module, broken control board, power output short circuit protection.
  3. Inspection and Repair:
    • Power on the miner, turn on the power switch, and plug in the network cable. Check if the network port link light flickers.
      • If the network port light is off, the MM control board has no power. Check power line connection, replace power supply, or check for short circuit in power output.
      • If the network port light is on but the MM control board LED is off, replace the MM control board.
    • If the MM control board LED is on but the fan does not rotate, check fan connection or replace the fan.

Cannot Mine:

  1. Phenomenon:
    • Unable to connect to the pool for a long time (over 5 minutes) after startup (miner lights yellow for a long time, no green light, no hashrate).
    • Miner connects to the pool after startup (LED green), but has no hashrate.
  2. Possible Causes: Pool configuration error, network configuration error, miner cannot access the Internet, miner power supply has no main circuit output (wiring error, overload, short circuit, damage), miner's hashboard not working, overheat protection.
  3. Check and Repair:
    • If PC cannot connect to miner via network: Try restoring factory settings (Appendix I) after confirming network environment, cable connection, and normal miner startup.
    • Check current firmware version and update to the latest with FMS (Appendix 3).
    • Check hashboard status in the log. If "overheating shutdown," check fan and ambient temperature.
    • Check the number of hash boards shown in the figure. If 1 or 2, contact after-sales. If 0, check power supply status.

Log Page Parameters (Appendix 4):

  • Elapsed: Total running time of miner (seconds).
  • Ver: Miner firmware version number.
  • DNA: Unique miner ID.
  • NETFAIL: Records pool disconnection/reconnection times. Odd items are disconnection times, even items are reconnection times. If odd items have data and even items are 0, connection is currently disconnected.
  • SYSTEMSTATU: Current system working status, including number of hash boards in operation. If hash board count is 1 or 2, contact after-sales.
  • DH: Average calculation error rate (normal: 0.6-1.6%).
  • Temp: Ambient temperature.
  • TMax: Maximum chip temperature.
  • TAvg: Average chip temperature.
  • Fan1/Fan2: Fan rotating speed.
  • FanR: Fan rotating percentage.
  • Vo: Average chip voltage.
  • PS (Power Supply Status):
    • Item 1: Error code (0 indicates power failure/output short circuit).
    • Item 2: Voltage to control board (normal: 12xx).
    • Item 3: Voltage to hash board (normal: 1200-1320).
    • Item 4: Current output from power supply to hash board.
    • Item 5: Output power of power supply to hash board (normal: 3100-3300).
    • Item 6: Desired output voltage of power supply to force calculation board.
    • If all PS parameters are 0, control board cannot communicate with power supply. Check circuit, replace PSU if necessary.
  • PLLO/PLL1: Distribution of hash board chips at each frequency point.
  • GHSmm: Theoretical hashrate (GH/s).
  • GHSavg: Average hashrate at 1 hour.
  • WU: Work Utility.
  • Freq: Equivalent frequency.
  • Led: White LED status (1=on, 0=off). Used for identifying specific miners.
  • MGHS: Calculation force of a single force plate (GH/S).
  • MTmax: Maximum chip temperature in a single hashboard.
  • MTavg: Average chip temperature in a single hashboard.
  • TA: ASIC chip numbers.
  • SF0/SF1: Frequency point configuration state of hashboard 0/1.
  • PVT_T0/PVT_T1: Temperature list of all chips of hashboard 0/1.
  • PVT_V0/PVT_V1: Voltage list of all chips of hashboard 0/1.
  • PVT_R0/PVT_R1: DH value list of all chips of hashboard 0/1.

Network Setting Check:

  • Click "Network" on the left. Default is DHCP. Refresh if data is empty.
  • If using static IP, incorrect DNS can prevent pool access. Common DNS: China (114.114.114.114), outside China (8.8.8.8).
  • Save and restart after modifying network configuration.

Canaan AvalonMiner1246 Specifications

General IconGeneral
BrandCanaan
ModelAvalonMiner1246
CategoryNetwork Hardware
LanguageEnglish

Related product manuals