EasyManua.ls Logo

Canature 95 Series - User Manual

Canature 95 Series
28 pages
Print Icon
To Next Page IconTo Next Page
Loading...
95
High Flow
Water Softeners
Installation and Operation Manual
REVISION # 1
REVISION DATE MAY 8/12
1. Read all instructions carefully before operation.
2. Avoid pinched o-rings during installation by applying (provided with install kit) NSF certified
lubricant to all seals.
3. This system is not intended for treating water that is microbiologically unsafe or of unknown
quality without adequate disinfection before or after the system.

Questions and Answers

  • J
    Jamie BradleyAug 18, 2025
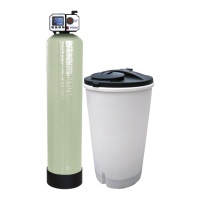
    What to do if Canature Water Dispenser fails to draw brine?
    • D
      Dr. Lisa TorresAug 19, 2025
      If your Canature Water Dispenser isn't drawing brine, here are a few things to check: * The drain line flow control might be plugged, so clean the parts. * The injector or screen could be plugged, so clean the parts. * The inlet pressure might be too low, so increase the pressure to 25 PSI. * There could be an internal valve leak, so replace the seals, spacers, and piston assembly. * The safety valve might be closed, so check for leaks in the brine line connections and replace the safety float assembly. * There may be a vacuum leak in the brine line, so check for leaks and tighten all connections. * The drain line may have a kink or blockage, so check the drain line.
  • L
    ljonesAug 21, 2025
    How to fix a Canature Water Dispenser that won't start a regeneration cycle?
    • R
      Robert ReidAug 21, 2025
      If your Canature Water Dispenser isn't starting a regeneration cycle, consider the following: * Check the electrical service and fuse to ensure there is a power supply. * If there was a power failure, reset the time of day. * A defective circuit board can prevent regeneration, so replace any faulty parts. * A defective meter can be the cause, so replace the turbine meter.
  • D
    Denise WalkerAug 25, 2025
    Why is there too much water in the brine tank of my Canature Water Dispenser?
    • J
      John MartinAug 25, 2025
      Excessive water in the brine tank of your Canature Water Dispenser may be due to: * A plugged injector or screen, so clean the parts. * The valve not regenerating, so replace the circuit board, motor, or control. * Foreign material in the brine valve, so clean the parts. * The unit not drawing brine, so check for a vacuum leak in the brine line connections.
  • K
    Kayla WalshAug 27, 2025
    Why does my Canature 95 Series Water Dispenser have low water pressure?
    • J
      Johnny RojasAug 28, 2025
      Low water pressure in your Canature Water Dispenser can result from: * Iron or scale buildup in the line feeding the unit, so clean the pipes. * Iron buildup inside the valve or tank, so clean the control and add resin cleaner to clean the bed, and increase regeneration frequency. * The inlet of the control being plugged by foreign material, so remove the piston and clean the control valve. * Deteriorated resin (possibly from high chlorine or chloramines), so re-bed the unit and consider adding carbon pre-treatment.
  • J
    Jack FordAug 31, 2025
    What to do if Canature 95 Series Water Dispenser flows to drain continuously?
    • A
      Arthur ValenzuelaAug 31, 2025
      If your Canature Water Dispenser is continuously flowing to the drain, it could be due to: * Incorrect valve settings, so check the valve settings. * Foreign material in the control valve, so clean the control. * An internal leak, so replace the seals, spacers, and piston assembly. * The piston being stuck, which may indicate a motor failure or jammed gears, so check for power to the motor, loose wires, jammed gears, or disengaged gears, and replace any faulty parts.
  • R
    robert59Sep 3, 2025
    Why is the salt use so high in my Canature Water Dispenser?
    • R
      reedlisaSep 3, 2025
      High salt usage in your Canature Water Dispenser may be caused by: * Refill time being set too high, so check the refill time setting. * A defective flow control, so replace it.
  • A
    Ashley ZavalaSep 5, 2025
    Why is there resin in the drain line of my Canature Water Dispenser?
    • N
      nicolehoodSep 6, 2025
      Resin appearing in the drain line of your Canature Water Dispenser may be due to: * Air in the water system, so check the well system for proper air eliminator control. * An incorrect drain line flow control (DLFC) button, so check for the proper flow rate.
  • C
    colleen83Sep 9, 2025
    Why is my Canature 95 Series valve making a beeping sound?
    • N
      Nicole WatsonSep 9, 2025
      If your Canature Water Dispenser valve is beeping, it could be because the piston has not advanced to the next cycle position properly. Check for power to the motor, loose wires, or jammed/disengaged gears.
  • J
    Jacob ToddSep 12, 2025
    Why does the valve on my Canature 95 Series continuously cycle?
    • D
      debra51Sep 12, 2025
      If the valve on your Canature Water Dispenser is continuously cycling, it may be due to a defective position sensor PCB. Replace any faulty parts.
  • Z
    Zachary BrownNov 15, 2025
    Why is my Canature 95 Series producing hard water?
    • C
      Carl WaltersNov 15, 2025
      Your Canature Water Dispenser might be producing hard water due to several reasons: * The by-pass valve may be open, so close it. * The salt level might be too low, so add salt to the tank. * There might be a flow blockage to the brine tank, so check the brine tank refill rate. * The injector or screen could be plugged, so clean those parts. * There may be a leak between the valve and the central tube, so check if the central tube is cracked or the o-ring is damaged and replace faulty parts. * The hot water tank may contain hard water, so repeat flushing of the hot water tank. * There could be an internal valve leak, so replace the valve seals, spacer, and piston assembly. * The reserve capacity setting may be too low, so increase it. * There might not be enough capacit...

Summary

Safety Guide

General Safety Precautions

Follow all safety guidelines, check local codes, use correct power and salt.

Proper Installation

Installation Location and Environment

Install away from freezing, weather, and direct sunlight.

Grounding and Plumbing Codes

Ensure proper grounding and compliance with all codes for connections.

Water Flow and Pressure Requirements

Minimum flow rate of 3 GPM and max pressure of 125 PSI.

Chlorine Impact on Resin

High chlorine levels can degrade softener resin.

Discarding Installation Materials

Dispose of unused parts and packaging safely.

Unpacking and Inspection

Check for Shipping Damage

Inspect the softener and packaging for any damage or missing parts.

Keep Small Parts Secure

Store small installation parts in their bag until needed.

Specifications

System Capacity and Salt Usage

Details on system capacity and salt usage for various models.

Tank Dimensions and Salt Storage

Information on tank sizes and brine tank salt capacity.

Flow Rates and Pressure Drops

Specifications for flow rates at different pressure drops.

Plumbing, Resin, and Electrical Data

Details on connections, resin type, and electrical requirements.

Water Temperature and Pressure Limits

Operating ranges for water temperature and pressure.

Installation Diagram and Dimensions

Diagram showing typical installation layout and physical dimensions.

Before Starting Installation

Tools, Pipe, and Materials Checklist

List of required tools, pipes, fittings, and other materials for installation.

Optimal Softener Location

Guidelines for selecting the best location for the water softener.

Connection to Water Heater

Instructions for connecting the softener before the main water heater.

Outdoor Installation Considerations

Precautions necessary when installing the unit outdoors.

Sunlight Exposure Warning

Avoid direct sunlight to prevent damage to plastic components.

General Installation

Planning Pipe Connections

Guidance on planning pipe routing and identifying inlet/outlet.

Typical Softener Layout Diagram

Illustrative diagram of a common softener installation setup.

Installation Instructions

Electrical Safety and Water Shut-off

Steps for safely shutting off power and water supply.

Tank Placement and Plumbing Connections

Instructions for placing tanks and making plumbing connections.

Drain Line Setup with Air Gap

Proper connection and routing of the drain line with an air gap.

Initial Water Flush and Leak Check

Flushing air from the system and checking for leaks.

Brine Tank Water Addition

Procedure for adding water to the brine tank.

Softener Installation Diagram

Electrical and Water Inlet;Outlet Connections

Diagram showing power connection and water pipe connections.

Brine Tube and Drain Line Connections

Illustration of brine tube, drain line, and overflow connections.

Main Tank and Brine Tank Components

Diagram identifying main tank, brine tank, and related parts.

Start-up Instructions

Power Connection and Initial Screen

Connecting power and understanding the initial display.

Initiating Manual Regeneration

Steps to initiate a manual regeneration cycle (e.g., IMMEDIATE).

Backwash and Drain Flushing Procedure

Steps for backwashing and flushing the unit media.

Brine Draw and Rinse Cycle

Procedures for drawing brine and performing the rinse cycle.

Brine Refill and Service Transition

Steps for refilling the brine tank and reaching the service position.

Programming Controller Settings

Setting time, date, water hardness, and household size.

Control Keypad Configuration

Explanation of control panel buttons and their functions.

Change Setting Procedure

Navigating and Editing System Settings

Step-by-step guide to navigate and modify system parameters.

Main Display Information

Initial Display During Service Search

Understanding the screen display during service position finding.

Service Mode Display Overview

Information shown on the screen when the unit is in service mode.

Manual Regeneration Process

Unlocking the Control Screen

Procedure to unlock the control screen if it is locked.

Initiating Immediate Regeneration

How to start a manual regeneration cycle immediately.

Regeneration Cycle Display Status

What the screen indicates during the regeneration process.

Regeneration Status Updates

Backwashing Phase Display

Screen indication during the backwash cycle.

Transition to Brine Cycle

Display showing the unit advancing to the brine cycle.

Brining Phase Display

Screen indication during the brining cycle.

Main Program Settings

Navigating the Main Menu

How to enter and navigate the main menu options.

Setting Current Date and Time

Instructions for adjusting the system's date and time.

Changing Display Units and Language

Options to modify display units and language settings.

System Configuration Options

Setting Water Hardness and People Count

Configuring water hardness and household size for capacity.

Activating Holiday Mode

How to enable Holiday Mode and set an end date.

Advanced Settings: Auto vs. Manual

Choosing between automatic calculation and manual system settings.

Regeneration Mode Selection

Overview of Automatic Calculate Mode

Explanation of advanced system settings available in this mode.

Understanding Regeneration Modes

Details on Calendar Clock, Meter Immediate, Meter Delayed, Override.

Regeneration Timing and Data Input

Setting Preferred Regeneration Time

Adjusting the time of day for regeneration cycles.

Entering System Data Parameters

Inputting resin volume, salt amount, and refill rate.

Adjusting Regeneration Cycle Durations

Customizing the length of backwash, brine, rinse, and refill cycles.

Restore Factory Defaults

Warning on Resetting Settings

Cautionary note about losing current settings when restoring defaults.

System Information and Diagnostics

Accessing Diagnostic Data

Viewing total regenerations, water treated, and other metrics.

Resetting System Values to Zero

Procedure for resetting system values.

About the Water Softener System

Operation During Power Failure

How the system maintains settings and resumes operation after power loss.

Automatic Hard Water Bypass

Explanation of bypassing hard water during regeneration.

Safety Float Functionality

Purpose and operation of the brine tank safety float.

Regeneration Cycle Steps

Detailed explanation of the backwash, brine, rinse, and refill steps.

System Configuration Details

95 HF System Configurations by Tank Size

Table outlining system configurations based on tank diameter.

Maintenance Procedures

Adding Softener Salt

Instructions on how and when to add salt to the brine tank.

Addressing Salt Bridging Issues

Causes and solutions for salt bridging in the brine tank.

General System Care and Cleaning

Recommendations for cleaning and maintaining the softener's appearance.

Resin Cleaner Application Guidelines

When and how to use resin cleaner, especially for iron issues.

Removing the Power Head Assembly

Manual Power Head Removal Steps

Step-by-step guide for manually detaching the power head assembly.

Automatic Power Head Removal Steps

Instructions for automatically detaching the power head.

Replacing Flow Controls

Drain Line Flow Control (DLFC) Replacement

Instructions for removing and replacing the DLFC component.

Brine Line Flow Control (BLFC) Replacement

Instructions for removing and replacing the BLFC component.

Injector Assembly Maintenance

Injector Assembly Overview and Cleaning

Location and ease of cleaning the injector assembly.

Injector Replacement and Cleaning Steps

Detailed procedure for replacing or cleaning injector parts.

Cleaning Small Injector Orifices

Tips for cleaning injector orifices using mild acid.

Main Repair Parts - Exploded View

Twin Tank Exploded View Diagram

Visual representation of twin tank components.

Main Repair Parts List

Replacement Parts for Twin Tank System

List of replacement parts for the twin tank softener.

Power Head Exploded View

Power Head Assembly Components List

Detailed list of parts comprising the power head assembly.

Control Valve Exploded View

Control Valve Assembly Components List

Detailed list of parts comprising the control valve assembly.

Control Valve Parts List

Detailed Control Valve Components

Comprehensive list of components for the control valve.

Troubleshooting Guide

Regeneration Initiation Failures

Causes and solutions for unit failing to start regeneration.

Resolving Hard Water Issues

Troubleshooting common causes of hard water.

Addressing High Salt Consumption

Diagnosing and resolving issues with high salt usage.

Low Water Pressure Diagnosis

Causes and solutions for low water pressure.

Resin in Drain Line Troubleshooting

Identifying causes and fixing resin in the drain line.

Brine Tank Water Level Problems

Troubleshooting issues related to water level in the brine tank.

Unit Fails to Draw Brine

Diagnosing and fixing problems with the unit drawing brine.

Continuous Valve Cycling Issues

Troubleshooting why the valve cycles continuously.

Constant Flow to Drain

Diagnosing and resolving continuous water flow to the drain.

Solving Valve Beeping Sounds

Identifying the cause and resolving beeping sounds from the valve.

Canature 95 Series Specifications

General IconGeneral
BrandCanature
Model95 Series
CategoryWater Dispenser
LanguageEnglish

Related product manuals