23
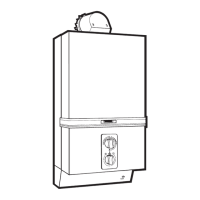
99.. GGAASS CCOONNVVEERRSSIIOONN
FFrroomm nnaattuurraall ggaass ttoo bbuuttaannee--pprrooppaannee aanndd vviiccee--
vveerrssaa
(see fig. 34, 35, 36 and 37).
- Shut off electricity
- Turn off fresh water before the appliance and
open a hot water tap to fall down the sanitary
water pressure.
- Turn off gas at the gas service cock and remove
the front casing.
- Unscrew the screw (1) and remove pilot tube (2).
- Remove the burner manifold (4) by unscrewing
the two screws (3) and the two screws (12).
- Disconnect at thermo-electric valve by undoing
nut (5) and pull off the electrode cable (6) from
the printed circuit board.
- Pull burner forward to remove gently.
- Unscrew the four screws (8) and lift the gas sec-
tion top off the base.
- Unscrew the complete valve box (9).
- Replace the new complete valve box fitted inside
with a spring and the gas valve (factory assem-
bled).
- After changing the gasket, replace the gas section
top on the base and screw the four screws (8).
- Replace the burner
- Re-assemble the thermocouple nut (5) and re-
connect the electrode cable (6) inside the printed
circuit board.
- Change the pilot injector.
- After changing the gasket, replace the new burner
manifold with appropriate injectors and the mani-
fold restrictor (if planned).
- Fasten the two screws (3) and the two screws (12).
- Replace the plot tube (2) conform with the new
used gas and gently tighten the screw (1).
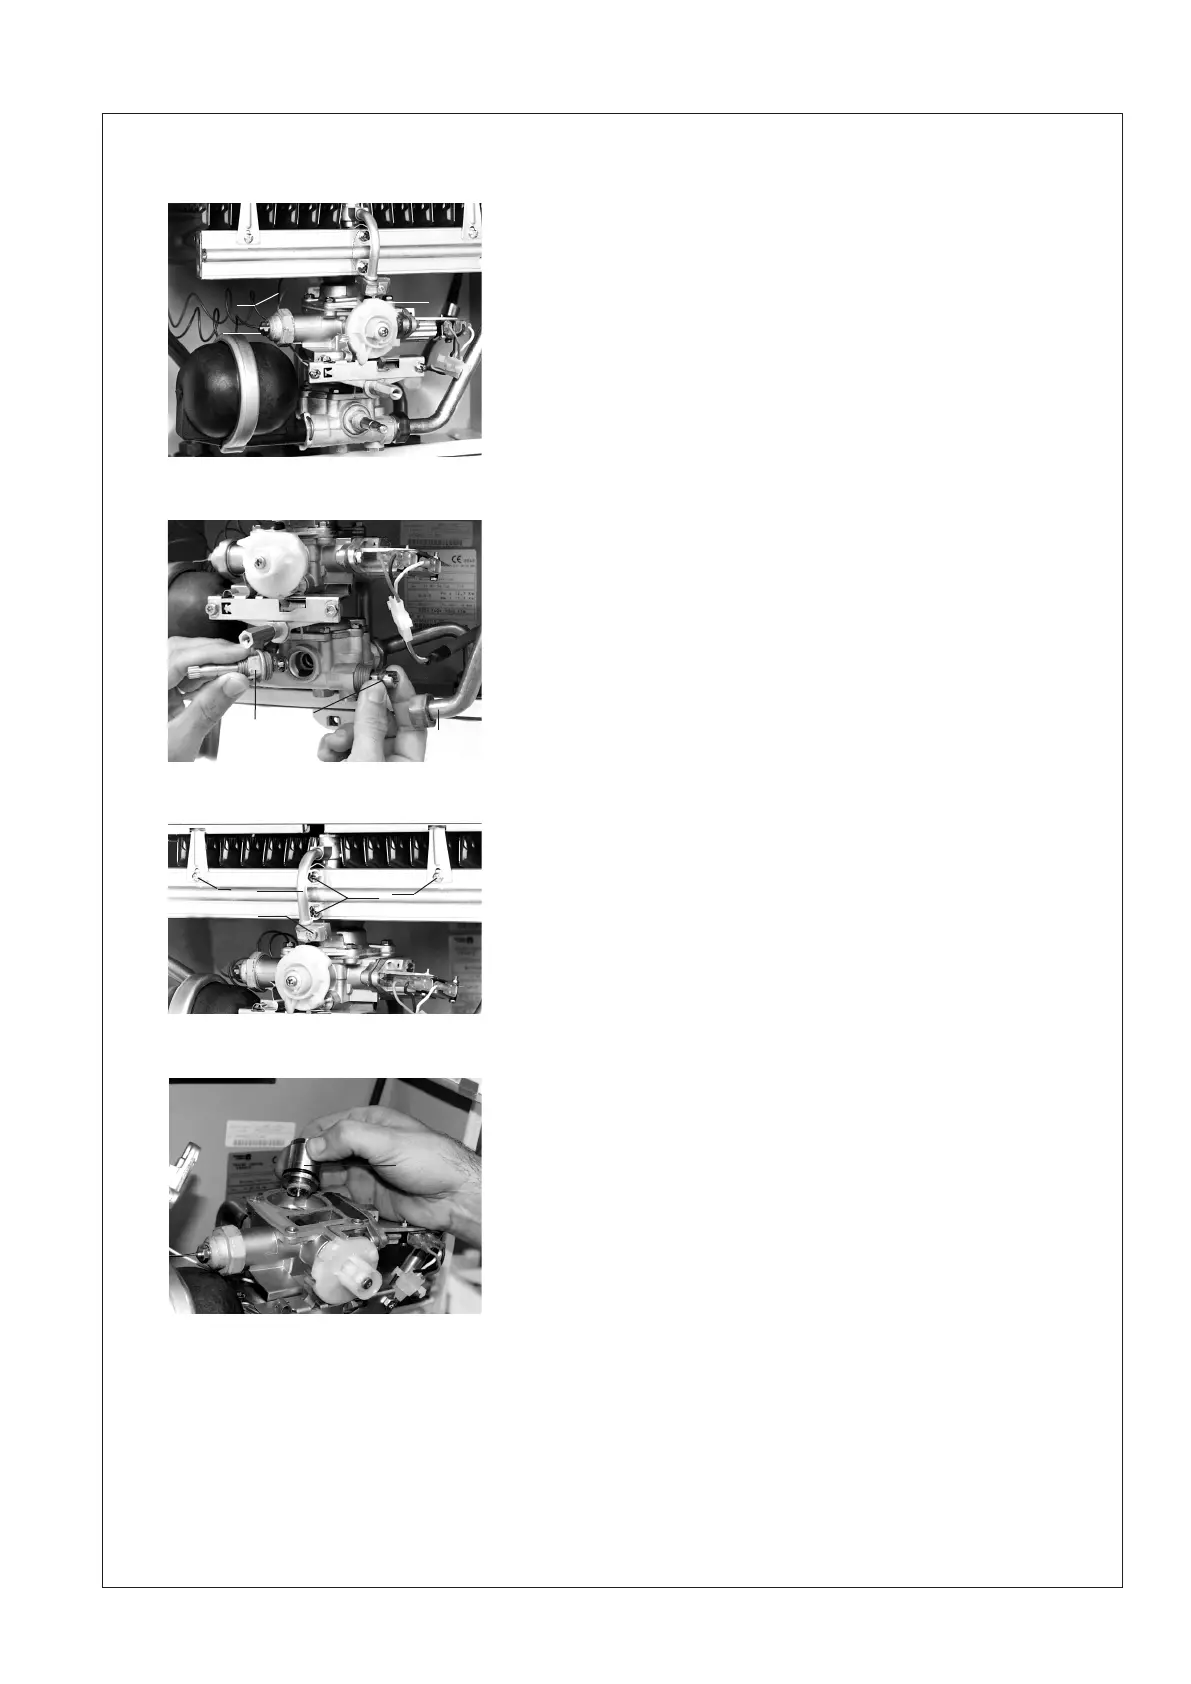
- Unscrew the temperature selector device (13).
Take care of the water remaining in the appliance.
- After changing of the new gasket, replace the new
temperature selector device.
- Unscrew the copper tube (10) (water valve side,
take care of the water falling) and turn it.
- Unscrew the venturi (11 ) with the help of a flat
screwdriver and replace the new venturi.
- Fasten the copper tube by screwing the nut stron-
gly.
- Check for gas soundness and water tightness and
test the function of the appliance.
- Stick the adhesive advice informing about the
natur
e and pr
essur
e of the adjusted gas
- Replace fr
ont casing.
FFiigg.. 3344
FFiigg.. 3355
FFiigg.. 3366
5
6
8
12
2
1
3
3
4
9
10
13
11
FFiigg.. 3377
 Loading...