This document provides comprehensive user instructions for Candy ovens, covering safety guidelines, product description, usage, cleaning, maintenance, and troubleshooting.
General Instructions
The manual emphasizes the importance of reading it carefully for optimal oven performance and retaining it for future reference. Users are advised to note the serial number for customer service needs. Upon unpacking, it's crucial to check for transport damage; if any doubts arise, a qualified technician should be consulted. Packaging materials should be kept away from children. Initial use may produce a strong smell from insulation glue, which is normal and dissipates after the first use. The manufacturer disclaims responsibility for damages resulting from non-observance of instructions. The manual notes that oven functions, properties, and accessories may vary by model.
Safety Indications
The oven is designed solely for cooking food; any other use, such as a heat source, is considered improper and dangerous. The manufacturer is not liable for damages from improper use. Basic electrical safety rules include not pulling the power cable, avoiding contact with wet hands or feet, and refraining from using adaptors or extension cables. In case of malfunction, the appliance should be switched off and not tampered with.
During cooking, moisture condensation inside the oven is normal and will disappear as the oven heats up. To minimize this, preheat the oven for 10-15 minutes before placing food inside. Vegetables should be cooked in lidded containers. Food should not be left in the oven for more than 15-20 minutes after cooking.
WARNINGS:
- The appliance and accessible parts become hot during use; avoid touching hot surfaces.
- Children must be kept at a safe distance from the hot oven.
- Ensure the appliance is switched off before replacing the bulb to prevent electric shocks.
- Before initiating an automatic cleaning cycle, clean the oven door, remove coarse food residues with a damp sponge (no detergents), remove all accessories and sliding racks, and do not place tea towels inside.
- For ovens with a meat probe, close the probe hole with the provided nut before cleaning and whenever the probe is not in use.
- Children under 8 must be continuously supervised if near the appliance.
- Children should not play with the appliance. Those aged 8 or over, or with limited physical/mental capacities, can use the appliance only under supervision and after receiving instructions on safe operation and potential risks.
- Cleaning and maintenance should not be performed by unsupervised children.
- Do not use rough, abrasive materials or sharp metal scrapers on the oven door glass to avoid scratching or shattering it.
- The oven must be switched off before removing removable parts for cleaning, and parts must be reassembled according to instructions.
- Only use the meat probe recommended for this oven.
- Steam cleaners should not be used for cleaning.
Electrical Safety
Electrical connections must be made by a qualified electrician and conform to local regulations. The manufacturer is not responsible for damages from non-compliance. The oven requires an earthed wall outlet or a multipolar disconnector. The electrical supply needs suitable fuses and cables. The oven operates on 220-240 Vac 50 Hz. Before connection, verify voltage and disconnector settings. The yellow-green earth wire must be connected to the power supply's earth terminal. A qualified electrician should check earth terminal continuity. The manufacturer disclaims responsibility for accidents due to faulty earth connections. The plug or omnipolar breaker should be easily accessible. If the power cable is damaged, it must be replaced by technical service staff. The cable type must be H05V2V2-F. Non-compliance compromises safety and voids the guarantee.
Recommendations
Regular cleaning extends the appliance's lifespan. Do not line oven walls with aluminum foil or single-use protectors, as direct contact with hot enamel can cause melting and damage. To prevent excessive dirt and smoke, avoid cooking at very high temperatures; instead, extend cooking time and lower the temperature. Use only dishes and baking molds resistant to high temperatures.
Installation
The manufacturer is not obligated to install the oven. Incorrect installation voids the guarantee and can cause harm. Installation instructions for qualified personnel must be followed. The oven can be placed high in a column or under a worktop. Good ventilation is crucial for cooling and protecting internal parts. Openings specified on the last page should be made according to the fitting type.
Waste Management and Environmental Protection
The appliance is labeled according to European Directive 2012/19/EU (WEEE). WEEE contains pollutants and reusable elements, requiring specific treatments for proper disposal and material recovery. WEEE should not be treated as domestic waste but taken to dedicated collection areas. Old appliances can be returned to vendors when purchasing a new one of equivalent type.
Saving and Respecting the Environment:
- Avoid pre-heating the oven whenever possible.
- Fill the oven completely when cooking.
- Open the oven door infrequently to minimize heat loss.
- Switch off the oven 5-10 minutes before cooking ends to utilize residual heat.
- Keep seals clean to prevent heat dispersal.
- Use the "delayed cooking" program with hourly tariffs to save energy by cooking during reduced tariff times.
Declaration of Compliance
Parts in contact with foodstuffs comply with EEC Directive 89/109. The CE mark signifies compliance with relevant European safety, health, and environmental requirements.
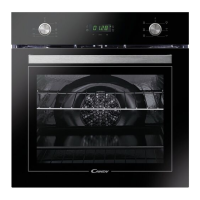
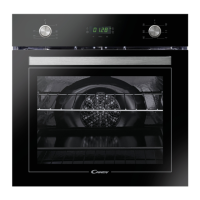
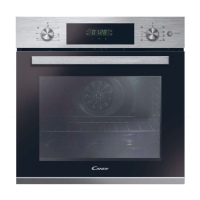
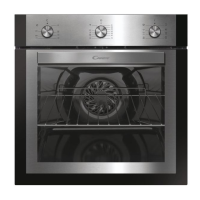
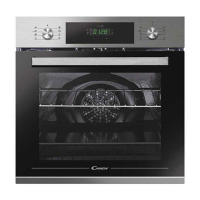
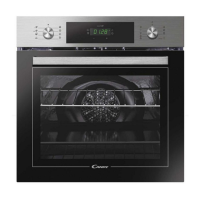
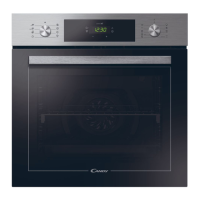
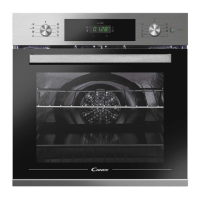
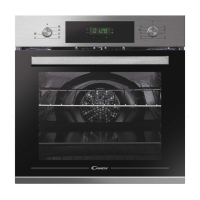
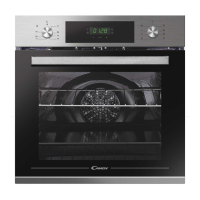
Product Description
Overview:
- Control panel: Houses the display and knobs for operating the oven.
- Shelf positions: Multiple levels for placing trays and grills, often including lateral wire grids.
- Metal grill: Used for supporting baking trays and plates.
- Drip pan: Collects residues and juices during grilling.
- Fan: Located behind a steel plate, circulates air for even cooking.
- Oven door: Provides access to the oven cavity.
Accessories:
- Metal grill: For baking trays and plates.
- Drip pan: Collects drippings from grilled foods.
- Lateral wire grids: If included, provide additional shelf positions.
First Use:
Before first use, perform preliminary cleaning: wipe external surfaces with a damp cloth, wash all accessories, and clean the oven interior with hot water and washing-up liquid. Then, set the empty oven to maximum temperature for about an hour to remove any newness smells.
Use of the Oven
Display Description:
- Minute minder: Sets a timer without affecting cooking.
- Clock setting: Adjusts the time of day.
- Cooking time: Sets the duration of a cooking program.
- End of cooking: Sets the time when cooking should finish.
- Temperature or clock display: Shows current temperature or time.
- LCD display adjustment controls: Buttons for adjusting settings.
- Thermostat selector knob: Sets the desired temperature.
- Function selector knob: Chooses the cooking mode.
WARNING:
- After installation or a power cut (indicated by a flashing 12:00), the first step is to set the time.
- The "200°" LED flashes until the set temperature is reached.
- "HOT" alternates with the time display after a program finishes if the oven is still hot, even if knobs are off.
Setting the Correct Time:
After installation or a power cut, the display will flash 12:00. To set the time:
- Push the central button four times.
- Set the time using the "-" and "+" buttons.
- Release all buttons.
The oven will not operate until the clock is set.
Cooking Modes:
- LAMP: Turns on the oven light.
- DEFROST: Circulates room temperature air to defrost food quickly without altering protein content.
- FAN COOKING: Recommended for poultry, pastries, fish, and vegetables. Ensures even heat distribution, reduces cooking/preheating times, and allows cooking different foods simultaneously without mixing smells. Allow extra ten minutes for multiple foods.
- FAN ASSISTED GRILL: Uses the top heating element with fan circulation. Preheating is needed for red meats but not white meats. Ideal for thick foods like roast pork or poultry. Place food centrally on the middle shelf with the drip tray underneath. Turn food halfway through.
- FAN + LOWER ELEMENT: Circulates air with the bottom heating element. Ideal for juicy fruit flans, tarts, quiches, and pâté. Prevents drying and promotes rising in cakes and bottom-cooked foods. Place shelf in the bottom position.
- CONVENTIONAL COOKING: Uses both top and bottom heating elements. Preheat for ten minutes. Ideal for traditional roasting and baking, seizing red meats, roast beef, lamb, game, bread, foil-wrapped food, and flaky pastry. Place food on a shelf in mid-position.
- GRILL: Uses the top heating element alone. Adjustable temperature. Five minutes preheating required. Guaranteed for grills, kebabs, and gratin dishes. White meats should be placed further from the grill for better taste. Red meats and fish fillets can be placed on the shelf with the drip tray underneath. Two grill positions: Grill (2140 W) and Barbecue (3340 W). Grill function must be performed at 200°C maximum.
- Funzione pizza: Circulates hot air for perfect pizza or focaccia.
- COOK LIGHT: Promotes healthier cooking by reducing fat/oil. Combines grill and fan with pulsating air to retain moisture, grill surfaces, and shorten cooking time without compromising taste. Suitable for meat, roasted vegetables, and omelettes. Pulsed air maintains humidity, preserving nutritional values and ensuring uniform cooking.
Oven Cleaning and Maintenance
General Notes on Cleaning:
Regular cleaning extends appliance life. Wait for the oven to cool before cleaning. Avoid abrasive detergents, steel wool, or sharp objects to prevent damage to enamelled parts. Use only water, soap, or bleach-based detergents (ammonia).
Glass Parts:
Clean the glass window with absorbent kitchen towel after each use. For stubborn stains, use a detergent-soaked sponge, wring it out, and rinse with water.
Oven Window Seal:
Clean with a slightly damp sponge if dirty.
Accessories:
Wash accessories with a wet, soapy sponge, then rinse and dry. Avoid abrasive detergents.
Drip Pan:
After grilling, remove the pan, pour out hot fat, and wash with hot water, sponge, and washing-up liquid. For greasy residues, immerse the pan in water and detergent. It can also be washed in a dishwasher or with commercial oven detergent. Never return a dirty pan to the oven.
Aquactiva Function:
This steam-based procedure helps remove fat and food particles.
- Pour 300 ml of water into the Aquactiva container at the oven bottom.
- Set the oven function to Static or Bottom heater.
- Set the temperature to the Aquactiva icon.
- Run the program for 30 minutes.
- After 30 minutes, switch off and let the oven cool.
- Clean inner surfaces with a cloth.
Warning: Ensure the appliance is cool before touching it. Hot surfaces pose a burn risk. Use distilled or drinkable water.
N.B.: For pyrolytic ovens with Precò Touch User Interface, activate Aquactiva by setting the function selector to the AQUACTIVA symbol and temperature to 90° using "-" and "+" keys.
Maintenance:
Removal of the Oven Window:
- Open the front window.
- Push down the hinge housing clamps on the right and left sides.
- Replace the window by reversing the procedure.
Removal and Cleaning of the Glass Door:
- Open the oven door.
- Lock the hinges, remove screws, and pull up the upper metal cover.
- Carefully extract the glass from the oven door (for pyrolytic ovens, remove second and third glass if present).
- After cleaning or substitution, reassemble parts in reverse order.
- Ensure the "Pyro" indication on all glass is legible and positioned on the left side of the door, near the left-hand lateral hinge, so the printed label of the first glass is inside the door.
Changing the Bulb:
- Disconnect the oven from the mains supply.
- Undo the glass cover, unscrew the bulb, and replace it with a new bulb of the same type.
- Replace the glass cover.
Troubleshooting
FAQ:
- Problem: The oven does not heat up.
- Possible Cause: The clock is not set.
- Solution: Set the clock.
- Problem: The oven does not heat up.
- Possible Cause: The child lock is on.
- Solution: Deactivate the child lock.
- Problem: The oven does not heat up.
- Possible Cause: A cooking function and temperature have not been set.
- Solution: Ensure necessary settings are correct.