This document is a user manual for a Candy tumble dryer, providing comprehensive instructions for safe use, installation, maintenance, and optimal performance. It is available in Italian, German, English, Spanish, and French.
Function Description
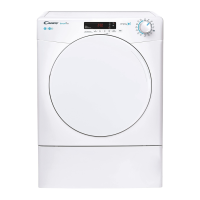
The Candy tumble dryer is designed for domestic use to dry household textiles and garments. It utilizes Wi-Fi technology, allowing remote control via the hOn App. The dryer collects water removed from laundry in a container, which needs to be emptied after each drying cycle (or can be permanently drained using an optional kit). The drying process includes a cool-down phase at the end to ensure clothes are not damaged by heat. The drum rotates intermittently after the cycle to minimize creasing.
Important Technical Specifications
- Electrical Data: Supply voltage and power input are indicated on the product rating plate.
- Maximum Load: Refer to the energy label for the maximum drying weight.
- Energy Efficiency: Refer to the energy label for the energy class.
- Refrigerant Gas: The appliance contains R290, an eco-sustainable and flammable refrigerant gas. Keep open flames and ignition sources away.
- Drain Hose Kit (Optional): Allows permanent drainage of condensed water to a waste water drain pipe. The maximum height for connection is 85 cm from the dryer's base.
- Stacking Kit (Optional): Available in "standard size" (for washing machines with minimum depth of 44 cm), "slim size" (for washing machines with minimum depth of 40 cm), and "universal stacking kit with sliding" (for washing machines with minimum depth of 47 cm).
- Wi-Fi Network: The home Wi-Fi network frequency must be set to the 2.4 GHz band. The machine cannot be configured if the network is set to the 5 GHz band.
Usage Features
- Quick User Guide:
- Open the door and load laundry, ensuring garments do not obstruct closure.
- Gently close the door until it clicks.
- Select the desired drying program using the program knob or specific button.
- Press the START/PAUSE button to begin.
- If the door is opened during a cycle, close it and press START/PAUSE to resume.
- The machine enters a cool-down phase near the end of the cycle.
- After the cycle, the drum rotates intermittently to minimize creasing until switched OFF or the door is opened.
- Program Selector (OFF position): Rotate the selector in either direction to choose a program. To cancel or switch off, turn to OFF.
- First Starting:
- Language Setting: After connecting and powering on, press "C" or "D" to view available languages. Select with START/PAUSE.
- Change Language: Press "C" and "D" simultaneously for about 5 seconds to change the setting language.
- START/PAUSE Button: Press to start a selected cycle. Press and hold for 2 seconds to pause; press again to resume.
- DELAY START Button: Delays the program start from 30 minutes (or 1 hour on some models) up to 24 hours in 30-minute (or 1-hour) intervals.
- TIME CYCLE SELECTION Button: Transforms an automatic cycle to a programmed one (up to 3 minutes after start). Progressive pressure increases time in 10-minute intervals.
- MEMO Button: Stores selected options for a cycle. Press for 3 seconds to memorize; press after cycle selection to recall.
- DRYING SELECTION Button: Sets the desired dryness level (editable up to 3 minutes after start):
- Ready to Iron: Leaves garments slightly wet for easier ironing.
- Dry Hanger: Garments ready to hang.
- Dry Wardrobe: Laundry ready for direct storage.
- Extra-dry: Completely dry garments, ideal for full load.
- Drying Manager Function: On automatic cycles, intermediate drying levels are indicated by a flashing light.
- EASY IRON Button: Sets alternate drum movements to reduce folds and automatically sets "Ready to Iron" dryness. Activates an anti-crease movement pre-cycle (with delay start) and post-cycle (up to 6 hours, every 10 minutes).
- CHILD LOCK (D+F buttons): Press "D" and "F" simultaneously for 2 seconds to lock keys, preventing accidental changes. Can be cancelled by pressing both buttons again. If the door is opened with Child Lock active, the cycle stops but the lock remains; unlock and press START/PAUSE to resume.
- Display: Shows remaining drying time, postponed time, and other notifications.
- Indicator Lights:
- Drying Selection: Displays selected dryness levels.
- Water Container: Lights up when the condensate water tank needs emptying.
- Lint Filters and Sponge Filter Cleaning: Fixed light for lint filters, blinking for sponge filter.
- Wi-Fi: Indicates connection status (fixed on for enabled, slow flashing for disabled, quick flashing for connection issues/pairing, on for 1 second then off for 3 seconds if door is open).
- Programmes: A variety of programs for different fabric types and loads, including Daily Perfect, Daily, Saving, Refresh, Sport Plus, Relax, Small, Woolmark, Shirts, Synthetics, Darks & Coloured, Jeans, Whites, and Eco Cotton.
- Remote Control (Wi-Fi):
- Pairing: Download the hOn App, create a profile, and follow in-app instructions.
- Enable: Ensure router is on and connected to the Internet, load laundry, close the door, and turn the program selector to REMOTE CONTROL (Wi-Fi). Start the cycle via the app.
- Disable: Turn the program selector to any position other than REMOTE CONTROL (Wi-Fi) without going through OFF.
Maintenance Features
- Water Containers: Empty after each drying cycle.
- Door Drawer Container: Gently pull out by the handle (A), tilt to empty (B), and replace (C).
- Bottom Water Drawer (on some models): Pull top of kickplate to unclip, unhinge bottom to remove (A). Pull handgrip to slide out container (B), support with both hands (C). Open lid and empty (D). Refit lid and slide container back (D). Refit kickplate.
- Lint Filters: Clean before every cycle. Extract filters (A and B) by pulling upwards, open them, gently remove lint with fingertips, a soft brush, cloth, or under running water. Close and reposition firmly. Ensure no lint residue in the compartment before reinserting.
- Sponge Filter: Clean every six months or when the cleaning indicator light blinks. Remove kickplate, turn handle anti-clockwise to pull out front cover, gently remove sponge filter frame, gently remove sponge from frame. Wash sponge under running tap, wring, and refit. Refit frame, front cover (turn handle clockwise to lock), and kickplate. Do not touch fins behind the sponge filter frame.
- Cleaning the Dryer:
- Wipe the inside of the drum and door with a damp cloth after each use.
- Leave the door open for a while to allow air circulation.
- Wipe the outside of the machine and door with a soft cloth.
- DO NOT use abrasive pads or cleaning agents.
- Clean the inner door and gasket with a damp cloth after every drying cycle to prevent sticking or fluff buildup.
- The appliance is for domestic use only.
- Children aged 8 and above, and persons with reduced capabilities, can use the appliance with supervision and instruction. Children under 3 should be continuously supervised.
- Misuse can create a fire hazard.
- Do not touch the appliance with damp or wet hands/feet.
- Do not lean on the door or use it to lift/move the machine.
- Do not use if faulty.
- Do not use if industrial chemicals have been used for cleaning.
- Do not use if the fluff filter is not in position or is damaged.
- Avoid lint and fluff accumulation around the machine.
- Always unplug before cleaning.
- Allow the dryer to complete the cool-down period before removing laundry.
- During transport, keep the dryer upright. If tilted, wait at least 4 hours before switching on to allow oil to flow back into the compressor.
- Do not install in low-temperature rooms or where frost may occur. Ambient room temperature should be 5-35°C.
- Ensure adequate ventilation in the room.
- Install the rear of the appliance near a wall or vertical surface, with at least a 12 mm gap from obstructions.
- Do not obstruct air inlet/outlet.
- Do not discharge exhaust air into a flue used for other appliances.
- Ensure the electrical system is earthed and compatible with the appliance's plug.
- Do not use adapters, multiple connectors, or extensions.
- The plug should be accessible after installation.
- Do not plug in or switch on until installation is complete.
- If the supply cord is damaged, it must be replaced by the manufacturer or service agent.
- Do not dry fabrics treated with dry cleaning fluids or foam rubber materials (latex foam, shower caps, waterproof textiles, rubber-backed articles, pillows with foam rubber pads).
- Remove all objects from pockets (lighters, matches).
- Do not overload the drum.
- Clean lint filters before every cycle.
- Clean the sponge filter every six months or when the indicator blinks.
- For 10/11 kg capacity models with a drain hose kit, connect the drain hose for condensate water recovery.