Do you have a question about the Canon Autozoom Electronic 1014 and is the answer not in the manual?
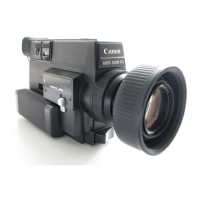
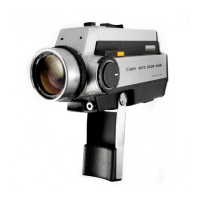
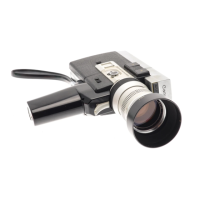
Features a 10x compact zoom lens with high resolving power and Super Spectra Coating.
Utilizes TTL servo EE mechanism with CdS photocells for precise light metering and aperture control.
Enables accurate and easy lap dissolves, fade-ins, fade-outs, and superimpositions.
Features an enlarged eyepiece for brightness and a split-image screen for easy focusing.
Allows instant slow-motion shooting at approximately 54 fps for enhanced definition.
Built-in system allows easy close-up photography by simply switching the zooming ring.
Includes a built-in flash synchronization socket for single-frame shooting and titling.
Enables use of remote control accessories to extend shooting possibilities and flexibility.
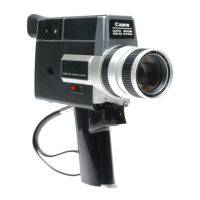
Instructions on how to properly unfold the camera's handgrip for use.
Guidance on inserting six 1.5V penlight (AA) batteries for camera operation.
Procedure to verify battery voltage using the check button and window.
Simple instruction to remove the protective cap from the lens.
How to adjust the eyepiece for clear viewfinder image using the split-image screen.
Steps for correctly inserting a Super 8 film cartridge into the camera.
Selecting the appropriate filming speed, typically 18 fps for natural motion.
Procedure for setting the exposure adjustment knob to the correct position.
Guidance on setting the variable shutter control ring to the 'O' position.
Ensuring the fading setting indicator is orange for proper operation.
Verifying the aperture control ring is engaged for automatic EE operation.
Instruction to set the main switch dial to the 'R' position.
Proper grip and posture for stable shooting during EE operation.
Focusing the subject precisely at the longest focal length (70mm).
Using the zooming ring to frame the subject and adjust composition.
Pulling the trigger lightly to check if the exposure needle is within the proper range.
Completely pulling the trigger to initiate filming and start recording.
Adjusting zoom magnification dynamically during the filming process.
Procedure for safely removing the film cartridge after shooting is complete.
Setting the main switch dial to 'R' to activate electric circuits and shutter.
Verifying the aperture control ring is engaged for automatic EE operation.
Selecting the appropriate filming speed, typically 18 fps for natural motion.
Ensuring the variable shutter control ring is set to 'O' (OPEN).
Positioning the exposure adjustment knob according to the scale.
Checking that the rewind setting indicator is orange.
Verifying film movement using the indicator lamp or visible indicator.
Proper grip and posture for stable shooting during EE operation.
Understanding the information displayed in the viewfinder for EE shooting.
Using the zooming ring or power buttons for magnification changes.
Rotating the focusing ring to achieve a sharp split-image in the viewfinder.
Framing the subject within the viewfinder for the desired composition.
Pulling the trigger lightly to observe the meter needle for correct exposure.
Fully engaging the trigger to start filming.
Procedure for completing shooting and safely removing the exposed film cartridge.
Guidance on exchanging film cartridges before completion.
Explanation of how the shutter mechanism controls exposure via leaf angles.
Description of the ring's settings (O, 2, 4, C) and their effect on exposure.
How the scale compensates for shutter angle changes affecting exposure.
Using shutter control for proper exposure in backlight or high-contrast scenes.
Reducing shutter angle to prevent motion blur in fast-moving subjects.
Plate indicating combinations of fading and rewind indicators for techniques.
Function of the indicator showing if the shutter control ring is locked or free.
Indicator used for superimposition and lap dissolve film rewinding.
Button to cancel rewinding for superimposition or lap dissolve.
Automatic fade-out and fade-in effects controlled by specific button operations.
Manually controlling fade-out and fade-in effects using the shutter control ring.
Creating smooth scene transitions by fading out one scene while fading in the next.
Lamp indicating proper film advancement during shooting.
Technique for overlaying images, typically used for shooting titles.
Procedure to cancel accidental setting of the film rewinding mechanism.
Enables continuous shooting by locking the trigger in the running position.
Using remote control switches for operating the camera from a distance.
Performing single-frame exposures using a remote control switch.
Automatic shooting triggered by a self-timer, allowing the photographer to be in the scene.
Shooting single frames at pre-set time intervals for time-lapse photography.
Capturing motion frame-by-frame at intervals for time-lapse recording.
Performing unmanned photography with a self-timer for delayed shooting.
Utilizing the interval timer for shooting single frames at fixed time intervals.
Using zooming for interesting visual effects and scene transitions.
Method of shooting broad scenes by smoothly turning the camera.
Vertical camera movement, either tilt-down or tilt-up, for varied shots.
Using the camera's macro capabilities for shooting professional-looking titles.
Exclusive close-up lenses for 8mm movies, correcting aberration and aiding titling.
Specific 58mm close-up lenses (450 and 240) for varied focusing distances.
Explanation of various filters (UV, Y, ND, CCA) and their photographic applications.
Accessory for titling, close-up shooting, copy work, and single-frame shooting.
Automatic projector with slow-motion feature for Super 8, single 8, and regular 8 films.
| Focusing | Manual |
|---|---|
| Lens | Canon Zoom Lens |
| Zooming | Manual |
| Frame Rates | 18, 24 fps |
| Exposure | Automatic |
| Shutter Speed | 1/30 second at 18 fps, 1/40 second at 24 fps |
| Viewfinder | Reflex |
| Power Supply | Battery |
| Weight | 1500g |