EasyManua.ls Logo

Canon creative park User Manual

Canon creative park
45 pages
To Next Page IconTo Next Page
Page #1 background imageLoading...
Page #1 background image
Potala Palace, China : Assembly Instructions
A. Red Palace / White Palace
Before starting assembly :
Writing the number of each section on its back side before
cutting out the sections is highly recommended.
(* This way, you can be sure which section is which even
after cutting out the sections.)
Indicates where sections should
be glued together.
Assembly Instructions
Mountain fold(dotted line)
Make a mountain fold.
Valley fold(dashed and dotted line)
Make a valley fold.
Scissors line(solid line)
Cut along the line.
Cut in line(solid line)
Cut along the line.
Glue spot(Red dot)
Glue parts with the same number together.
Glue spot(Green dot)
Glue within the same part.
Glue spot(Blue dot)
Glue to the rear of the other part.
Glue
The glue spot(colored dot)
shows where to apply the glue.
Tools and materials
Assembly tip
Caution
Scissors, set square, glue(We recommend stick glue), pencil, used
ballpoint pen, toothpicks, tweezers, (useful for handling small parts)
Before gluing, crease the paper along mountain fold and valley
fold lines and make sure rounded sections are nice and stiff.
Glue, scissors and other tools may be dangerous to young children
so be sure to keep them out of the reach of young children.
View of completed model
Assembly Instructions : Forty five A4 sheets (No. 1 to No. 45)
*Hint: Trace along the folds with a ruler
and an exhausted pen (no ink) to get a sharper, easier fold.
* Build the model by carefully reading the Assembly Instructions, in the parts sheet page order.
* This model was designed for Papercraft and may differ from the original in some respects.
Narrow
Wide
Assemble in the direction shown
in the illustration.

Other manuals for Canon creative park

Question and Answer IconNeed help?

Do you have a question about the Canon creative park and is the answer not in the manual?

Canon creative park Specifications

General IconGeneral
PrintableYes
Assembly RequiredYes
TypePaper craft
MaterialsPaper
Difficulty LevelVaries depending on the model, from beginner to advanced
Age RangeVaries depending on the model, often suitable for children with adult supervision, and adults

Summary

A. Red Palace / White Palace Assembly

Initial Red Palace Assembly Components

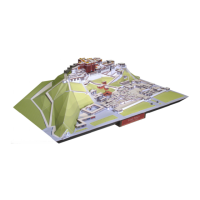
Diagrams showing assembly of the first set of components (A1-A6) for the Red Palace.

B. East Garden / West Garden Assembly

Initial East/West Garden Assembly Components

Diagrams showing assembly of the first set of components (B1-B4) for the East/West Garden.

C. Jie Bu Jiao / Shang Kong Xia / Xi Yuan Bao Assembly

Initial C Section Assembly Components

Diagrams showing assembly of the first set of components (C1-C6) for the C section.

D. Northern side of Marpo Ri Assembly

Initial D Section Assembly Components

Diagrams showing assembly of the first set of components (D1-D6) for the D section.

E. Eastern side of Marpo Ri Assembly

Initial E Section Assembly Components

Diagrams showing assembly of the first set of components (E1-E7) for the E section.

F. Southern side of Marpo Ri / Front steps Assembly

Initial F Section Assembly Components

Diagrams showing assembly of the first set of components (F1-F3) for the F section.

G. Southern side of Marpo Ri / Front steps Assembly

Initial G Section Assembly Components

Diagrams showing assembly of the first set of components (G1-G5) for the G section.

H. Government office district Assembly

Initial H Section Assembly Components

Diagrams showing assembly of the first set of components (H1-H5, H11-H12) for the H section.

I. Base Assembly

Initial I Section Assembly Components

Diagrams showing assembly of the first set of components (I1, I3, I4, I7, I10-I13) for the I section.