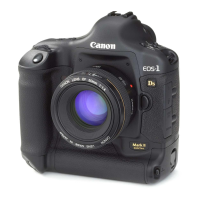
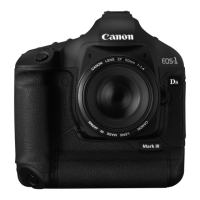
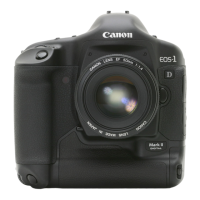
Do you have a question about the Canon EOS 1Ds Mark III and is the answer not in the manual?
Instructions for connecting the charger to a power outlet and recharging the battery.
Procedures for installing and removing the LP-E4 battery pack from the camera.
Connects the camera to a household power outlet using the AC Adapter Kit ACK-E4.
Steps for installing and removing CF and SD memory cards from the camera.
Instructions for attaching and detaching Canon EF lenses to the camera body.
Covers fundamental camera operations like power switch and shutter button usage.
Explains the function of the power switch and the Quick Control Dial.
Details on how to use the two-step shutter button for focusing and taking pictures.
Describes how to use the Main Dial for setting various camera parameters.
Explains how to use the Quick Control Dial for various camera settings.
Guidance on how to hold the camera properly for stable shooting.
Overview of navigating camera menus to adjust settings.
Step-by-step instructions on how to change settings using the camera menus.
Lists and describes various menu settings available on the camera.
Initial setup procedures before beginning camera operation.
Instructions for selecting the desired language for the camera interface.
Procedure to set the camera's date and time for accurate image metadata.
Configure the camera's auto power-off time setting.
Steps to format memory cards for optimal camera compatibility and data integrity.
Resets all camera settings to their factory default values.
Configure image size, type (JPEG, RAW, sRAW), and JPEG quality.
Choose the image resolution for recorded photos.
Adjust the JPEG compression level to balance file size and quality.
Set the camera's sensitivity to light.
Choose predefined image styles for photographic expression.
Adjust individual parameters like sharpness and contrast for Picture Styles.
Save custom Picture Style settings for quick access.
Set the white balance to ensure accurate colors under different lighting.
Manually set white balance using a reference object for accuracy.
Numerically set the white balance using color temperature (Kelvin).
Fine-tune white balance by adjusting color bias (Blue/Amber or Magenta/Green).
Choose between sRGB and Adobe RGB color spaces for image output.
Manage memory cards, folders, and how images are recorded.
Configure how images are saved across multiple memory cards.
Create new folders on the memory card for image organization.
Choose an existing folder for saving captured images.
Customize the alphanumeric prefix of image file names.
Set how image file numbers are assigned (Continuous, Auto Reset, Manual Reset).
Choose AF modes like One-Shot AF or AI Servo AF based on subject.
Manually select or automatically determine the active AF point.
Troubleshooting steps when autofocus cannot achieve focus.
Instructions for focusing manually when autofocus is not suitable.
Choose drive modes like Single Shooting, Continuous, or Self-timer.
Details on using the self-timer for delayed shots.
Select metering modes like Evaluative, Partial, Spot, or Center-weighted.
Camera automatically sets shutter speed and aperture.
Set shutter speed; camera sets aperture automatically.
Set aperture; camera sets shutter speed automatically.
Manually set both shutter speed and aperture for exposure control.
Adjust exposure level to make images brighter or darker.
Capture multiple shots at different exposures automatically.
Lock exposure settings to recompose shots.
Keep shutter open while button is held for long exposures.
Reduce camera shake by locking the mirror up before exposure.
Guide to using flash photography with EX-series Speedlites.
Basic steps for using Canon's EX-series Speedlites.
Configure Speedlite functions and custom functions via camera menu.
Set flash level manually for close-up photography using a gray card.
Steps to set up the camera for Live View shooting.
How to activate and view the live image on the LCD screen.
Use magnification features for precise manual focusing in Live View.
Procedures for composing and capturing images in Live View mode.
Details on the information displayed during Live View shooting.
View captured images one by one on the LCD monitor.
View detailed shooting settings for a selected image.
Understand brightness and RGB histograms for image analysis.
View multiple images at once in a 4- or 9-image index.
Navigate through images by specific increments like 10 images or date.
Magnify images to check focus and detail.
Rotate images to the correct orientation for playback.
Connect the camera to a TV to view images.
Prevent accidental erasure of selected or all images.
Apply or cancel protection for individual images.
Protect all images within a folder or on the entire memory card.
Add a sound clip to captured images.
Copy images between memory cards.
Select and copy specific images to another card or folder.
Copy all images from a selected folder to another location.
Copy all images from the source memory card to the target card.
Delete images from the memory card.
Delete individual images one by one.
Select multiple images to erase simultaneously.
Erase all images in a selected folder or the entire memory card.
Customize playback display options.
Adjust the LCD monitor's brightness for better readability.
Set how long captured images are displayed after shooting.
Enable automatic rotation of vertically oriented images.
Camera automatically cleans the sensor upon power activation.
Capture dust spot data to allow software removal of dust.
Procedure for cleaning the image sensor manually with a blower.
Steps to connect the camera to a printer for direct printing.
Information on the PictBridge standard for direct camera-to-printer connection.
Process of printing images directly from the camera.
Select the paper size loaded in the printer.
Choose the paper type for optimal print quality.
Configure the arrangement of images on the printed page.
Apply effects like Vivid, NR, or B/W to prints.
Option to imprint date and file number on printed images.
Specify the quantity of copies for each image to be printed.
Crop images to adjust composition before printing.
Troubleshooting common printer errors during direct printing.
Record print instructions (selections, quantity) on memory card.
Configure print type, date, and file number imprinting for DPOF.
Use DPOF to print images directly via PictBridge printer.
Install software and connect camera to computer for image transfer.
Steps to transfer images from camera to computer.
Choose specific images or groups for transfer.
Configure advanced camera functions via Custom Functions (C.Fn).
Custom functions related to exposure settings.
Custom functions for image quality, flash, and display.
Custom functions for autofocus and drive system.
Custom functions for camera operation and other settings.
Save and load sets of custom function settings.
Create a custom menu with frequently used items.
Save camera settings to a memory card and load them later.
Register and apply frequently used basic camera settings.
View current camera settings and battery status.
Display of current camera settings on the LCD monitor.
Detailed information about the camera's battery performance.
Instructions for replacing the camera's backup battery.
Explanation of the Program AE exposure combinations graph.
Solutions for common camera problems and issues.
Troubleshooting tips for power-related issues.
Troubleshooting tips for shooting and recording problems.
Troubleshooting steps when Live View shooting fails.
Troubleshooting common issues with image playback and camera operation.
List of camera error codes and their countermeasures.
Diagram showing camera system accessories and connections.
Technical details and specifications of the camera.
| Camera Type | Digital SLR |
|---|---|
| Sensor | CMOS |
| Sensor Size | 36 x 24 mm |
| Resolution | 21.1 megapixels |
| Image Resolution | 5616 x 3744 |
| ISO Range | 100-1600 (expandable to 50-3200) |
| Autofocus Points | 45 |
| Shutter Speed | 30-1/8000 sec |
| Continuous Shooting Speed | 5 fps |
| Video Recording | No |
| Weight | 1210 g (body only) |
| Battery | LP-E4 |
| Mount | Canon EF |
| Viewfinder | Optical (pentaprism) |
| Storage Media | CompactFlash (Type I or II), SD/SDHC |
| LCD Screen | 3.0-inch, 230, 000 dots |
