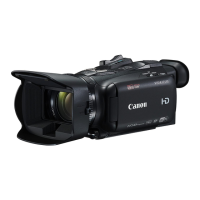
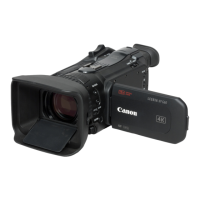
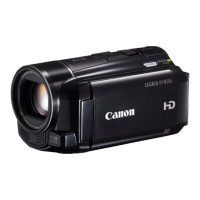
Do you have a question about the Canon Legria HF G25 and is the answer not in the manual?
Covers copyright warnings, general cautions for electric shock, interference, and proper usage.
Information regarding WEEE Directive for product disposal and recycling in the EU.
Lists trademarks and registered trademarks related to the camcorder and its software.
Details on the 1/3-type HD CMOS PRO sensor and DIGIC DV III processor for enhanced low-light performance.
Enables cinematic look using CINEMA mode and cinema-look filters for creative recordings.
Covers manual controls, face detection, relay and double slot recording for versatile operation.
Features for optimizing audio with scene selection and automatic scene mode detection.
Details on the 100% frame coverage LCD screen and viewfinder usability.
Explains Touch AE for exposure control and added functions like video scopes.
Instructions for connecting to HDTVs, digital recorders, and using memory cards.
Using Eye-Fi for wireless uploads and converting scenes for web sharing.
Provides context about the manual's purpose and how to use it for reference.
Explains symbols, terms, and formatting used throughout the manual for clarity.
Step-by-step instructions on how to activate and use the self timer for movies and photos.
Illustrations and names of all physical accessories included with the camcorder.
Details on PIXELA's VideoBrowser and LEGRIA CD-ROM contents.
Identification of buttons and terminals on the left side of the camcorder.
Identification of buttons and terminals on the right side of the camcorder.
Identification of buttons and components on the front and back of the camcorder.
Identification of buttons and features on the top of the camcorder.
Identification of parts located on the bottom of the camcorder.
Explanation of the functions for each button on the wireless controller.
Step-by-step instructions for connecting the power adapter and charging the battery.
Procedure for correctly attaching the lens hood to protect the lens.
Instructions on how to pull out and adjust the viewfinder for optimal viewing.
Guidance on rotating the LCD panel for different shooting angles and viewing.
How to turn on and adjust the LCD screen's backlight for better visibility.
Instructions for fastening the grip belt and attaching optional straps for secure handling.
Guidance on attaching an optional shoulder strap for carrying convenience.
Instructions for inserting the battery and using the wireless controller.
Guidelines for mounting the camcorder on a tripod, including screw length recommendations.
Explains how to interact with the camcorder using touch and drag gestures.
Explanation of AUTO, M, and CINEMA recording modes.
How to switch to and operate the camcorder in playback mode.
Guide to using the FUNC. Panel and Edit Panel for accessing features.
Instructions on how to open and navigate the camcorder's setup menus.
Step-by-step guide to set the camcorder's date, time, and time format.
Instructions for selecting the desired menu language from available options.
How to adjust the time zone and daylight saving time settings.
Information on compatible SD, SDHC, and SDXC memory cards.
Procedures for correctly inserting and removing memory cards from the camcorder.
Choosing between built-in memory and a memory card for recording.
Enabling continuous recording across multiple memory cards when one becomes full.
Recording the same scene simultaneously to two memory cards for backup.
Procedure for erasing all data on a memory card or the built-in memory.
Steps required before starting to record, such as attaching battery and selecting memory.
How to record using automatic settings for scene, focus, and exposure.
Details on Smart AUTO scene detection and Intelligent IS image stabilization.
A guide to icons displayed by Smart AUTO for different shooting conditions.
Tips on power saving, LCD usage, and notes regarding photo recording.
How to manually adjust settings like exposure, focus, and white balance.
Method to review the last 4 seconds of a recorded scene without changing modes.
How to use standby mode to save power and quickly resume recording.
Explanation of MXP, FXP, XP+, SP, LP modes and their approximate recording times.
Details on 50i (Standard) and PF25 frame rates for cinematic effect.
Using the focus ring and peaking assist for precise manual focusing.
Setting and recalling specific focus positions for quick adjustments.
Explanation of how the peaking feature highlights edges in focus.
Setting the autofocus speed and selecting modes like Instant, Medium, or Normal AF.
Details on AF modes and important notes for optimal autofocus performance.
How face detection automatically adjusts focus and exposure settings.
Choosing the primary subject for face detection to optimize settings.
Using the Face Only AF function for selective autofocus.
Tracking moving subjects by touching them on the screen.
Operating the zoom using the camcorder's lever or the wireless controller.
Adjusting the speed of the zoom lever and wireless controller.
Approximate zoom speeds for the zoom lever and wireless controller.
Operating the zoom directly via the touch screen interface.
Gradually starting and stopping the zoom for smoother transitions.
Using the digital tele-converter to digitally enlarge the image.
Selecting between Dynamic, Standard, and Off modes for image stabilization.
Enhancing image stabilization using Powered IS via an assignable button.
Setting the AGC limit to control noise levels in low-light conditions.
Explanation of P, Tv/Shutter-Pri, and Av/Aperture-Pri AE modes.
Tables showing available shutter speed and aperture value settings.
Adjusting aperture, shutter speed, and gain manually for precise exposure control.
Utilizing the zebra pattern to identify and correct overexposed areas.
Adjusting exposure using Touch AE or the manual dial for optimal subject brightness.
Specific adjustment for bright highlights to prevent overexposure.
Improving overall picture brightness, especially in backlit scenes.
Choosing from Auto, Daylight, Shade, Cloudy, Fluorescent, Tungsten, and Color Temp modes.
Procedure to set a custom white balance by pointing at a white object.
Situations where custom white balance may yield better results.
Scene programs for portraits, sports, and nightscapes.
Scene programs for snow, beach, and sunset shooting conditions.
Scene programs optimized for low light and spotlight situations.
Specific program for capturing fireworks, recommending tripod use.
Notes regarding picture smoothness, exposure, and stability for scene programs.
How to adjust color depth, sharpness, contrast, and brightness.
Optimizing audio pickup based on the surrounding environment using scene settings.
Manually adjusting the audio recording level for the built-in or external microphone.
How to show the audio level meter on the screen during recording.
Options to control the directionality of the built-in microphone (Monaural, Normal, Wide, Zoom).
Adjusting sound levels by targeting high or low frequencies using the equalizer.
Automatically reducing background wind noise when recording outdoors.
Mixing audio from the built-in mic with external sources and adjusting balance.
How to connect headphones and control the volume during recording and playback.
How to attach optional accessories like microphones or lights to the shoe.
Using SM-V1 Surround Microphone and DM-100 Directional Stereo Microphone.
Details on using the WM-V1 wireless microphone for distant subjects.
How to connect standard microphones via the MIC terminal.
Instructions for attaching VL-5 Video Light and VFL-2 Video Flash Light.
How to output color bars and a 1 kHz audio reference signal.
Displaying the waveform monitor in Programmed AE and Manual Exposure modes.
Using the edge monitor to assist with manual focusing.
Recording short scenes to create video stories or clips.
Activating pre-recording to capture footage before pressing the record button.
How to turn onscreen displays and icons on or off.
Information about the data code (date/time, camera settings) recorded with footage.
Using fade-in and fade-out transition effects for scenes.
Assigning frequently used functions to the CUSTOM button and dial.
How to assign and use the two available assignable buttons.
Backing up and loading camcorder settings to/from a memory card.
Navigating the date index screen and playing back recorded video scenes.
Controlling the speaker or headphone volume during playback.
Details on playback controls, fast/slow playback, and important usage notes.
Using the 3D Flip View for convenient browsing of recorded scenes.
Selecting content to play back by date, story, or photos.
Comparing playback modes: chronological date index vs. story gallery.
Procedure for deleting a single movie scene.
Deleting multiple scenes recorded on a specific date.
Removing individual scenes from a story.
Deleting scenes based on their assigned star rating.
Permanently deleting a story and all its associated scenes.
Dividing a scene into multiple parts at a chosen point.
Setting a specific start frame for playback within a long scene.
Creating short video clips by capturing segments from movies.
Extracting still photos from movie footage for printing or use.
Using Story Creator to select themes and record scenes for video stories.
Adding footage to specific categories within a story.
Choosing specific categories or scenes within a story theme.
Adding more footage to existing video stories.
Setting the camcorder to CINEMA mode for a cinematic look.
Applying various filters to achieve different cinematic visual styles.
Customizing the parameters like color depth and contrast for filters.
Applying graphical elements like stamps and drawings while recording video.
Instructions for drawing with pens and adding stamps to video.
Adding animated elements to video for decorative purposes.
Adding text captions and image frames (image mix) to video.
Detailed steps for using animated stamps and adding captions.
Detailed procedure for applying image mix frames with video.
Applying decorations to recorded scenes during playback.
Navigating the gallery and playing back video stories.
Filtering story playback based on the rating assigned to scenes.
Rating scenes immediately after they are recorded.
Rating scenes from the gallery list or during playback.
Adding background music from supplied tracks to movie or photo playback.
Balancing the original audio volume with the background music volume.
Connecting an external audio player for background music.
Procedures for copying or moving scenes within or between stories.
Changing the representative image for a story in the gallery.
Editing the title of a story, up to 14 characters.
Identification of AV OUT, HDMI OUT, USB, and COMPONENT OUT terminals.
Wiring diagram for connecting the camcorder to an HDTV via HDMI.
Wiring diagram for connecting the camcorder via component video output.
Wiring diagrams for composite video and SCART connections.
Wiring diagram for connecting the camcorder to a computer via USB.
Steps for connecting the camcorder to a TV and viewing recordings.
How to navigate and browse through photos in the index screen.
Displaying and browsing individual photos one by one.
Quickly navigating through a large number of photos using the scroll bar.
Setting up photo slideshows with music and transition effects.
Procedure for removing a single photo from the camcorder.
Removing multiple photos from the index screen.
Copying scenes recorded on a specific date to a memory card.
Copying scenes from a story based on their rating.
Copying a single photo to a memory card.
Copying multiple photos from the photo index screen to a memory card.
Transferring recorded movies to a computer using VideoBrowser software.
Transferring photos to a computer using ImageBrowser EX software.
Checking if the ImageBrowser EX software is installed correctly.
Steps for connecting the camcorder to a computer using a USB cable.
Transferring HD content to Blu-ray recorders or AVCHD devices via USB.
Transferring SD content to VCRs or digital recorders via analog connections.
Converting HD scenes to standard definition for web sharing.
Choosing scenes and setting bit rate for web upload conversion.
Connecting the camcorder to a computer for uploading videos.
Converting story scenes based on their rating for web upload.
Performing partial conversion of scenes or stories to standard definition.
Using an Eye-Fi card for automatic wireless uploads to web services.
Important guidelines and precautions for using an Eye-Fi card.
Uploading photos to platforms like Facebook using ImageBrowser EX.
Lists functions available in different recording modes and their page references.
Lists options available in the Edit Panel for different modes.
Lists options for managing stories and scenes within the gallery.
Lists all settings available under the Camera Setup menu.
Explanations for Digital Zoom, Focus Assistance, Auto Slow Shutter, and ND Filter settings.
Explanations for Surround Mic, Playback Setup options like Data Code and TV Type.
Lists settings related to recording modes, frame rates, and connections.
Explanation of x.v.Color and different file numbering methods.
Lists system setup options such as Language, LCD Brightness, and Volume.
Lists system setup options like Power Saving, Initialize, Time Zone, and HDMI settings.
Explanations for LCD Dimmer, Mirror Image, Notification Sounds, and Remote Control.
Explanations for Focus Ring, Power Saving, Battery Info, and other system settings.
Explanations for HDMI Control, 1080p Output, Distance Units, and Demo Mode.
Explanation of icons displayed during movie recording, including Story Creator.
Explanation of icons displayed during recording in Manual and Cinema modes.
Explanation of icons shown during movie playback and photo viewing.
Explanation of icons related to memory card status and battery level.
Basic troubleshooting steps for power source, recording, and playback issues.
Troubleshooting issues like failure to start recording or focus problems.
Resolving problems with recording movies or photos properly.
Troubleshooting background music playback and scene synchronization issues.
Resolving problems related to dividing scenes or copying recordings.
Diagnosing problems based on indicator lights and onscreen display messages.
Troubleshooting specific errors related to the Eye-Fi card.
Resolving issues with screen darkness, noise, horizontal bands, and viewfinder.
Addressing issues with audio recording levels or distortion.
Troubleshooting memory card errors and wireless controller malfunctions.
Resolving issues when connecting to TVs or other external devices.
Troubleshooting problems with HDMI-CEC and USB connections.
Resolving problems when saving photos to a computer.
Explanations for various error messages displayed by the camcorder.
Troubleshooting access problems with built-in memory or battery pack communication.
Resolving errors encountered during scene conversion or copying operations.
Troubleshooting issues related to standby mode and loading canvas files.
Resolving issues when playing back or recording on memory cards.
Troubleshooting errors that occur when recording to the built-in memory.
Addressing problems with accessing or reading memory cards.
Troubleshooting USB connection issues and file name errors.
Issues with memory card capacity, unsupported data, or dim screen.
Troubleshooting problems caused by the memory card's LOCK switch.
Resolving problems with scenes not found, divided, deleted, or rated.
Troubleshooting problems displaying or copying photos.
Issues with Eye-Fi card slots and mode restrictions for CUSTOM functions.
Handling problems related to photo quantity limits and unsupported gallery data.
Precautions for handling the camcorder, touch screen, and operating environment.
Advice on tripod mounting and maintaining stable video.
Safety guidelines for handling the stylus pen, especially concerning children.
Recommendations for storing the camcorder and battery packs for long periods.
Guidelines for battery pack care, cleaning terminals, and remaining time display.
Recommendation to use genuine Canon battery packs for safety and compatibility.
Precautions for memory card care, data backup, and avoiding damage.
Instructions for charging the camcorder's internal rechargeable lithium battery.
Safety warnings and handling instructions for the lithium button battery.
Proper procedures for disposing of the camcorder and memory, including initialization.
Instructions for cleaning the camcorder body, lens, and viewfinder with soft cloths.
How to clean the LCD touch screen safely with a soft lens-cleaning cloth.
Guidance on preventing condensation and what to do if it occurs.
Information on power adapter compatibility and PAL system TV playback abroad.
Important notes regarding compatibility with the Mini Advanced Shoe.
Overview and images of optional accessories compatible with the camcorder.
Details on compatible battery pack models like BP-808 and BP-819.
Information regarding the CG-800E battery charger.
Tables showing approximate charging and usage times for battery packs.
Table showing recording times for built-in memory based on mode and battery.
Table showing recording times for memory cards based on mode and battery.
Details on TL-H58 Tele-converter and WD-H58W Wide-converter lenses.
Information on optional video lights and lens filters.
Details on WM-V1 Wireless Microphone and SM-V1 Surround Microphone.
Details on the DM-100 Directional Stereo Microphone.
Information on the SC-2000 Soft Carrying Case and Canon accessory mark.
Details on recording system, media, sensor, LCD, and viewfinder specifications.
Specifications for the lens, AF system, and filter diameter.
Specifications for white balance modes and minimum illumination levels.
Specifications for video recording sizes and camcorder terminals.
Power supply, consumption, operating temperature, dimensions, and weight.
Technical specifications for the CA-570 Compact Power Adapter.
Technical specifications for the BP-808 Battery Pack.
Specifications for compatible music files, including audio encoding and sampling.
Specifications for image files used with the Image Mix function.
| Sensor type | CMOS |
|---|---|
| Total megapixels | 2.37 MP |
| Optical sensor size | 1/3 \ |
| Effective megapixels (image) | 2.07 MP |
| Digital zoom | 200 x |
| Optical zoom | 10 x |
| Image stabilizer | Yes |
| Focal length range | 4.25 - 42.5 mm |
| Interchangeable lens | - |
| Minimum aperture number | 2.8 |
| Focal length (35mm film equivalent) | 30.4 - 304 mm |
| Memory slots | 2 |
| Camcorder media type | Memory card |
| Disc types supported | No |
| Compatible memory cards | SD, SDHC, SDXC |
| Maximum memory card size | 64 GB |
| Internal storage capacity | 32 GB |
| Focus adjustment | Auto/Manual |
| Closest focusing distance | 0.1 m |
| Camera shutter speed | 1/2000 s |
| Display diagonal | 3.5 \ |
| Display resolution (numeric) | 922000 pixels |
| Viewfinder resolution | 260000 pixels |
| Viewfinder screen size | 0.24 \ |
| Photo effects | Cinema |
| Camcorder type | Handheld camcorder |
| Image processor | DIGIC DV III |
| Self-timer delay | 2, 10 s |
| Minimum illumination | 0.1 lx |
| Product color | Black |
| Video resolutions | 1440 x 1080, 1920 x 1080 pixels |
| Supported video modes | 1080p |
| Video formats supported | AVCHD |
| Maximum video resolution | 1920 x 1080 pixels |
| Bitrate at maximum video resolution | 24 Mbit/s |
| Audio system | Dolby Digital 2.0/5.1 |
| Headphone outputs | 1 |
| USB 2.0 ports quantity | USB 2.0 ports have a data transmission speed of 480 Mbps, and are backwards compatible with USB 1.1 ports. You can connect all kinds of peripheral devices to them. |
| USB 3.2 Gen 1 (3.1 Gen 1) Type-A ports quantity | 0 |
| Battery type | BP-827 |
| Battery capacity | - mAh |
| Battery life (max) | - h |
| Video recording time | 1.55 h |
| Depth | 210 mm |
|---|---|
| Width | 95 mm |
| Height | 82 mm |
| Weight | 565 g |

