Do you have a question about the Canon Optura Pi and is the answer not in the manual?
Warnings regarding exposure to rain, moisture, and electric shock risks.
Explanation of warning symbols for electric shock and important instructions.
Cautionary advice on preventing electric shock by matching plug slots.
Warnings against inserting objects and attempting self-servicing.
Conditions indicating damage that require professional servicing.
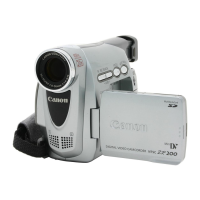
Overview of Digital Video, Progressive Scan CCD, LCD Screen, and Image Stabilizer.
Introduction to Dubbing, Digital Effects, and Audio Dubbing/A/V Insert Editing.
Instructions for connecting the camera to an AC outlet for power.
Instructions for charging the battery pack using the power adapter.
Step-by-step guide for physically attaching the battery pack to the camera.
Connecting the power adapter and AC outlet for charging.
Step-by-step instructions for loading and unloading a videocassette.
Using the cassette tab to prevent accidental recording or erasure.
Checklist of steps to complete before beginning recording.
Steps to start recording video using the camcorder.
Instructions for setting the program selector to Easy Recording mode.
How to start and pause video recording using the start/stop button.
Using the camcorder's optical zoom lens for framing shots.
Enabling and using the digital zoom feature for magnification.
Using the LCD screen for instant playback of recorded tapes.
Instructions for using PLAY, STOP, FF, and REW buttons for playback.
How to connect the camera to a TV using an S-video cable for higher picture quality.
How to connect the camera to a TV using audio/video input terminals.
Steps to turn off the optical image stabilizer via the camera menu.
Overview and list of options available in the camera menu.
Overview and list of options available in the VCR menu.
List of functions and corresponding page numbers accessible via the VCR menu.
Steps to take if the wireless controller is not functioning correctly.
Selecting the correct time zone and daylight saving time for accurate date/time display.
Step-by-step guide to setting the camera's date and time.
Detailed procedure for setting the camera's internal clock and date.
Detailed steps for setting the year, month, day, hours, and minutes.
Steps to start recording in Progressive Scan Mode for high-quality frames.
How to take still pictures while video recording is in progress.
Steps to take still pictures when the camera is in record pause mode.
Steps to select and set desired programs within the AE mode.
Steps to set up the multi-image screen and transition speeds.
Choosing between 16-bit and 12-bit audio modes for recording.
Steps to set and use the self-timer for recording movies.
Using the self-timer and PHOTO button for taking still photographs.
Locking exposure to control image brightness in changing light.
Manually adjusting exposure level and iris for desired brightness.
Manually setting shutter speed for stable shots of moving subjects.
Locking focus at a point set by autofocus.
Steps to adjust focus manually using the selector dial.
How to set white balance manually or use preset modes (Indoor/Outdoor).
Choosing whether to display date, time, or both on the data code.
Using the wireless controller for photo or date search on tape.
Using the ZERO SET MEMORY button to mark a tape position.
How the camera automatically stops at the zero set position after playback.
Steps to prepare the camera, TV, and VCR for dubbing.
Instructions for connecting the camera to a VCR for dubbing.
Positioning the camera to remotely control the VCR using infra-red signals.
Ensuring camera and VCR are set up correctly for initial dubbing.
Selecting the correct RECORDER setting for your VCR brand.
Using the chart to find and set the correct RECORDER setting for your VCR.
Selecting dubbing mode, faders, or effects before starting.
Positioning the tape in the VCR and camera for the start of dubbing.
How to start, pause, and stop the dubbing process.
Adjusting cut-in and cut-out points for precise scene start/end.
Using recorded digital timer to calculate optimal cut-in/cut-out values.
Step-by-step guide for manually editing scenes to a VCR.
Steps for dubbing digital video from another device to the camera.
Connecting camera to VCR/TV and preparing devices for analog recording.
Steps for recording audio/video from external sources via analog input.
Step-by-step guide for performing basic editing using analog line-in.
Inserting new scenes from VCR/camcorder over existing footage.
Steps to perform A/V Insert Editing using the camera and VCR.
Detailed steps for inserting scenes, including finding start points and pausing.
Adding sound from external sources or microphone to existing tapes.
How to connect external audio devices or microphones for dubbing.
Steps to select audio input (IN or MIC. IN) and start audio dubbing.
Pressing AUDIO DUB. and PAUSE buttons to start and stop audio dubbing.
Choosing audio output settings: STEREO1, STEREO2, MIX/FIXED, MIX/VARI.
List of output channel settings (L/R, L/L, R/R) for multi-channel audio.
Instructions for cleaning terminals, attaching terminal covers, and storing batteries.
Steps for inserting the CR2025 lithium battery into the backup battery holder.
DANGER!, WARNING!, and CAUTION notices regarding backup battery handling.
Cautions about handling the camera gently and not disassembling it.
Steps to protect the camera from condensation before moving to warm/humid places.
Steps to take if condensation is detected on the camera.
Common problems and solutions related to recording and playback.
Problems with digital effects, PLAY button, and screen display issues.
Problems with rough picture, no picture, or no sound during playback.
Troubleshooting issues with wireless controller, tally lamp, power indicator, and DV cable.
Detailed technical specifications for the OPTURA Pi camcorder.