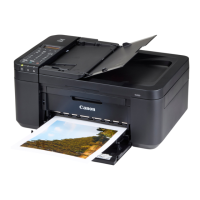
This document serves as a "Getting Started" guide for the Canon TR7600 series printer, outlining the initial setup process for both computers and smartphones, as well as essential maintenance and usage instructions.
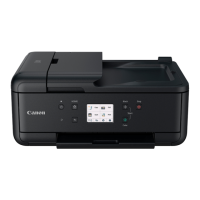
The Canon TR7600 series printer is a versatile all-in-one device designed for home and office use, capable of printing, scanning, copying, and faxing. Its primary function is to provide high-quality document and photo output, with features that streamline the setup and daily operation for users. The guide emphasizes an online setup approach, directing users to the Canon website for detailed instructions and videos, ensuring a comprehensive and interactive setup experience.
Usage Features:
The setup process is divided into several key stages, starting with the physical installation of the printer and then moving on to connecting it to various devices.
-
Initial Physical Setup:
- Unpacking and Preparation: The guide begins by illustrating how to properly hold the printer during unpacking to avoid damage. It then details the removal of all packing materials, including protective films and orange tapes, which are crucial for the printer's proper functioning. Failure to remove these materials can lead to malfunctions.
- Power Connection: Users are instructed to connect the power cord, noting that the plug is designed to be set at an angle.
- Turning On: The process involves opening the operation panel and pressing the ON button to power on the device.
- Language and Region Selection: Upon initial power-up, the printer prompts the user to select their preferred language and country/region from a list, ensuring a localized user experience.
- Print Setup Confirmation: After language selection, the printer displays a message indicating the start of print setup, directing users to continue by referring to the manual.
-
Ink Tank Installation:
- Accessing Ink Tank Compartment: The guide instructs users to open the scanning unit/cover to access the ink tank compartment. A caution is provided not to touch the print head holder until it stops moving, preventing potential injury or damage.
- Preparing Ink Tanks: Users must remove the tape and film from each ink tank before installation. It's emphasized to check that no tape or film remains, as this could impede ink flow. The orange cap on each ink tank must be slowly removed, with a warning not to squeeze the ink tank if the Y-shaped air hole is blocked. Additionally, users are advised not to touch specific red-highlighted areas on the ink tanks.
- Inserting Ink Tanks: Each ink tank is inserted into the print head and pressed down until it clicks, confirming proper seating.
- Verification: After installation, the printer screen displays the colors of the installed ink tanks (M, B, K, Y, PGBK, C), allowing users to verify correct installation. An important note clarifies that if a color is not displayed, it might indicate an incorrect ink tank or one not supported by the printer, advising users to install the correct or provided setup ink tank. This process is repeated for all ink tanks.
- Initialization: Once all ink tanks are installed, closing the scanning unit/cover initiates the printer's initialization process.
-
Loading Paper:
- Paper Loading for Alignment: The guide instructs users to load A4 or Letter-sized plain paper into the cassette for print alignment. Users are told to place the paper against the front paper guide and align the right paper guide to the width of the paper.
- Cassette Re-insertion: After loading paper, the cassette cover is attached, and the cassette is replaced in the printer. Users are advised to check from the side to confirm it looks like the diagram.
- Paper Output Tray: The paper output tray must be pulled out for printing.
-
Aligning Print Head:
- Initiating Alignment: The printer prompts users to perform alignment to improve print quality. Users tap "OK" to start this process.
- Printing Alignment Pattern: The printer then prints a Print Head Alignment pattern.
- Placing Pattern on Platen: Users are instructed to open the document cover, place the printed pattern print-side down on the platen, aligning it with the arrow mark on the device and the pattern.
- Completing Alignment: After placing the pattern, users close the document cover and tap "OK" to complete the alignment.
- Alignment Success: A screen confirms "Alignment successful. This procedure is now complete."
-
Connecting to Devices:
- Connection Options: The guide presents options for connecting the printer:
- Without connecting to any other devices: Setup is complete, with a note to refer to page 8 for fax setup.
- Connecting to a computer or smartphone: Users proceed to the next page for detailed instructions.
- Anonymous Usage Information: The printer asks for cooperation in allowing it to send anonymous usage information to Canon. Users tap "Next" and follow on-screen instructions, referring to the "Safety and Important Information" document for details.
- Main Screen Verification: Users verify that the main screen, showing options like Copy, FAX, Scan, and Print, appears, confirming successful setup.
-
Connecting to a Computer (7-a):
- Access Canon Website: Users access the Canon website (https://ij.start.canon) from their computer.
- Select Setup: They select "Set Up" on the website.
- Enter Model Name: Users enter the printer's model name and click "Go."
- Start Setup: Click "Start."
- Choose Connection Type: Click "(B) Connecting to a Computer/Smartphone." These steps are primarily for Windows users.
- Download and Run File: Users click "Download" and then run the downloaded file.
- Start Setup (Software): Click "Start Setup" within the Canon software.
- Follow On-Screen Instructions: Users follow the on-screen instructions to complete the installation. The guide notes that this may take some time.
- Connecting to Smartphone (Optional): Instructions for connecting to a smartphone are provided on page 7.
- Fax Setup (Optional): Instructions for fax setup are provided on page 8.
- Using Setup CD-ROM: An alternative method using the Setup CD-ROM is provided for users without internet access, directing them to run
EasySetup.exe or SETUP.exe from the win folder.
-
Connecting to a Smartphone (7-b):
- Install Canon PRINT Inkjet/SELPHY App: Users install the "Canon PRINT Inkjet/SELPHY" app from the App Store or Google Play, or by accessing the Canon website.
- Add Printer: Users open the installed app and follow the on-screen instructions within the app to add their printer.
- Printing from Smartphone: Once the printer is added, users can print from their smartphone. Instructions for loading photo paper are on page 8.
- Fax Setup (Optional): Instructions for fax setup are on page 8.
-
Loading Photo Paper:
- Rear Tray Only: Photo paper can only be loaded in the rear tray.
- Open Rear Tray and Extend Support: Users open the rear tray cover and extend the paper support.
- Load Photo Paper: Several sheets of photo paper are loaded with the print side facing up. The side paper guide is slid against the edge of the paper stack.
- Close Feed Slot Cover: The feed slot cover is closed. On-screen instructions guide users to set information for the loaded paper.
Maintenance Features:
The manual implicitly covers several maintenance aspects through its setup instructions:
- Proper Unpacking: The emphasis on removing all packing materials and tapes is a critical initial maintenance step, preventing internal blockages or damage.
- Correct Ink Tank Installation: Detailed instructions for installing ink tanks, including removing protective films and caps, and verifying correct color display, ensure the printer's ink system functions optimally from the start. Warnings about not touching specific areas or squeezing ink tanks prevent user-induced damage.
- Print Head Alignment: The print head alignment procedure is a crucial maintenance step that ensures print quality. By guiding users through printing a pattern and scanning it, the printer self-calibrates for optimal output.
- Paper Loading Best Practices: Instructions for loading paper correctly, including aligning paper guides, help prevent paper jams and ensure smooth feeding, contributing to the printer's longevity and consistent performance.
Online Resources:
Throughout the guide, there is a strong emphasis on leveraging online resources:
- Online Setup: Detailed instructions and videos are available on the Canon website (https://ij.start.canon).
- Instructional Videos: QR codes and URLs are provided for accessing instructional videos, offering visual guidance for various setup steps.
- Online Manual: The guide directs users to access the online manual for further assistance.
- FAX Setup Guide: For fax functionality, users are directed to the Canon website to access the FAX Setup Guide.
This comprehensive guide ensures that users can set up their Canon TR7600 series printer efficiently and correctly, covering everything from physical installation to connecting with various devices and performing essential maintenance tasks.