Do you have a question about the Canon PowerShot G2 (PC1015) and is the answer not in the manual?
Recommend shooting trial images to confirm camera operation before photographing important subjects.
Digital cameras are intended for personal use; avoid infringing copyright laws and regulations.
Camera warranty is only effective in the country of sale; abroad, return to country of sale for claims.
Read and understand safety precautions for safe and correct operation to prevent injuries or damage.
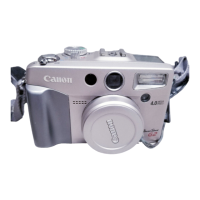
Identifies and describes the external parts and connectors on the front of the camera.
Identifies and describes the external parts and connectors on the back of the camera.
Details the various buttons, dials, and indicators on the camera for operation.
Explains the function and use of the main dial and mode dial for switching modes.
Describes the information shown on the camera's display panel, including icons and settings.
Provides step-by-step instructions for charging the camera's battery pack before first use.
Details the procedure for correctly inserting the battery pack into the camera.
Explains how to use an AC adapter for continuous camera use or connecting to other devices.
Describes using a car cigarette lighter socket to charge battery packs or power the camera.
Guides on how to properly insert a CF card into the camera's card slot.
Instructions for setting the camera's date and time for accurate image metadata.
Explains how to select the desired language for camera menus and messages.
Details how to securely attach the camera strap for carrying.
Instructions for fitting the lens cap to protect the camera lens.
Information on using the optional soft case for carrying the camera and accessories.
Step-by-step guide on how to power on the camera using the main dial.
Details the camera's automatic power-off feature to conserve battery life.
Explains how to switch between the shooting and image replay modes using the main dial.
Information on using the LCD monitor for shooting, replaying, and adjusting settings.
How to cycle through different information display modes on the LCD monitor.
Explains the two-stage action of the shutter button for focus and shooting.
Guide on composing shots using the camera's optical viewfinder.
Instructions on how to use the zoom lever for optical and digital zoom adjustments.
Procedure for navigating camera menus to adjust various shooting and playback settings.
Explains how to use Auto mode where the camera automatically sets all exposure parameters.
Methods to view images immediately after they are taken, beyond the default 2-second display.
How to adjust how long images are displayed on the LCD monitor after shooting.
Guides on using the camera's built-in flash and its different modes.
A chart detailing flash mode availability across different shooting modes.
How to adjust image resolution and compression settings to suit various output needs.
Explains how to switch between JPEG and RAW file formats for image capture.
Details the Program AE mode where the camera sets shutter speed and aperture automatically.
Shutter-priority AE mode: camera sets aperture, user sets shutter speed for motion effects.
Aperture-priority AE mode: camera sets shutter speed, user sets aperture for depth of field control.
Manual mode: user controls both shutter speed and aperture for full creative exposure control.
How to choose the AF frame for precise focusing on off-center subjects.
How to adjust exposure compensation to correct subject brightness in challenging lighting.
Setting white balance to match light sources for accurate color reproduction.
Procedure for setting a custom white balance using a white or gray reference.
Takes three shots with varying exposures to ensure optimal exposure in difficult conditions.
How to adjust the intensity of the flash output for flash photography.
Locks exposure and focus settings, useful for high-contrast scenes or backlit subjects.
Locks flash exposure settings for consistent flash illumination on a subject.
Explains how to switch between Evaluative, Center-Weighted, and Spot metering modes.
Details the different light metering options available for exposure measurement.
How to choose the specific point for spot metering (center or AF frame).
Procedure to switch the metering method to spot AE point.
Tips for autofocusing on subjects that may pose challenges for the AF system.
Methods to lock focus on a subject at a specific distance for recomposing shots.
Explains how to manually set focus for precise control over image sharpness.
How to select between Continuous and Single AF modes for different shooting scenarios.
Adjusting ISO speed, contrast, sharpness, and saturation for desired image output.
Options for managing file numbering when inserting new CF cards or continuing sequences.
A chart summarizing which functions are available in each camera shooting mode.
Instructions for viewing recorded images one by one on the LCD monitor.
How to zoom in on images to check details during single image replay.
Displaying up to nine images simultaneously on the LCD monitor for quick browsing.
Using the jump bar to quickly advance or go back through images in replay modes.
How to play back movie clips recorded by the camera.
Instructions for rotating images 90 or 270 degrees clockwise on the LCD monitor.
How to start and manage automated slide shows of recorded images.
How to protect important images from accidental erasure.
Procedure for deleting individual images from the CF card.
How to erase all images from the CF card at once, excluding protected ones.
Instructions for initializing a CF card, erasing all data, including protected images.
How to select individual images or all images on the CF card for printing.
Options for setting print type (Standard, Index, Both), date, and file number on prints.
How to reset all print settings to their default values.
Step-by-step guide for connecting a compatible printer to the camera using interface cables.
Instructions on how to initiate printing from the camera after connecting a printer.
How to specify the desired number of copies for each selected image.
Choosing print styles like Standard, Index, Borders, and Date.
Specifying which part of an image to print, including size and position adjustments.
Using DPOF settings to print via a Bubble Jet Printer with direct print functionality.
Details menu items and settings for the Recording (Rec.) menu.
Explanation of the digital zoom function and its settings.
Reference for autofocus modes: Continuous and Single.
Details on Evaluative and Center-Weighted metering options.
Reference for selecting the spot metering point: Center or AF Point.
Reference for adjusting image contrast levels.
Reference for adjusting image sharpness.
Reference for adjusting image color saturation.
Details menu items and settings for the Playback (Play) menu.
Details menu items and settings for the Setup menu.
Reference for setting the camera's date, time, and format.
Reference for formatting CF cards.
Reference for changing the camera's menu and message language.
Reference for selecting the video output standard (NTSC or PAL).
Instructions for installing the date battery into the wireless controller.
How to remove the date battery from the wireless controller.
Steps for attaching the Macro Ring Lite MR-14EX to the camera.
Description of the wide converter lens and its effect on focal length.
Description of the tele-converter lens and its effect on focal length.
Details of the close-up lens for easier macro shooting.
Instructions on how to attach conversion and close-up lenses to the camera.
Procedure for replacing the camera's internal date battery when it is depleted.
Guidelines for cleaning the camera body, lens, viewfinder, and LCD monitor.
Lists common camera problems, their causes, and suggested solutions.
Explanation of error and message codes that may appear on the camera's display panel.
Details various messages that may appear on the LCD monitor during operation.
Technical specifications of the camera and its accessories.
| Type | Digital Camera |
|---|---|
| Effective Pixels | 4.0 Megapixels |
| Shutter Speed | 15 - 1/1000 sec |
| ISO Sensitivity | 50, 100, 200, 400 |
| Interface | USB, Video Out |
| Image Sensor | 1/1.8 inch CCD |
| Aperture | f/2.0 - f/2.5 |
| LCD Monitor | 1.8" |
| Optical Viewfinder | Yes, real-image zoom |
| Exposure Compensation | -2 to +2 EV in 1/3 EV steps |
| White Balance | Auto, Daylight, Cloudy, Tungsten, Fluorescent |
| Flash Range | 0.7 - 3.0m (T) |
| Shooting Modes | Auto, Program, Shutter priority, Aperture priority, Manual |
| Movie Mode | 320 x 240 (15 fps) |
| Storage Media | CompactFlash |
| File Formats | JPEG |
| Power Source | Rechargeable Lithium-ion Battery |
| Battery | Lithium-Ion Battery |