Do you have a question about the Canon Prima AF-8 Date and is the answer not in the manual?
Camera is not water-resistant. Handle with care to avoid water damage.
Store camera in a cool, dry, dust-free environment, away from direct sunlight.
Avoid disassembling the camera due to high-voltage circuitry inside.
Handle batteries with care; avoid disassembly, fire, or high temperatures.
Use a blower brush for dust; avoid fluids. Seek service for thorough cleaning.
Request manual inspection for film at airports to prevent X-ray damage.
Develop exposed film promptly to maintain color quality.
Explains the symbols and conventions used throughout the instruction manual.
Button used to rewind the film.
Button used to take a picture.
Displays the number of exposures taken or remaining.
The window through which the photographer views the scene.
Window for the camera's light metering system.
Lamp indicating red-eye reduction or self-timer operation.
The built-in flash unit for illumination.
Sensor that receives light for autofocus.
Dial to select shooting modes and power.
The optical lens of the camera.
Button used for specific functions, possibly for winding or date setting.
Attachment point for the camera strap.
Part of the strap attachment system.
Emits light for autofocus.
The window through which the photographer views the scene.
Light indicating camera status or readiness.
Window to check the film status.
Cover for accessing the battery compartment.
Threaded hole for attaching a tripod.
Button used for setting and confirming values.
Button used for selecting options or values.
Button used for changing shooting modes.
Latch for opening and closing the camera's back cover.
Displays the imprinted date.
Camera uses two LR6 AA-size batteries.
Open the battery cover located on the bottom of the camera.
Insert batteries with correct +/- terminal orientation and close cover.
Turn mode dial to AUTO to power on and check battery status.
Ensure the lens cover is fully open before powering on.
Green indicator lighting up indicates good battery condition.
Always check the batteries before taking pictures.
Do not use nickel-cadmium or lithium batteries.
Replace both batteries simultaneously with new ones.
Remove batteries if the camera will not be used for an extended period.
Approx. 50 rolls of 24-exp film with 50% flash use (alkaline batteries).
Long-life alkaline batteries are recommended.
Use DX-coded ISO 100, 200, or 400 film for automatic speed setting.
Open the camera's back cover to load film.
Load a new film roll into the camera.
Pull the film tip across to the marked position.
Close the back cover securely after loading film.
Film advances automatically; "1" appears on the frame counter.
If 'S' is displayed in the frame counter, reload the film.
Insert batteries and press shutter until '1' appears if done after film loading.
Camera is designed for negative film only; slide film cannot be used.
Hold the camera firmly with both hands for sharp pictures.
Support the camera with both hands to prevent movement.
Rest elbows lightly against your body for better stability.
Align viewfinder with forehead for proper viewing.
Do not block lens, AF emitters/receptors, or flash with fingers or hair.
Explains the different framing areas within the viewfinder.
Compose the picture within this main frame.
Use this frame for close-up shots at specific distances.
Indicates camera readiness (lights up) or low power/flash charge (off).
The shutter button operates in two stages: half-press for focus, full-press for exposure.
Press halfway to focus; the green indicator will light up.
Press fully to release the shutter.
Press the shutter button slowly and gently.
Shutter will not operate unless the lens cover is fully open.
A short delay exists between pressing the shutter and its operation.
Hold camera still until film winding sound is heard.
Opening lens cover activates auto mode with auto flash.
Maintain at least 0.8m (2.6 ft) distance from the subject.
Center the subject in the viewfinder.
Half-press shutter to focus and check green indicator.
Compose the shot while holding the shutter button halfway.
Press the shutter button completely to take the picture.
Flash fires automatically in low light conditions.
Close the lens cover when the camera is not in use to protect the lens.
Film automatically rewinds after the last frame is exposed.
Frame counter numbers decrease during film rewinding.
Ensure counter shows "S" and motor stops before removing film.
Check that the frame counter has returned to 'S'.
Open the back cover to access the film.
Carefully remove the film from the camera.
Press the film rewind button to initiate mid-roll rewind.
Exposures beyond indicated frame count may be cut off.
Replace batteries if they run out during rewind, then press rewind button again.
Use the strap fixture projection to press the rewind button.
Choose the flash mode suitable for the subject or shooting environment.
Turn the mode dial to select the desired shooting mode.
Turns the camera off.
Flash fires automatically with red-eye reduction in low light.
Flash fires automatically in all lighting conditions.
Flash will not fire, using only available light.
Delays shutter release for group shots or self-portraits.
In low light, red-eye lamp lights, then flash fires.
Turn the mode dial to the AUTO setting.
Red-eye occurs when flash light reflects off the subject's retina in low light.
Red-eye lamp contracts pupil, reducing red-eye. Activate before flash.
Half-press shutter, wait for green light, then fully press after ~1 sec.
Pressing shutter fully before green light prevents red-eye function.
Key guidelines to ensure the red-eye reduction function is effective.
Subject must look directly at the red-eye lamp for the function to work.
Keep within 2 meters (6.6 ft) of the subject for best results.
The effectiveness of red-eye reduction can vary between individuals.
Increase ambient light levels for better red-eye reduction.
Flash fires regardless of lighting; useful for backlit subjects.
Turn the mode dial to the flash ON setting.
Specifies the effective flash range for different ISO film speeds.
Red-eye reduction activates when shutter is half-pressed in low light.
Use when flash is prohibited or only available light is desired.
Turn the mode dial to the flash OFF setting.
Use self-timer to include yourself; place camera on a steady surface or tripod.
Turn the mode dial to the self-timer setting.
Center the subject in the viewfinder for the self-timer shot.
Green indicator lights up when shutter is pressed and self-timer starts.
Red-eye lamp flashes; shutter releases after ~10 seconds.
Turn the mode dial to any setting other than self-timer.
Do not stand in front of the camera when pressing shutter to avoid incorrect focus.
Lamp blinks rapidly for the last 2 seconds; stays lit if red-eye reduction is active.
Press MODE button to cycle through date/time formats for imprinting.
Use the strap fixture projection to press the buttons.
Confirmation mark flashes when date/time is imprinted.
Position imprints over dark areas for better visibility.
Built-in calendar up to 2019; procedure for correcting date after travel or battery replacement.
Press MODE button to display the date format for correction.
Press SELECT button until the desired digit blinks.
Press SET button to correct the selected digit.
Press SELECT until all digits stop blinking to complete setting.
Always set the time as well as the date for correct calendar function.
Press SET to advance digits; hold to scroll continuously.
Use the strap fixture projection to press the buttons.
Built-in calendar up to 2019; procedure for correcting time after travel or battery replacement.
Press MODE button to display the time format for correction.
Press SELECT button until the desired digit blinks.
Press SET button to correct the selected digit.
Press SELECT until all digits stop blinking to complete setting.
Press SET to advance digits; hold to scroll continuously.
Use the strap fixture projection to press the buttons.
Procedure for replacing the date battery when imprints become faint.
Replace battery when imprinted digits become faint. Uses one CR2025 lithium battery.
Open the back cover and the date battery cover.
Remove the old battery and insert a new one with the positive terminal facing up.
Close the date battery cover, then the main back cover.
Readjust the date and time after replacing the battery.
Date display changes; reset date and time after replacement.
Keep the battery out of reach of small children.
Troubleshooting steps for when the green indicator is not illuminated.
Troubleshooting steps when the shutter button does not operate.
Troubleshooting steps for blurry or unfocused images.
Troubleshooting steps for when the entire picture appears cloudy.
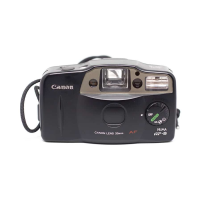
35mm fully automatic lens-shutter AF camera.
Film display size is 24 x 36mm.
Features a Canon 35mm f/4.5 lens.
Effective shooting distance from 0.8m/2.6ft to infinity.
Shutter with combinable program settings.
Inverted Galilean viewfinder.
Automatic film loading with blank film advance.
Automatic film advance; mid-roll rewind is possible.
Counter advances during winding, counts down during rewind.
Window at the back of the camera to check film.
Automatic setting of film speed (ISO 100 or 400) via DX coding.
10-sec electronic timer activated by shutter press; lamp blinks during operation.
Specifies the metering range at ISO 100.
Metering values for Flash AUTO/ON modes.
Metering values for Flash OFF mode.
Auto flash in low light, forced ON/OFF, linked with red-eye reduction.
Effective flash range for ISO 100 and ISO 400 film.
Time taken for the flash to recharge, approximately 5 seconds.
Requires two LR6 AA batteries; Ni-Cd/lithium not usable.
Approx. 50 rolls of 24-exp film with 50% flash use using alkaline batteries.
Physical dimensions of the camera, with and without date back.
Weight of the camera, with and without date back (excluding battery).
Details on the date and time imprinting function.
Uses LCD panel and auto-calendar with quartz clock for imprinting.
Available formats for imprinted date and time data.
The color used for imprinting is orange.
Powered by a single CR2025 lithium battery.
All specifications are based on Canon's Standard Test Method.
Specifications may be changed without prior notice.
| Focus Type | Auto Focus |
|---|---|
| Viewfinder | Real Image Viewfinder |
| Date Imprint | Yes |
| Power Source | 2 x AA Batteries |
| Type | Compact Camera |
| Film Speed Setting | ISO 100/200/400 |
| Flash | Built-in Flash |