

J
John CamachoAug 14, 2025
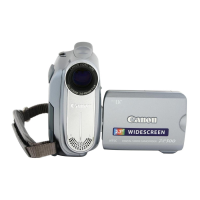
What to do if memory card is full on Canon ZR400?
- DDebra MendezAug 14, 2025
If the memory card in your Canon Camcorder is full, replace it with a new one or erase some images to free up space.
What to do if memory card is full on Canon ZR400?
If the memory card in your Canon Camcorder is full, replace it with a new one or erase some images to free up space.
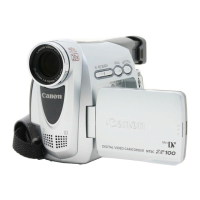
What to do if card error occurred on Canon Camcorder?
If a card error occurred on your Canon Camcorder, turn off the camcorder. Remove and reinsert the memory card. If the flashing persists, format the memory card.
How to adjust speaker volume on Canon ZR400 Camcorder?
If the speaker volume is turned off on your Canon Camcorder, adjust the volume using the SET dial.
How to adjust viewfinder on Canon ZR400?
If the viewfinder is not adjusted on your Canon Camcorder, adjust it with the dioptric adjustment lever.
What to do if file number reached maximum value on Canon ZR400?
If the file number has reached its maximum value on your Canon Camcorder, set [FILE NUMBERS] to [RESET] and insert a new memory card.
How to correctly insert memory card in Canon Camcorder?
If the memory card was not facing the correct direction in your Canon Camcorder, turn the memory card over and reinsert it.
What to do if battery pack is damaged on Canon ZR400 Camcorder?
If the battery pack of your Canon Camcorder is damaged, use a different battery pack.
What to do if my Canon ZR400 Camcorder stopped operating to protect the tape?
If the camcorder stopped operating to protect the tape, unload and reload the cassette.
Read, retain, heed warnings, and follow all instructions for safe operation.
Proper cleaning, avoiding hazards, power sources, and grounding.
Protect from lightning, overloads, liquids, and refer servicing to qualified personnel.
Explains symbols and references used throughout the manual.
Details camcorder operating modes based on POWER and TAPE/CARD switch.
Copy recordings to VCR/digital devices via analog/DV, or from analog/digital sources.
Convert analog to digital signals and add audio to recordings.
Transfer video recordings to a computer using a DV cable.
Procedure for inserting the battery into the wireless controller.
Steps for attaching and charging the camcorder's battery pack.
Connect to mains power for continuous operation and battery charging.
Adjust viewfinder for clear vision using the dioptric adjustment lever.
Secure lens protection and adjust grip belt for comfortable handling.
Procedure for inserting the battery into the wireless controller.
Rotate LCD panel 90 degrees outward or 180 degrees inward for viewing flexibility.
Adjust LCD screen brightness for better visibility in different lighting conditions.
Select time zone and adjust for daylight saving time.
Set the year, month, day, hours, and minutes for accurate recording.
Test recording and head cleaning before starting.
Start, pause, and stop recording movies onto the tape.
Steps to safely turn off the camcorder after recording.
Details on pixel quality and auto power off features.
Rotate LCD for subject viewing; option for mirrored or normal display.
Review last few seconds of recording to verify quality.
Locate specific points in tape using forward/reverse search.
Control zoom using the lever or buttons for 14x optical zoom.
Proper grip for stable handheld shooting.
Use external support like walls or tripods for steadier shots.
Tips for optimal lighting when recording outdoors.
Connect camcorder to TV/VCR using AV terminals and STV-250N cable.
Steps to access and change camcorder settings via menus.
Automatic settings for effortless recording.
Details on modes like Auto, Sports, Portrait, Spotlight, Sand & Snow, Low Light.
Select audio quality and channel configuration for recordings.
Enable or disable automatic wind noise reduction.
Apply effects like Black & White in CARD CAMERA mode.
Choose to display date or time in the data code.
Choose data code combinations like camera data or date/time.
Control audible beeps for camcorder operations.
Modify the brightness level of the LCD screen.
Disable the remote sensor to save power or prevent accidental activation.
Disable image stabilizer for tripod use or specific shooting conditions.
Prevent the camcorder from automatically starting its demonstration mode.
Select from Superfine, Fine, or Normal quality settings.
Choose resolution between 1152x864 and 640x480 pixels.
Capture still images from tape playback.
Capture still images from external analog or digital video devices.
Start and stop recording movies onto the memory card.
Capture movie footage from tape playback onto the memory card.
Capture movies from analog or digital devices.
Understand indicators for card access, movie time, and card capacity.
Choose from three focus points for sharp subject focus.
Disable focus priority for timing over focus.
View images automatically one after another.
Display up to 6 images at once for quick selection.
Quickly locate images without displaying them individually.
Select individual images to prevent accidental deletion.
Protect images directly from the index screen display.
Delete individual images from the memory card.
Delete all images (except protected ones) from the memory card.
Connect camcorder to a PictBridge-compliant printer using the cable.
Print images directly using the Print/Share button.
Configure print options like number of copies before printing.
Specify the number of copies for each selected image.
Configure print style options like layout, date imprint, and effects.
Select paper size, type, and layout for printing.
Enable or disable date printing on the image.
Choose images and set copy counts for printing.
Select images for printing directly from the index screen.
Clear all pending print orders from the camcorder.
Initiate printing and resume if interrupted.
Transfer all images, new images, or use transfer orders.
Set up transfer orders for specific images.
Transfer a single chosen image to the computer.
Set a still image as computer wallpaper.
Define transfer order for selected images.
Clear all previously set transfer orders.
Hide on-screen information on the LCD for a cleaner playback view.
Control camcorder display visibility when connected to a TV.
Icons and indicators for card camera mode operations.
Icons and indicators for card play mode operations.
Explanations for common camcorder messages and their solutions.
Explanations for memory card specific messages and solutions.
Guidelines for safe handling to prevent damage.
Recommendations for storing and cleaning the camcorder body, lens, and LCD.
Instructions for cleaning viewfinder screen and video heads.
Recognize and manage condensation to prevent camcorder damage.
Safe handling guidelines for lithium button batteries.
Proper care and handling of video cassettes.
Use the write-protect tab to prevent accidental tape erasure.
Guidelines for handling memory cards to prevent damage or data loss.
Information on using the camcorder abroad with different power supplies.
Playing back recordings on NTSC system TVs in supported countries.
Solutions for problems related to power supply and battery.
Troubleshooting common problems during recording and playback.
Solutions for problems encountered during playback.
Troubleshooting problems with dubbing and DV terminal.
Information on compatible battery packs and charging accessories.
Details on FS-28U filter set for lighting control.
Accessories for secure handling and portability.
Options for storing and transporting the camcorder and accessories.
Technical details on video system, sensor, lens, and more.
Details on recording media, file formats, and image compression.
Information on AV, DV, and USB terminal specifications.
Details on power consumption, temperature, and dimensions.
Technical specifications for power adapter, battery pack, and memory card.
| LCD screen size | 2.4-inch |
|---|---|
| LCD screen resolution | approx. 112, 000 pixels |
| viewfinder size | 0.33-inch |
| sensor type | CCD |
|---|---|
| sensor size | 1/4.5-inch |
| total pixels | approx. 1, 330, 000 pixels |
| focal length | f=3.7-51.8mm |
|---|---|
| maximum aperture | f/1.8-3.2 |
| zoom | 14x power zoom |
| dimensions | 2.0 x 3.7 x 5.1 in. (51 x 93 x 130mm) |
|---|---|
| weight | 15.2 oz. (430g) |