10 11
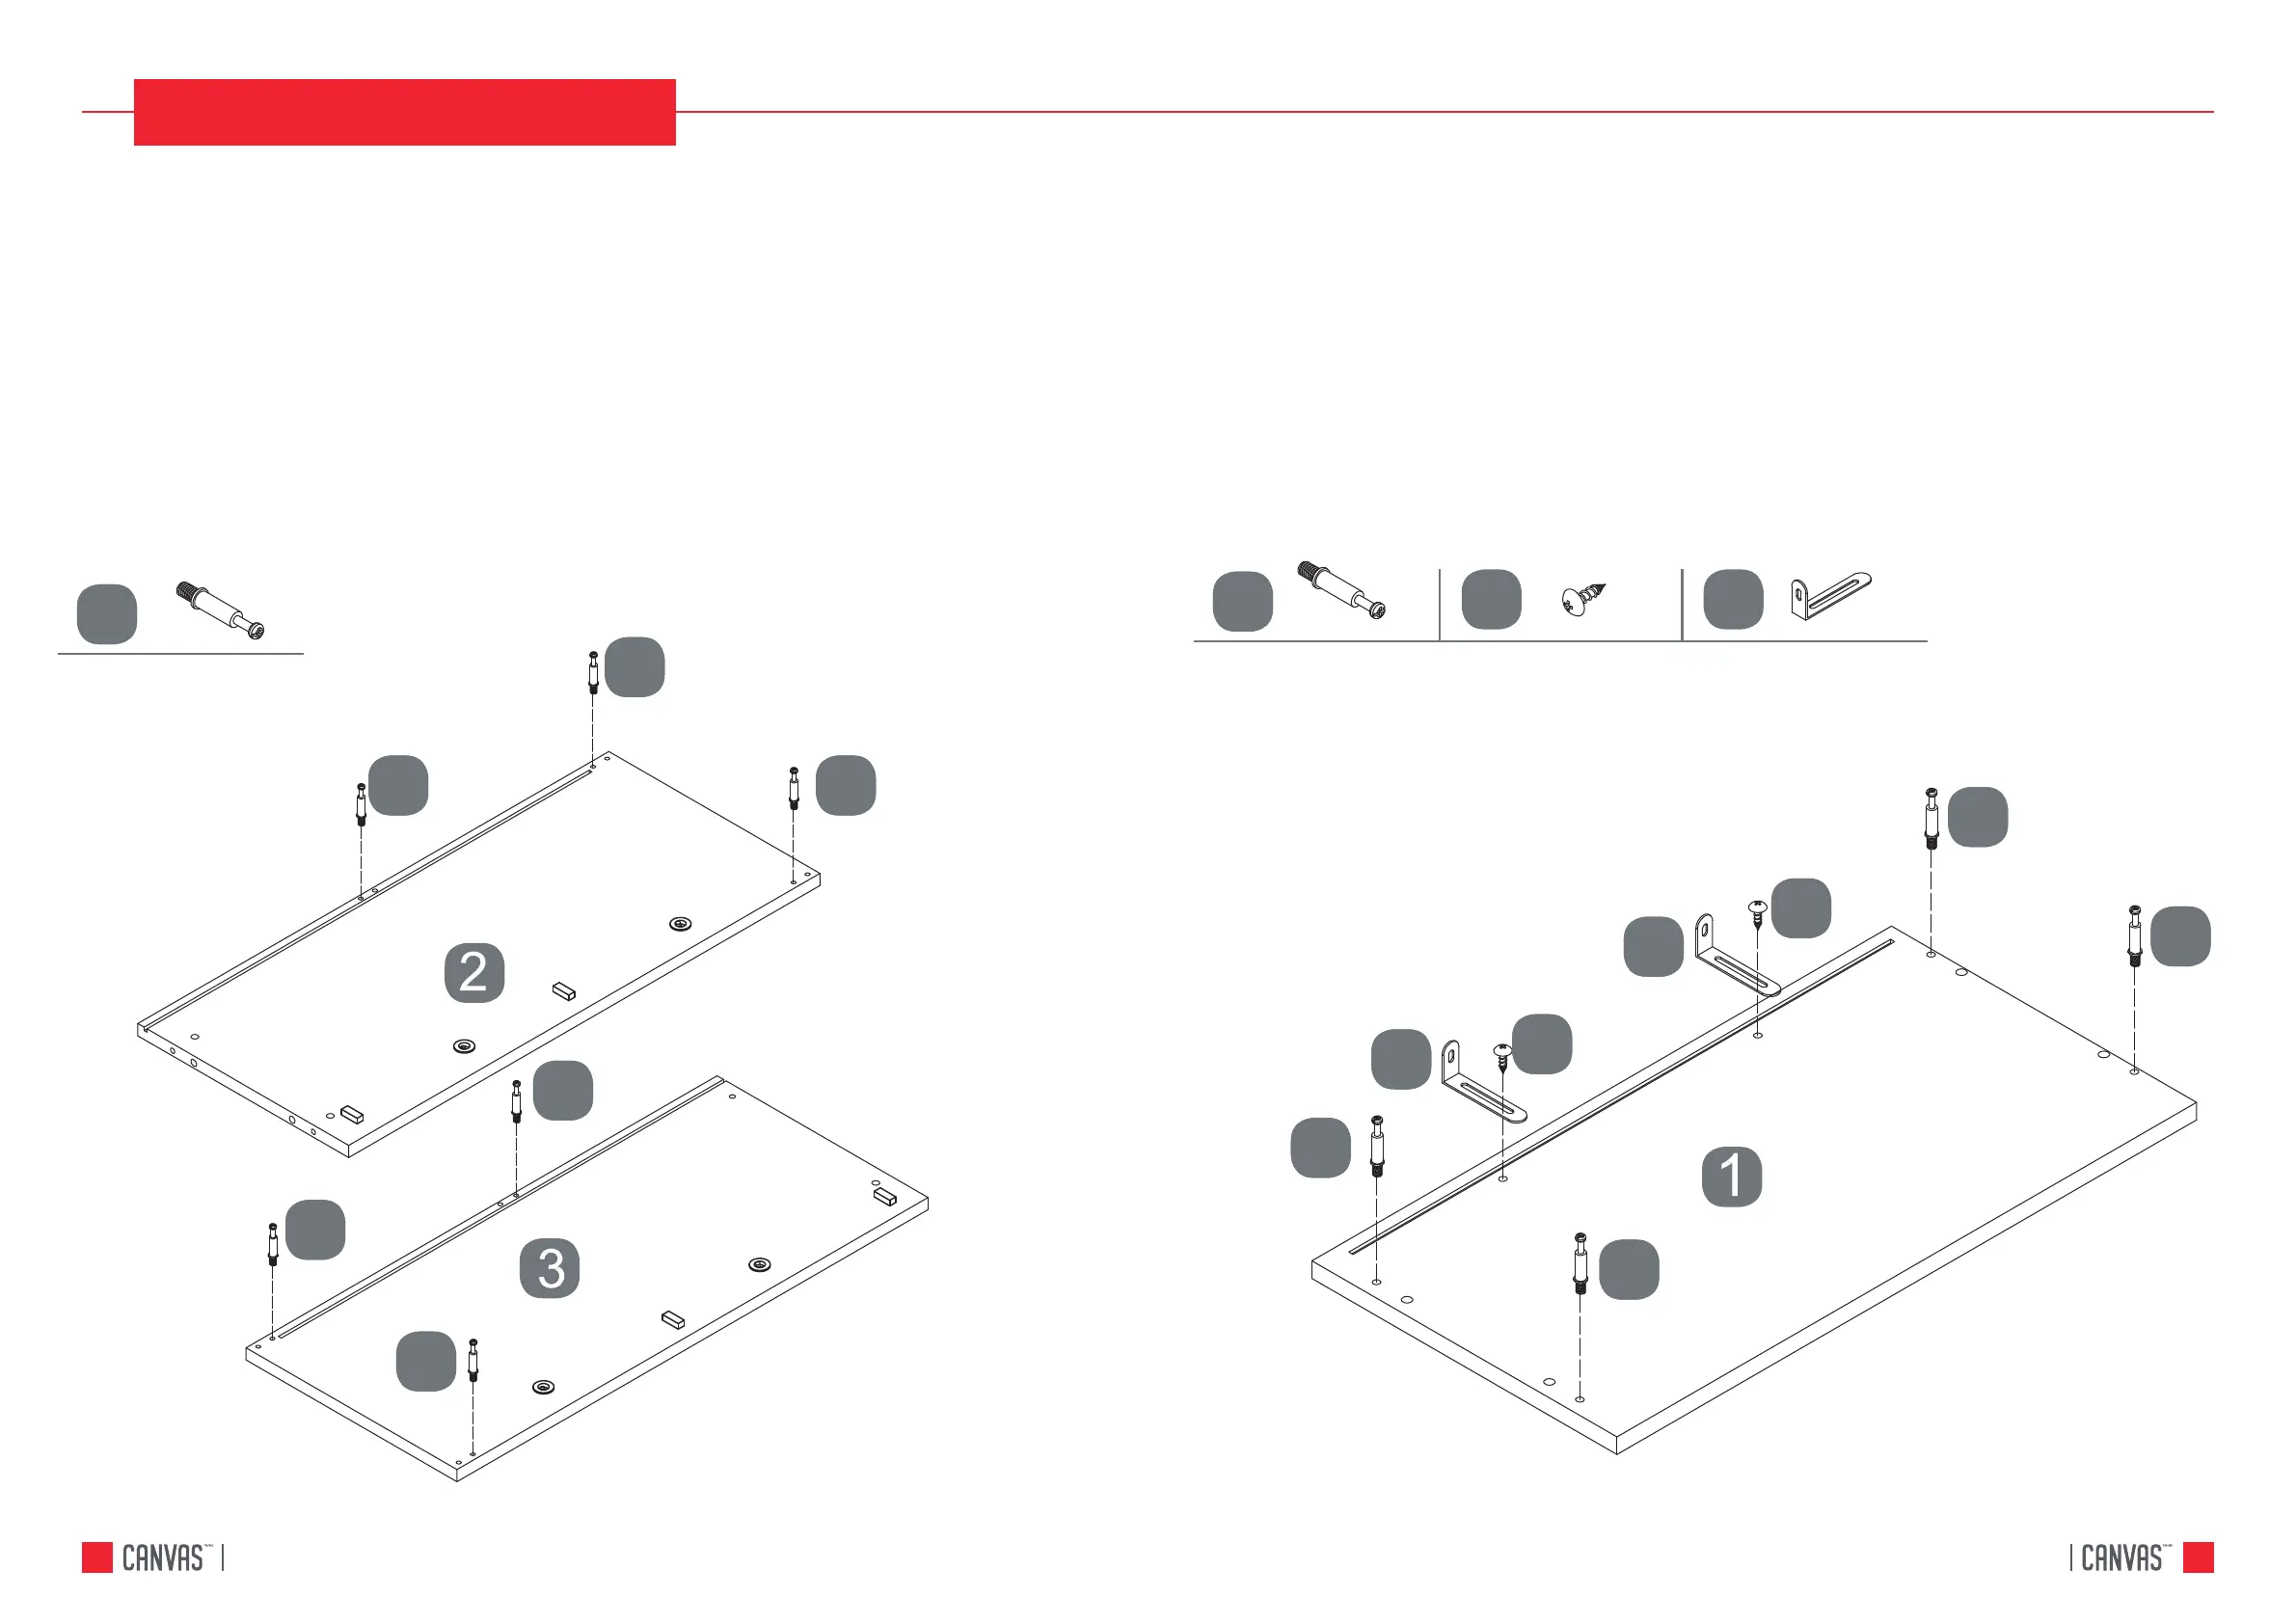
STEP 3
REQUIRES A, 2, 3
Insert three ANGLE HEAD SCREWS (A) into LEFT END (2).
Hand tighten the ANGLE HEAD SCREWS.
Insert three ANGLE HEAD SCREWS (A) into RIGHT END (3).
Hand tighten the ANGLE HEAD SCREWS.
STEP 4
REQUIRES A, K, H, 1
Insert four ANGLE HEAD SCREWS (A) into the TOP (1).
Fasten two ANTI-TIP HARDWARE (K) to the TOP (1), using two Pan Head Screws (H).
Hand tighten two PAN HEAD SCREWS (H).
NOTE: Ensure the ANGLE HEAD SCREWS are in the exact holes.
HUBBARD 2-TIER SHOE STORAGE CABINET
HUBBARD 2-TIER SHOE STORAGE CABINET
STEP-BY-STEP INS STRUCTION
A
A
A
A
A
A
A
A
K
K
H
H
A
A
A
A
H
A
K
 Loading...