ASSEMBLY / MONTAJE / MONTAGE
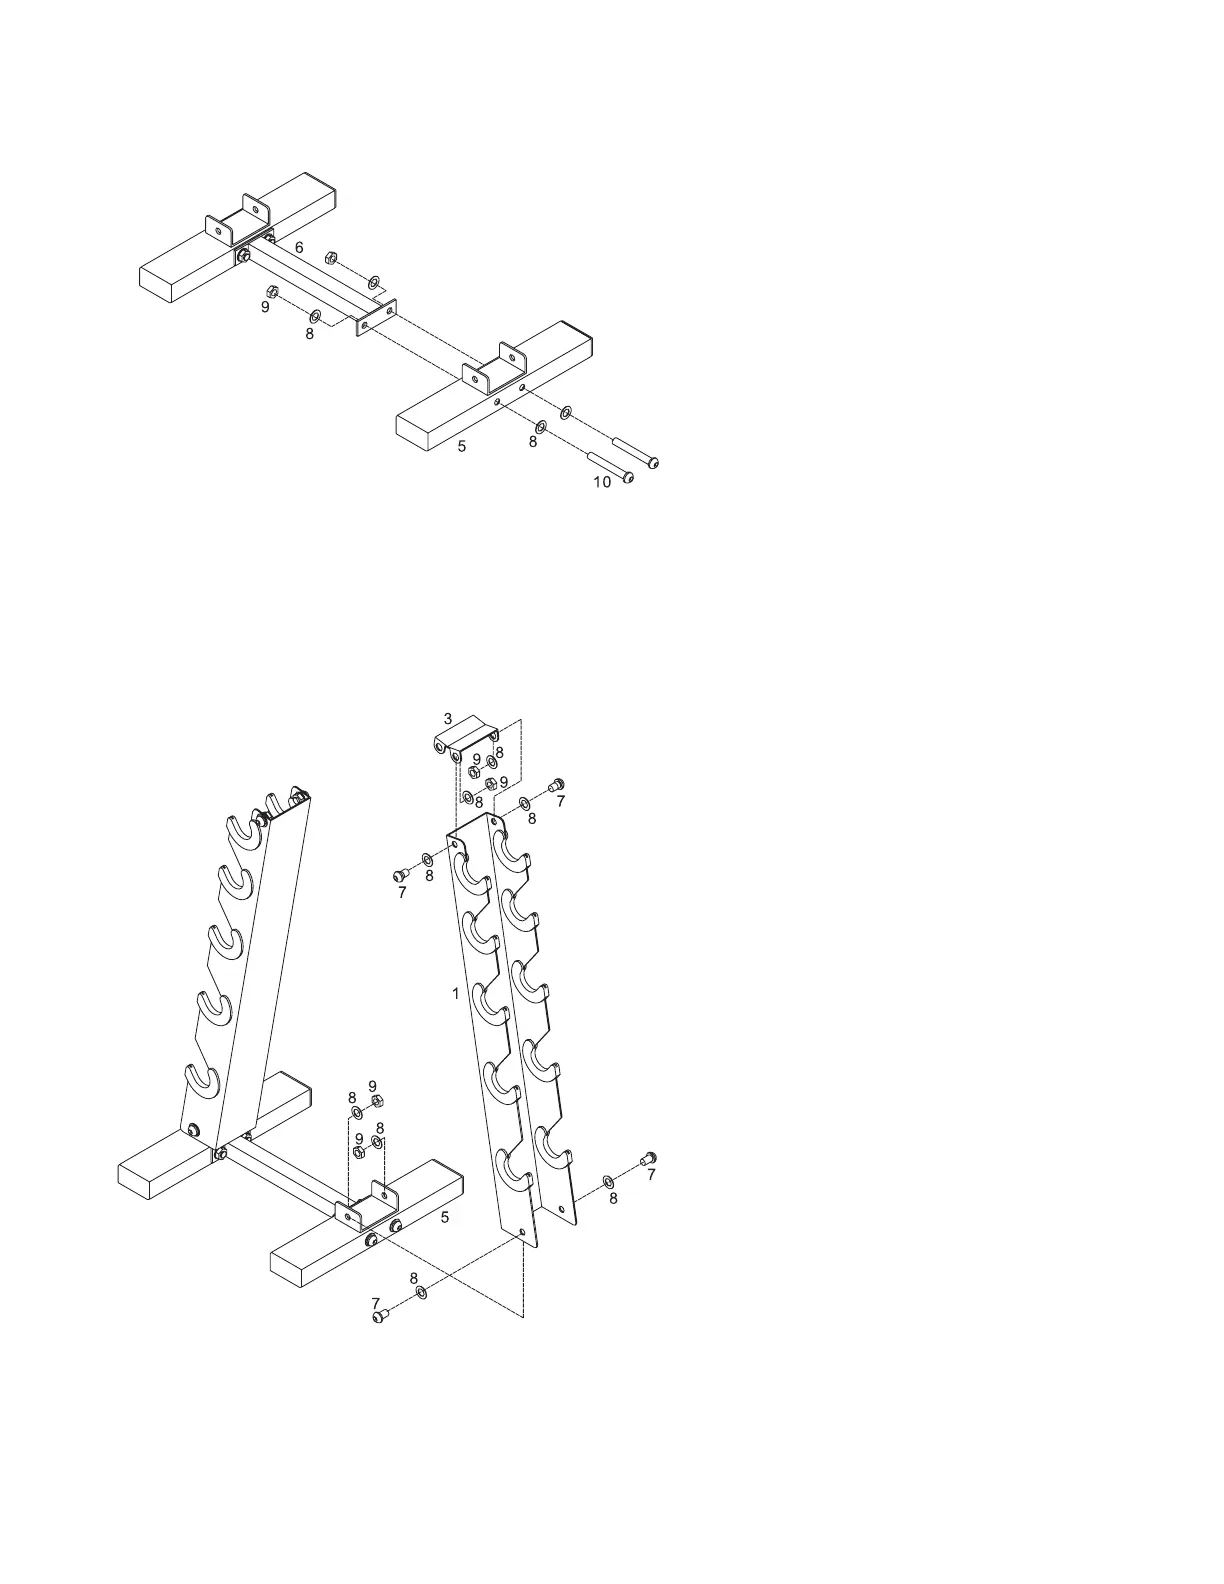
STEP 1:
Connect the two frame supports (#5) to the Center
Cross Base (#6) with two bolts (#10), four washers
(#8) and two nuts (#9) on each side.
Conecte los dos soportes del marco (# 5) a la Base
transversal Central (# 6) con dos pernos (# 10),
cuatro arandelas (# 8) y dos tuercas (# 9) en cada
lado.
Reliez deux supports de cadre (#5) à la base
transversale centrale (#6) avec deux boulons
(#10), quatre rondelles (#8) et deux écrous (#9) de
chaque côté.
STEP 2:
Insert the two Main Frames (#1) into the U-Frame
Supports (#5) with two bolts (#7), four washers
(#8) and two nuts (#9) on each side
Inserte los dos marcos principales (#1) en los
soportes po U (#5) con dos pernos (#7), cuatro
arandelas (#8) y dos tuercas (#9) en cada lado
Insérez les deux cadres principaux (#1) dans les
supports type U (#5) avec deux boulons (#7),
quatre rondelles (#8) et deux écrous (#9) de
chaque côté
STEP 3:
Place the top end cap (#3) onto the main
frames (#1), secure them with four Bolts (#7),
eight washers (#8) and four nuts (#9)
Coloque la tapa del extremo superior (#3) en
los marcos principales (#1) y asegúrelos con
cuatro pernos (#7), ocho arandelas (#8) y
cuatro tuercas (#9)
Placez le capuchon supérieur (#3) sur les
cadres principaux (#1) et fixez-les avec quatre
boulons (#7), huit rondelles (#8) et quatre
écrous (#9)
 Loading...