17Instruction manual WDU050Please keep this instruction manual for future reference
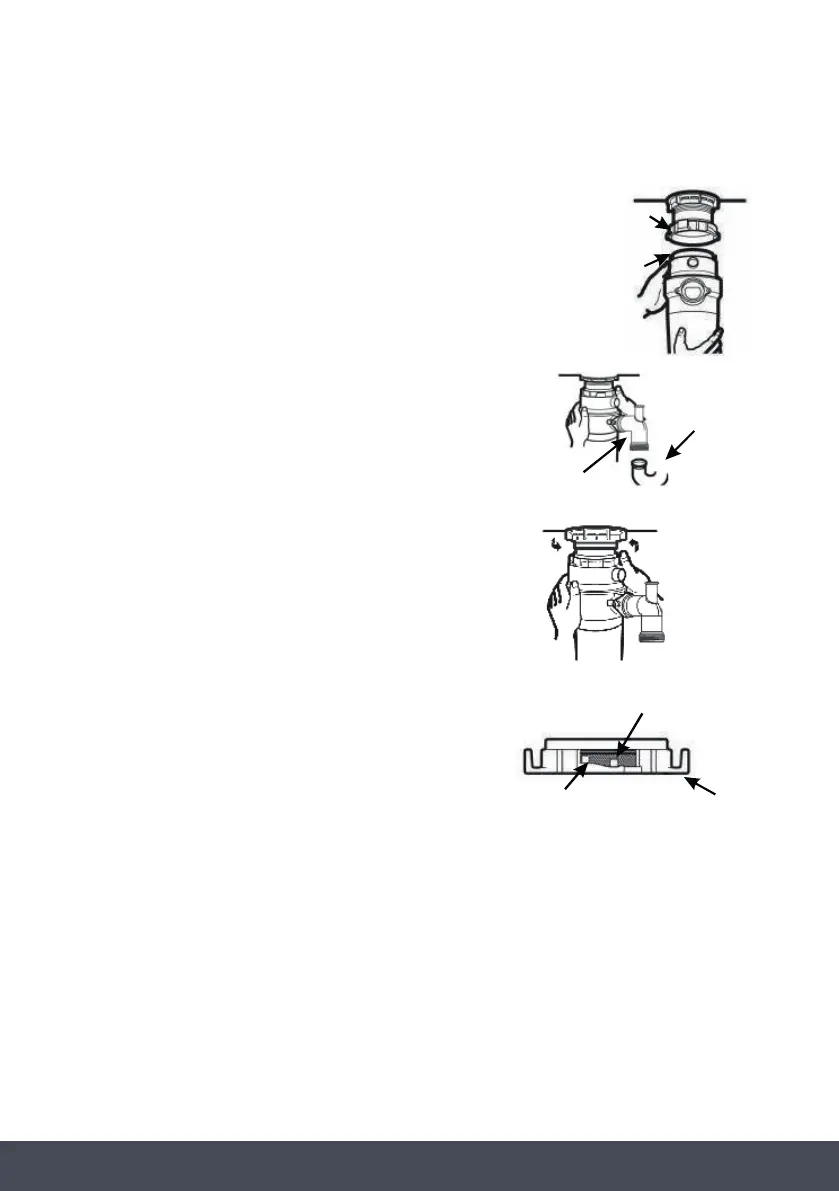
CONNECTING THE DISPOSER TO THE SINK FLANGE
1. Attach to the sink flange.
Line up the disposer under the sink flange. Guide the
hopper projections into the mount ring slots . Turn the
mount ring about 1 4 / “ to the right so that the disposer
is temporarily supported.
2. Line up with the outlet pipe.
Turn the mount ring and the disposer until the disposer
discharge elbow lines up with the outlet pipe. See next
page.
3. Lock the mount ring.
Turn the mount ring to the right until it locks up tight.
Hopper projections must be to the extreme left of the
mounting slots If the mount ring is hard to turn. You may
add a small amount of petroleum jelly or liquid soap to
the hopper projection Run water and check for leaks.
4. Check for leaks.
Check the unit for leaks 24 hours after installation and
first operation.
IMPORTANT:
DO NOT put your head or body under the disposer during the installation as it could fall.
Mount
ring slot
Hopper
projection
Outlet pipe
Locking Detail
Hopper projection in
‘supported’ position
Hopper projection in
‘locked’ position
Mounting
ring
Discharge
elbow