Do you have a question about the Car Solutions NTG 5.5 and is the answer not in the manual?
Details input/output specifications, power requirements, and switch input modes.
Lists important functionalities like AC info display, PIP, and phone mode switching.
Visual representation of system component interconnections and signal flow.
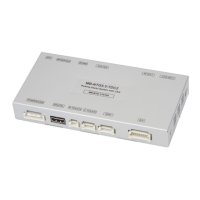
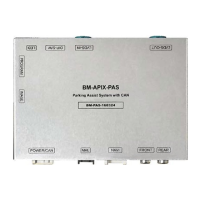
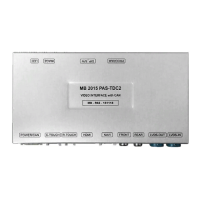
Lists and illustrates the primary hardware components provided with the system.
Details optional components such as the capacitive touch screen and touch board.
Shows the physical size of the unit and details power and NAVI connector pinouts.
Configuration options via dip switches for NAVI, DVB-T, DVD, and car models.
Explains how the display changes based on gear selection and dip switch settings.
Instructions for switching between modes using steering wheel and jog shuttle controls.
How to activate the Picture-in-Picture feature using the NAVI button.
How OEM A/C information is displayed on the external screen via button presses.
Using the original button to navigate DVB-T and DVD menus.
Detailed steps for navigating and adjusting OSD settings using the jog shuttle.
Explains the function of each button on the keyboard for OSD interaction.
Introduces the OSD menu structure and basic configuration options like NAVI-RGB, DVB-T, DVD.
Settings for rear camera type, power, detection, and front camera type.
Settings for front camera reception and automatic switching for phone calls.
Configuration for the PIP function and behavior of the original NAV button.
Settings for brightness, color, contrast, and screen scaling for NAVI display.
Adjustments for brightness, saturation, hue, and sharpness for DVD, DVBT, and camera sources.
Controls for parking guide lines ON/OFF, language, and position adjustment.
Settings for OSD display time, transparency, and language selection.
Access to factory reset, version information, and interface software details.
Step-by-step guide to learn and register IR codes for remote control functionality.
Illustrates the main connections between the unit, touch screen, and OEM monitor.
Detailed instructions for disconnecting OEM cables and connecting the CAN bus.
Steps for preparing the LVDS cable, unplugging the original cable, and removing covers.
Instructions for inserting and securing the offered LVDS cable and the disconnected OEM LVDS cable.
Guidance on identifying Type-1 and Type-2 LVDS connections based on OEM connectors.
Steps for installing the touch panel, including cover removal, screw loosening, and plastic modification.
Addresses common issues like mode switching, picture display, and screen problems.
Warnings regarding installation interference, cable connections, insulation, and professional installation.
| Category | Automobile Accessories |
|---|---|
| Compatibility | Mercedes-Benz Vehicles |
| Functionality | Smartphone Integration |
| Connectivity | Apple CarPlay, Android Auto |
| Display | Original car display |