This document is a user and maintenance instruction manual for the Bio 150 bio-chopper, a machine designed for professional use in processing organic materials.
Function Description
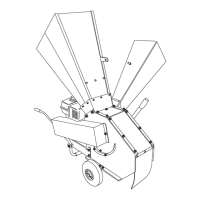
The Bio 150 bio-chopper is designed to chop vegetables, foliage, and natural wood. It can also be used for cutting peat and similar materials. It is not suitable for chopping other products, and users are advised to contact the manufacturer or authorized dealers for such purposes. The machine is available in different versions: petrol engine, electric motor, MTC (power take-off for MTC), and PTO (power take-off for a tractor).
Important Technical Specifications
The Bio 150 bio-chopper has the following overall dimensions:
- Breadth: 1500 mm
- Length: 1100 mm
- High: 1580 mm
- Weight: 150 kg
- LwA MAX (dB): 104
The manual provides a table detailing the power specifications and production capacity for each version:
- BIO 150 B (Petrol): 11-13 HP / 8.2-9.7 kW, producing 10 m³/h.
- BIO 150 B (Electric): 10 HP / 7.5 kW, producing 10 m³/h.
- BIO 150 MTC: 10-14 HP / 7.5-10.4 kW, producing 10 m³/h.
- BIO 150 T (PTO): 10-25 HP / 7.5-18.6 kW, producing 10 m³/h.
The production data (10 m³/h) is dependent on the quality of the material to be chopped and the feeding speed. The machine is identified by an EC identification plate, which includes the serial number, and complies with EC Directives 98/37, 89/336, 89/392, 94/626, and subsequent modifications.
Usage Features
The Bio 150 is intended for operation by a single operator who must have read and fully understood the instructions in this manual. The operator is responsible for ensuring that no persons or animals are within the machine's field of action during operation.
Unpacking and Preparation:
The bio-shredder is delivered partially dismantled and may be arranged on pallets. For transport in this condition, a transpallet or similar with a load capacity of approximately 300 kg is required. Users should avoid hoisting with ropes, dragging, bumps, shocks, or exposing the machine to rain, frost, or bad weather. Upon delivery, the contents should be checked against the delivery note for damage or deformity. Assembly is detailed in figures 5-6-7 of the manual.
Starting Up:
Before starting, ensure the bio-chopper is on a stable surface, and no unauthorized persons or animals are in the work zone. The engine/motor manufacturer's instruction book should also be consulted. Oil and fuel levels must be checked and filled if necessary.
- Petrol Engine Version: Set the selector to "I" (Start) (Fig. 9). Grasp the starting knob (Fig. 10) and pull the cord without force until compression is felt, then release and give a sharp tug. Allow the engine to idle for about 1 minute before taking it to maximum revs for normal use.
- Electric Motor Version: Verify that the mains voltage matches the motor's rated voltage. Connect the power supply cable and press the start/stop button.
- Tractor Coupling Version: Ensure the cardan shaft connecting the bio-shredder and tractor is in proper working order and correctly hooked up to the PTO before starting.
Functioning:
After preparation, material can be loaded into the hoppers.
- Upper Hopper: For trimming and foliage, load into the upper loading hopper, considering the available power of the specific model (Fig. 11). The material diameter should not exceed 3 cm.
- Side Hopper (Chaff Cutter): Assemble the side hopper as shown in section 3, ensuring the closure hook (Fig. 7) is fixed. This hopper is used for larger material, such as branches up to 7 cm in diameter (Fig. 11).
- Safety during Feeding: Always guide material to the hopper mouth and let it fall in. Never use hands or arms to push material into the hopper.
- Sieve Control: The sieve control lever (Fig. 12) on the left side of the bio-chopper can be opened completely to release material if a blockage occurs, then returned to its initial position to resume normal working.
- Environment: Machines with internal combustion engines should never be used in closed environments due to the danger of intoxication from fumes.
Maintenance Features
Regular maintenance is crucial for safe and efficient operation.
Safety Norms for Maintenance:
Before any maintenance operation, switch off the engine/motor and ensure there is no possibility of the machine functioning. Suitable protective gloves are obligatory.
- Stopping the Machine: To remove foreign bodies, transport, move, carry out maintenance/cleaning, or leave the machine unattended, switch off the motor, remove keys from the start panel, and remove the sparkplug cap (or disconnect the power supply cable for electric motors, or check that the machine is disconnected from the tractor PTO).
- Blades: Blades continue to turn for a few seconds after ignition is switched off.
- Parts: Assemble blades following instructions and use only original spare parts. Never use the chopper with defective guards, protection, or without correctly fitted safety devices.
Transportation and Storage:
To reduce the Bio 150's overall size for transportation, fold the side hopper inwards:
- Unhook the closure hook (Fig. 7).
- Fold the chaff cutter hopper (Fig. 13) and immobilize it with wing nut 1.
For storage, keep all nuts, bolts, and screws perfectly tightened. Promptly replace worn or damaged parts. Wear protective gloves during dismantling and assembly of blades.
Electric Motor Version Maintenance:
Regularly check the power supply cable for perfect condition. Do not repair damaged cables with insulating tape or thermal clamps. Use only standardized rubber cable type 05 RN-F (DIN 57282 / VDE 0282). Hook-up plugs must be rubber or rubber-covered.
Blade Replacement (8.1):
- Unscrew retaining screws and remove the upper hopper.
- Insert keys into the two apertures (Fig. 14) and remove the blade.
- Sharpen the blade or replace it with an original spare part. Reassemble in reverse order.
Counter-blade Replacement (8.2):
- Remove the side hopper by unscrewing the 3 nuts (Fig. 15).
- Unscrew the two security nuts of the counter blade to remove it.
- The blade must be removed as indicated in point 8.1 before this operation.
- Sharpen or replace the counter-blade with an original spare part. Reassemble in reverse order.
Breaker Bar Removal, Inversion, and Replacement (8.3):
- Unscrew retaining screws and remove the upper hopper.
- Remove the side hopper by unscrewing the 3 nuts (Fig. 5).
- Remove the transmission belt casing (Fig. 17).
- Remove the galvanized hole plate.
- Manually turn the rotor to align the cutter shaft with the aperture.
- Insert seeger pliers and remove the ring (Fig. 19) (chaff cutter side).
- Remove the shaft, noting the position of spacers separating the breaker bars (Fig. 20).
- Replace breaker bars if necessary, ensuring spacers are replaced in the same position.
Partial replacement of breaker bars must respect the opposite position for balancing.
Routine Maintenance (8.4):
The manual includes a table for routine maintenance checks:
- Beginning of Season: Check engine oil level, screws/tightness/casing/hopper, belt tension/wear, wear on cutters, wear on blade, wear on counter-blade, hopper rubber protection, and wear on bearings/transmission shafts.
- Before Each Job: Check engine oil level, screws/tightness/casing/hopper, belt tension/wear, and hopper rubber protection.
- End of Season: Check wear on cutters, wear on blade, wear on counter-blade, hopper rubber protection, clean machine, and check wear on bearings/transmission shafts.
Troubleshooting (9):
The manual provides a troubleshooting guide with remedies for common issues:
- Bio-chopper does not start: Check belt tension/condition, blocked pulleys/PTO/gears, cutters/blade/counter-blade/material in milling chamber, and engine/motor state.
- Difficult start-up or loss of power: Check belt tension/condition, blocked pulleys/PTO/gears, and engine/motor state.
- Bio-chopper loses revs and functions irregularly: Check belt tension/condition, blocked pulleys/PTO/gears, cutters/blade/counter-blade/material in milling chamber, sieve for blockages, engine/motor state, and examine chopped material at breakdown.
- Excessive vibration: Check cutters/blade/counter-blade/material in milling chamber.
- Drop in quality of output material: Check belt tension/condition, blocked pulleys/PTO/gears, and engine/motor state.
- Hopper rejects material: Check cutters/blade/counter-blade/material in milling chamber, engine/motor state, and wear on hopper rubber protection.
Fuel Handling:
Fuel is highly flammable. Keep fuel in designated containers, refuel in open air, and do not smoke or use naked flames. Fill the tank before starting the engine. Never open the fuel cap or add petrol while the engine is running or hot. If petrol spills, do not start the engine; move the machine away and avoid ignition sources until vapours disperse. Tighten the fuel tank cap. If blades undergo heavy shock or function anomalously, stop the engine, remove the spark plug hood, and seek expert advice.