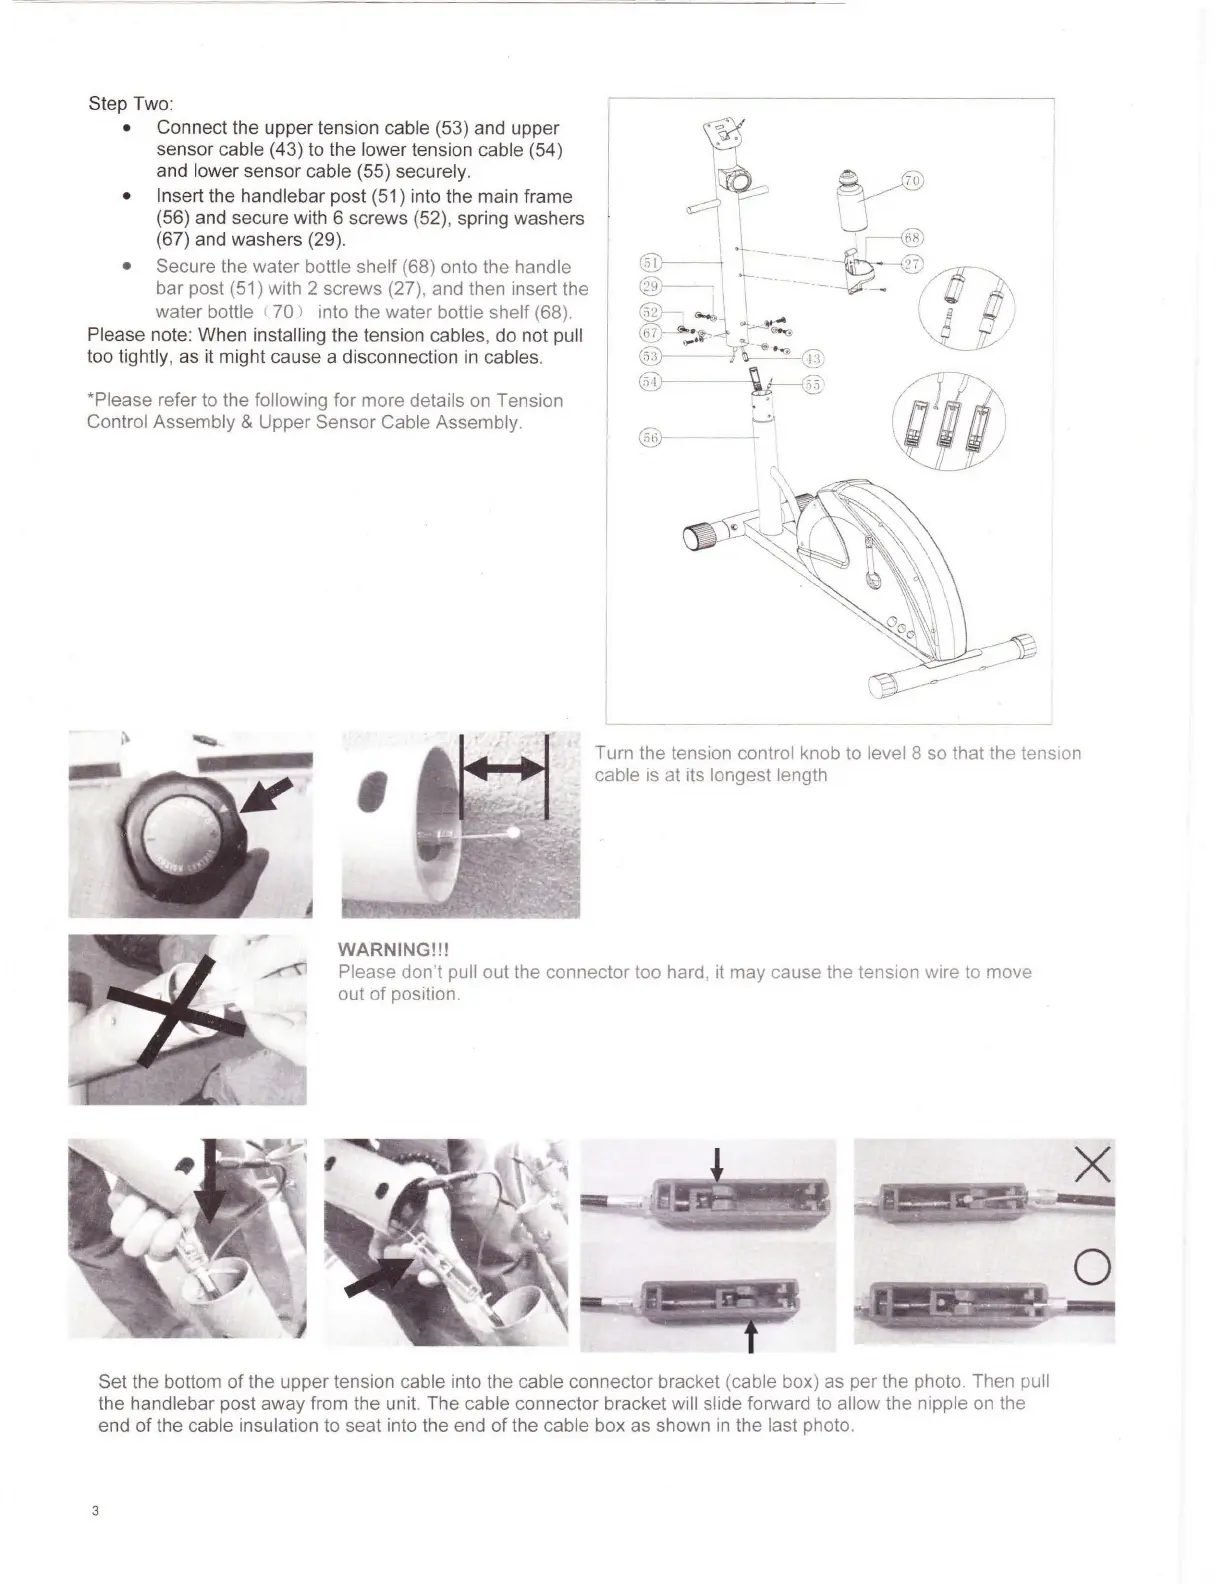
Step Two:
• Connect the upper tension cable (53) and upper
sensor
cable (43) to the lower tension cable (54)
and
lower sensor cable (55) securely.
• Insert
the handlebar post (51) into the main frame
(56) and secure with 6 screws (52), spring washers
(67) and washers (29).
• Secure the water bottle shelf (68) onto the handle
bar post (51) with 2 screws (27), and then insert the
water bottle (
70
) into the water bottle shelf (68).
Please note: When installing the tension cables, do not pull
too tightly,
as
it
might cause a disconnection
in
cables.
*Please
refer to the following for more details
on
Tension
Control Assembly & Upper Sensor Cable Assembly.
I
L
__
_
,
Turn the tension control knob
to
level 8
so
that the tension
cable
is
at its longest length
3
WARNING!!!
Please don't pull out the connector too hard,
it
may cause the tensi
on
wire
to
move
out of position.
Set the bottom of the upper tension
cable into the cable connector bracket (cable box)
as
per the photo. Then pull
the ha
nd
lebar post away from the unit. The cable connector bracket will slide forward
to
allow the nipple
on
the
e
nd
of
th
e cable insu
la
tion
to
seat into the end of the cable box
as
shown
in
the last photo.
o
 Loading...